

Replacing the Land Rover Haldex filter is the single most important step you can take to protect your all-wheel drive system from premature failure. The Haldex unit, fitted to models including the Freelander 2 and Range Rover Evoque, relies on clean fluid and a clear filter to maintain hydraulic pressure and engage the rear axle correctly. Neglect this service and you risk blocked passages, traction faults, and a repair bill that dwarfs the cost of a service kit. This guide covers every stage of the process, from tools to torque specs, so you can carry out a proper Haldex filter service with confidence.
What tools and parts do you need for Land Rover Haldex filter replacement?
Preparation determines whether the job goes smoothly or turns into a frustrating afternoon. Gather everything before you lift the vehicle.
Essential tools
- A quality torque wrench (capable of low Nm settings for Haldex drain plugs)
- A drain pan with at least 1 litre capacity
- Trim removal tools and a socket set (metric)
- Clean lint-free cloths and a parts cleaning brush
- Nitrile gloves and eye protection
- An OBD2 diagnostic scanner compatible with Land Rover protocols
The diagnostic scanner is not optional. DIY servicing without diagnostics can miss underlying faults even after a clean filter and fresh fluid are fitted. A scan before and after the service confirms the system is operating correctly.
Parts and fluids
| Item | Specification |
|---|---|
| Haldex filter | Generation-matched (3rd or 4th gen) |
| Haldex fluid | BorgWarner-specified grade |
| Pump (if worn) | OEM or genuine BorgWarner unit |
| Drain plug washer | New copper or aluminium sealing washer |
| Pump screen | Inspect and clean or replace |
The Freelander 2 (2006–2009) uses a 3rd generation Haldex unit, while later Evoque and Freelander 2 models from 2009 onwards use a 4th generation system. Generation-appropriate fluid and filters are non-negotiable. Fitting the wrong grade of fluid causes pressure loss and AWD engagement faults. Haldexparts stocks complete BorgWarner service kits matched to each generation, so you can order with confidence rather than guessing at compatibility.
Pro Tip: Buy a complete service kit that includes the pump, filter, and fluid together. Sourcing parts separately increases the risk of generation mismatches.
How to replace the Haldex filter step by step
Work on a level surface with the engine cold. Apply the handbrake and chock the front wheels before raising the rear of the vehicle.
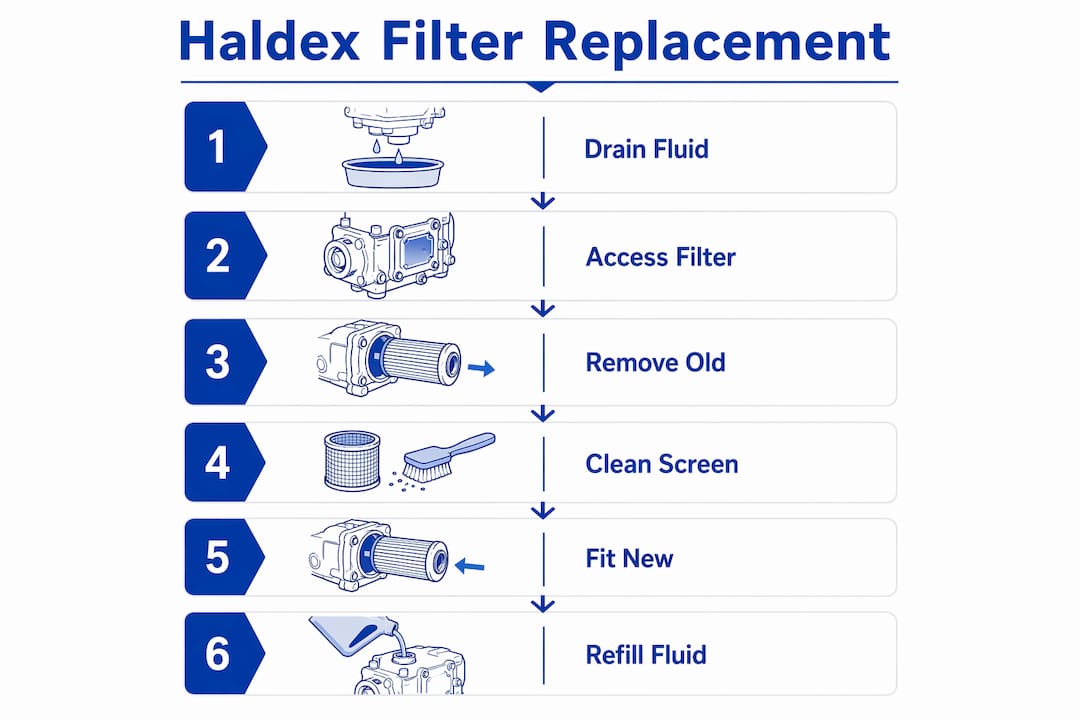
1. Drain the old Haldex fluid
Position your drain pan beneath the Haldex unit, which sits at the rear of the vehicle between the rear differential and the propshaft. Remove the drain plug carefully. Old fluid is often dark brown or black. That colour signals oxidation and contamination. Allow the unit to drain fully, which typically takes five to ten minutes.
2. Access the filter
On 3rd generation units, the filter sits inside the Haldex housing and is accessible once the unit is partially lowered. On 4th generation units, the filter is located within the pump assembly. Consult the Land Rover Freelander 2 workshop manual for your specific model year before proceeding. Factory torque specifications are critical here. Incorrect torque on housing bolts causes leaks and mechanical failure.
3. Remove the old filter
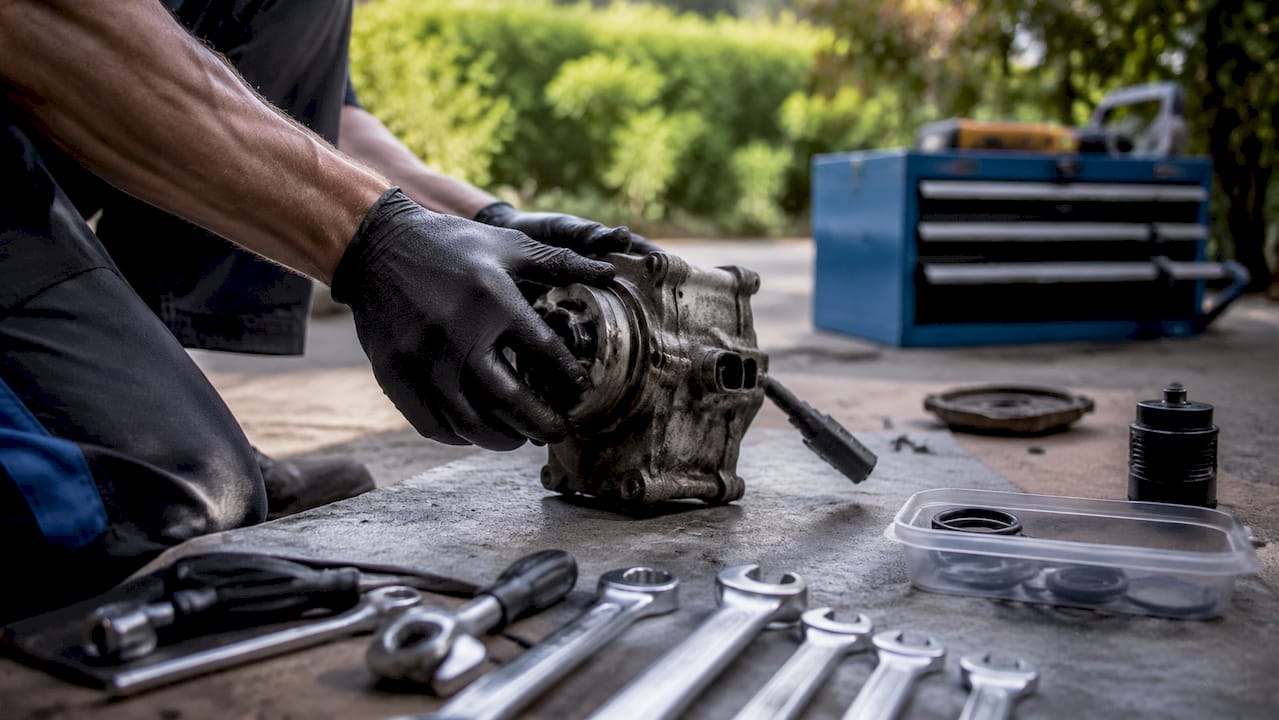
Unclip or unscrew the filter according to your generation’s design. Note the orientation before removal. Some filters have a directional flow arrow. Discard the old filter and any associated O-rings. Never reuse O-rings on a Haldex unit. They compress permanently and will not seal correctly a second time.
4. Inspect and clean the pump screen
This step is where many DIY services fall short. A blocked pump screen is a common failure point that a simple filter swap does not address. Remove the screen carefully and clean it with fresh Haldex fluid and a soft brush. If the screen shows damage or heavy metallic debris, replace it rather than reinstalling it.
Pro Tip: Metallic debris on the pump screen is a warning sign of internal wear. If you find it, carry out a diagnostic scan before reassembly to rule out pump failure.
5. Fit the new filter
Install the new filter in the correct orientation. Fit new O-rings lubricated lightly with fresh Haldex fluid. Do not use petroleum jelly or silicone grease as these can degrade the seals. Reinstall the pump screen and tighten all fasteners to the torque values specified in the workshop manual.
6. Refill with the correct fluid
The correct fluid grade is critical to clutch pack lubrication and hydraulic function. Fill slowly through the fill port and check the level against the specification in the workshop manual. Overfilling is as damaging as underfilling. The system has no overflow valve, so excess fluid pressurises the housing and can force seals out of position.
7. Bleed and check the system
Refit the drain plug with a new sealing washer and torque it correctly. Lower the vehicle. Start the engine and allow it to idle for two minutes. Drive slowly in a figure-of-eight pattern to cycle the Haldex clutch pack. This purges any air from the hydraulic circuit. Connect your diagnostic scanner and check for fault codes. Clear any codes that appeared during the drain phase and confirm they do not return.
The Haldex system plays a key role in vehicle stability and safe power distribution during varied driving conditions. Regular filter and fluid maintenance preserves these critical benefits and prevents traction loss. Skipping even one service interval compounds contamination and accelerates wear on the clutch pack and pump.
How do you identify problems during Haldex filter replacement?
Knowing what to look for during the service saves you from reassembling a unit that is already failing.
Warning signs to watch for
- Dark, metallic-smelling fluid indicates oxidation and clutch pack wear
- Metallic particles on the pump screen point to internal mechanical damage
- Swollen or cracked O-rings suggest previous fluid contamination or incorrect fluid use
- Scoring on the filter housing suggests debris has been circulating for some time
Neglected Haldex units develop blockages, pressure loss, and warning faults that lead to poor AWD engagement. If you find heavy contamination, a filter change alone will not restore full function. The pump may need replacement.
When to seek professional diagnosis
Traction warning lights that return after a fresh service indicate an electrical or mechanical fault beyond the filter and fluid. At that point, a specialist with Land Rover-specific diagnostic software should inspect the unit. Continuing to drive with an active AWD fault risks uneven power distribution and accelerated driveline wear. Knowing when to stop and seek help is as valuable as knowing how to carry out the service itself.
Pro Tip: Photograph the Haldex unit before disassembly. If you encounter an unexpected layout, the photo helps you identify which generation you are working on and find the correct procedure.
What maintenance schedule keeps the Haldex system reliable?
Consistent servicing is the most cost-effective way to protect a Haldex unit. Reactive repairs cost far more than planned maintenance.
The recommended Haldex fluid replacement interval for Land Rover models is around every 40,000 km. Ignoring this schedule allows contamination to build up and causes premature wear. Owners who use their vehicles off-road or in wet conditions should service the unit more frequently, as water ingress accelerates fluid degradation.
Key maintenance practices
- Record every Haldex service with the date, mileage, and parts used
- Inspect the rear differential at the same time as the Haldex unit
- Check rear differential fluid intervals alongside Haldex servicing to avoid uneven driveline wear
- Replace the drain plug washer at every service, not just when it looks worn
- Use only BorgWarner-specified fluid, regardless of price differences with generic alternatives
Servicing the Haldex unit during rear differential changes is critical. Failing to service both together risks uneven power distribution and increased repair costs. The two systems share a physical location and similar service intervals, so combining the work saves time and protects the entire drivetrain.
Environmental factors that accelerate wear
Repeated short journeys prevent the Haldex fluid from reaching full operating temperature. Cold fluid is thicker and less effective at lubricating the clutch pack. Owners in colder climates or those who make frequent short trips should reduce their service interval accordingly. Salt exposure from winter road treatments also accelerates corrosion on the unit’s external surfaces, so inspect the housing for rust at each service.
My view on Haldex servicing for Land Rover owners
Why generation awareness changes everything
Most of the Haldex service failures I have seen come down to one mistake: treating all Haldex units as identical. They are not. The 3rd and 4th generation systems fitted to Land Rover models differ in pump design, filter location, and fluid specification. A procedure that works perfectly on a 2007 Freelander 2 can cause damage on a 2012 Evoque if you apply it without checking the generation first.
The second pattern I have noticed is that owners underestimate the pump screen. They replace the filter, refill with fresh fluid, and consider the job done. Three months later, they are back with traction faults because the screen was partially blocked and restricted flow to the pump. Cleaning the screen is not optional. It is the step that separates a thorough service from a superficial one.
Haldex servicing varies significantly by generation, and awareness of the specific AWD control system is vital for effective maintenance. I would add that combining the service with a diagnostic scan is the single upgrade that most DIY owners skip and most regret. Physical maintenance and electronic health checks work together. One without the other gives you an incomplete picture of the system’s condition.
The Haldex system’s role in vehicle stability is not abstract. You feel it in how the vehicle handles on a wet roundabout or a loose gravel track. Keep the filter clean, use the right fluid, and the system rewards you with years of reliable AWD performance.
— Mindaugas
Genuine Haldex service kits for Land Rover models
Sourcing the right parts is straightforward when you use a specialist supplier that matches kits to your specific generation and model.
Haldexparts stocks genuine BorgWarner service kits for both 3rd and 4th generation Land Rover Haldex units. The 3rd gen service kit covers Freelander 2 and LR2 models from 2006 to 2009 and includes the pump, filter, and BorgWarner-specified oil. For later models, the 4th gen pump and filter kit covers Range Rover Evoque and Freelander 2 from 2009 onwards. If your pump seals need attention, the 4th gen seal repair kit is also available. Orders over £150 qualify for free shipping, and all kits include OEM-grade components matched to Land Rover specifications.
Key takeaways
Replacing the Haldex filter with generation-matched parts and correct fluid is the most effective way to maintain AWD reliability on Land Rover Freelander 2 and Range Rover Evoque models.
| Point | Details |
|---|---|
| Match parts to your generation | 3rd and 4th gen Haldex units require different filters, pumps, and fluid specifications. |
| Clean the pump screen | A blocked screen restricts hydraulic pressure and causes traction faults even after a filter change. |
| Use BorgWarner-specified fluid | Incorrect fluid grades cause pressure loss and AWD engagement failures. |
| Service every 40,000 km | Sticking to the recommended interval prevents contamination build-up and premature wear. |
| Combine with a diagnostic scan | A scan before and after the service confirms no underlying faults remain after the physical work. |
FAQ
What is the Haldex filter and why does it need replacing?
The Haldex filter traps debris inside the AWD unit to maintain clean fluid flow and hydraulic pressure. Over time it becomes blocked, reducing system efficiency and causing traction faults.
How often should I replace the Haldex filter on a Land Rover?
The recommended interval is around every 40,000 km. Owners who drive off-road or in wet conditions should service the unit more frequently to prevent contamination build-up.
Can I replace the Haldex filter myself without specialist tools?
Yes, with a torque wrench, drain pan, and an OBD2 scanner compatible with Land Rover protocols. A diagnostic scan before and after the service is necessary to confirm the system is functioning correctly.
Which Land Rover models use a Haldex AWD system?
The Freelander 2 and Range Rover Evoque are the primary Land Rover models fitted with Haldex units, using 3rd generation systems from 2006 to 2009 and 4th generation systems from 2009 onwards.
What happens if I use the wrong Haldex fluid?
Incorrect fluid types cause pressure loss and AWD engagement faults. Always use the BorgWarner-specified grade matched to your generation to protect the clutch pack and hydraulic circuit.



