

The correct way to prime a Haldex pump depends entirely on which generation you’re working with: run a diagnostic pump activation through VCDS or OBDeleven where the system supports it, and fall back to a controlled fill, ignition cycle, and short road test when it doesn’t. Identify the generation first. Gen 4 pumps typically build pressure to around 30 bar (roughly 435 psi), and that figure is your best confirmation the job’s done properly.
TL;DR:
- Priming a Haldex pump requires identifying whether the system is Gen 4 or Gen 5, as their procedures and behaviors differ significantly.
- Successful priming is confirmed by a pressure near 30 bar on Gen 4 systems, steady pressure during scan tool tests, and smooth AWD engagement during road testing.
- Manual priming without tools involves filling the system, cycling ignition multiple times, and performing low-speed drive to purge trapped air effectively.
- Using a scan tool provides controlled activation, more accurate pressure readings, and reduces cavitation risk compared to manual cycling.
- Proper servicing, including regular fluid and filter changes at specified intervals with correct parts, prevents common priming issues and system failures.
Table of Contents
- What does priming a Haldex pump actually mean?
- Tools, parts, and safety checks before you start
- How do you manually prime a Haldex pump without a scan tool?
- Using VCDS or OBDeleven to prime the pump directly
- How do you know if a Haldex pump primed correctly?
- Signs your Haldex pump has a problem beyond trapped air
- Fluid changes, filter checks, and when to service the pump
- Where this guide’s procedures come from
- Why diagnostic priming should be your default, not your backup
- Ready to order the right parts for your Haldex pump
- Sources
- FAQ
What does priming a Haldex pump actually mean?
Priming isn’t just filling the reservoir. It’s getting fluid moving through the entire circuit, purging trapped air, and letting the electric pump build enough pressure to push the accumulator and clamp the clutch plates. Skip this step after a pump or filter swap and you get a stuttering AWD system that seems to work, then doesn’t, then throws a fault code on the motorway.
The two dominant Haldex generations behave differently here, which is why generation identification comes before anything else.
Gen 4 uses a pressure‑building electric pump paired with an accumulator. The pump runs, builds pressure, the accumulator holds it, and a solenoid meters it out to the clutch pack on demand. This is the design most VAG group vehicles from the mid 2000s through to around 2015 carry, and Automotive Tech Info’s breakdown confirms the pump (labelled V81 in VAG diagrams) activates once engine speed passes roughly 400 rpm and works toward that ~30 bar target.
Gen 5, fitted to newer platforms, uses a demand‑controlled arrangement. There’s no accumulator holding a reserve charge. The pump responds to real‑time demand, which changes both how you prime it and how you verify success. Treating a Gen 5 pump like a Gen 4 unit is the most common mistake DIYers make, and it’s why generic “prime your Haldex” advice from a decade ago often misleads readers on current fitments, as ECS Tuning’s identification guide points out.
To identify your generation quickly, check:
- Whether the unit has a visible fluid filter housing (Gen 4 typically does, older units use a strainer)
- The pump and controller part numbers stamped on the housing
- The chassis code and production date cross‑referenced against a Haldex generation lookup
- Whether your scan tool lists Controller 22 AWD with a pump activation or output test function
Tools, parts, and safety checks before you start
Get the right kit on the bench before you touch a bolt. A scan tool with Haldex functions (VCDS or OBDeleven) is the biggest time‑saver here, but you can work without one using the manual method covered later.
You’ll need:
- A scan tool with access to Controller 22 AWD, or at minimum a multimeter to check pump current draw
- Jack stands rated for the vehicle’s weight, never a jack alone
- A clean funnel and a fluid catch tray
- Correct Haldex fluid for your generation, plus a replacement filter or strainer
- Torque wrench for the fill plug and any housing bolts
For parts, this is where matching generation to part number matters. If you’re replacing an early pump nose, the pump nose replacement guide for first and second generation units covers the common failure point on older housings. For Gen 5 fitments, the 5th generation Porsche pump and the 5th generation Audi R8 pump are correct by part number, not by guesswork.
Disconnect the negative battery terminal before working near the pump’s electrical connector, and check the Haldex controller fuse rating before you start, since a blown fuse mid‑job will look exactly like a priming failure. Dispose of old Haldex fluid at a registered waste facility, never down a drain.
Pro Tip: Keep the old filter or strainer in a sealed bag until the job’s confirmed working. If you get an abnormal pressure reading later, it’s the first thing worth inspecting again.
How do you manually prime a Haldex pump without a scan tool?
If you don’t have VCDS or OBDeleven access, you can still prime the system reliably. It takes longer and demands more patience, but the fill, cycle, and drive method has been a workshop staple for years, and community‑documented procedures back up the sequence below.
- Support the vehicle properly. Use jack stands, not a trolley jack alone, and chock the wheels that stay on the ground.
- Remove the fill plug and top up slowly. Fill until fluid overflows from the fill port, which confirms the housing itself is full, with no trapped air pocket at the top.
- Torque the fill plug to spec. Overtightening cracks the housing; undertightening causes seepage that mimics a pump fault later.
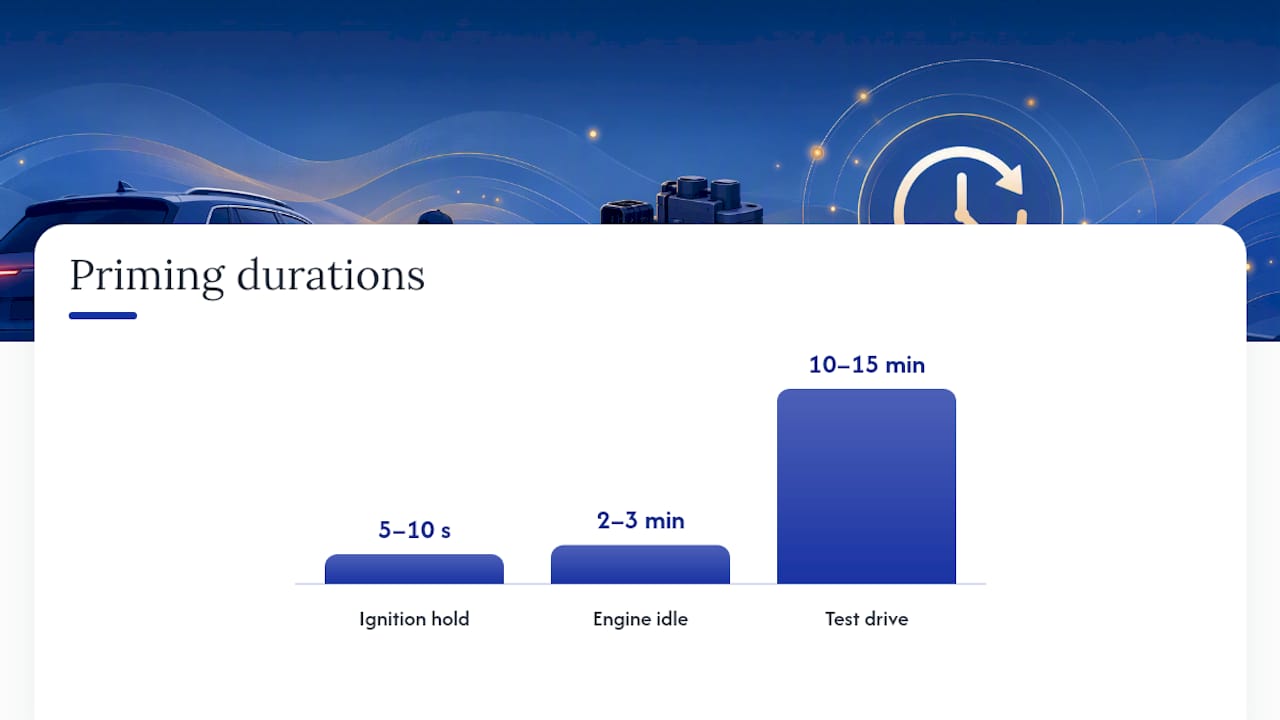
- Cycle the ignition without starting the engine. Turn to position two, hold for roughly 5 to 10 seconds, then off. Repeat this three or four times. Each cycle lets the control module run a brief self‑check and can nudge the pump into a short activation burst.
- Start the engine and let it idle for two to three minutes. Listen for the pump. On most Gen 4 units you’ll hear a distinct whirring cycle as it builds initial pressure.
- Recheck the fill level. If it’s dropped, top up again. Trapped air escaping shows up as a slight level drop even though nothing’s leaking externally.
- Take a short, low‑speed test drive. Ten to fifteen minutes with a mix of straight‑line driving and a few gentle, low‑speed turns helps work residual air out of the clutch pack by cycling actual torque demand through the system.
- Avoid hard acceleration or tight manoeuvring for the first 20 to 30 miles. Sudden torque spikes on a partially primed system stress the clutch plates unevenly.
- Recheck fluid level once more after the drive and top up a final time.
The insight worth remembering here: running the pump under load through repeated ignition cycles and a real drive works because it forces fluid through every branch of the circuit, not just the sections closest to the fill point. Idling alone often isn’t enough, which is exactly why forum reports of “it seemed fine parked but juddered on the road” are so common.
For Gen 4 systems specifically, watch for pressure behaviour: many units target roughly 30 bar (about 435 psi) once fully primed, and you’ll notice smoother, quieter engagement once that pressure holds steady rather than fluctuating.
Using VCDS or OBDeleven to prime the pump directly
A scan tool turns this from a patience exercise into a controlled test, and it’s the method Haldexparts recommends whenever the reader’s setup supports it.
- Connect the scan tool and navigate to Controller 22 AWD. This is the standard address for the Haldex coupling on VAG group platforms.
- Select Basic Settings or Output Test, depending on your software version. Both paths lead to the same pump motor function; naming varies slightly between VCDS and OBDeleven builds.
- Run the pump activation function. Most sessions complete in 30 seconds to about a minute, though some Gen 4 units run closer to two minutes to reach full pressure.
- Watch live data as the pump runs. You’re looking at pump percentage (how hard it’s working), pump current draw, and, where the software exposes it, actual pressure.
- Confirm the pressure target. On Gen 4 systems, a healthy pump climbs to around 30 bar and holds there without erratic swings.
- Top up fluid immediately if the level drops during the test. Air purging out shows up as a level change even mid‑cycle.
- Monitor battery voltage throughout. A weak battery can starve the pump motor and produce a false failure reading, so keep a charger connected if voltage sits below 12.4V beforehand.
The reason this beats manual cycling isn’t just speed. The controller regulates pump speed electronically during an output test, which keeps current draw within safe limits and avoids the cavitation risk that comes with prolonged, unregulated running. You get a controlled bleed instead of a hopeful guess.
For a deeper look at reading fault codes alongside this test, the technician’s guide to Haldex diagnostics walks through interpreting the live data channels in more detail.
How do you know if a Haldex pump primed correctly?
Success leaves clear signs, and you don’t need to guess.
- You hear the pump cycle distinctly, a whirring or ticking sound that rises then settles, rather than a continuous drone.
- No cavitation noise, which sounds like a rattling or gurgling whine and usually means air is still trapped or fluid level is low.
- AWD engages smoothly under light acceleration, with no hesitation or clunk from the rear axle.
- Scan tool pump percentage sits within the expected range for your generation rather than pinned at maximum, which usually signals the pump is struggling against resistance.
- Pressure holds steady near 30 bar on Gen 4 systems, without slow bleed‑down once the pump stops running.
- Fluid level stays constant after the road test, confirming no ongoing air ingestion or external leak.
Monitoring current draw and pump percentage gives you an objective pass or fail rather than relying on sound alone, which matters most when a pump is borderline and you’re deciding whether to keep it or replace it.
If pressure climbs slowly, stalls below target, or fluctuates once running, re‑attempt the priming sequence once. If the same result repeats, inspect the filter or strainer for blockage before assuming the pump itself has failed. For a full walkthrough of bench‑testing a suspect unit, see how to test a Haldex pump step by step.
Signs your Haldex pump has a problem beyond trapped air
Not every rough‑running AWD system is an air problem, and priming won’t fix a pump that’s genuinely failing or a circuit with an electrical fault.
Watch for these warning signs:
- Continuous pump running noise that never settles, suggesting the controller can’t reach its pressure target
- AWD warning light or a stored fault code, often pointing to the coupling itself rather than fluid condition
- No power transfer to the rear axle even after a full priming attempt and test drive
- Fluid appearing at the housing seam or drain plug between services, indicating a seal failure rather than an air pocket
Work through the basics before assuming pump failure. Check for visible leaks at the housing and fill plug, inspect the filter or strainer for debris blocking flow, and check the electrical connector for corrosion. Then check the Haldex controller fuse, commonly rated at 10A, since a marginal fuse causes intermittent pump dropout that mimics a mechanical fault.
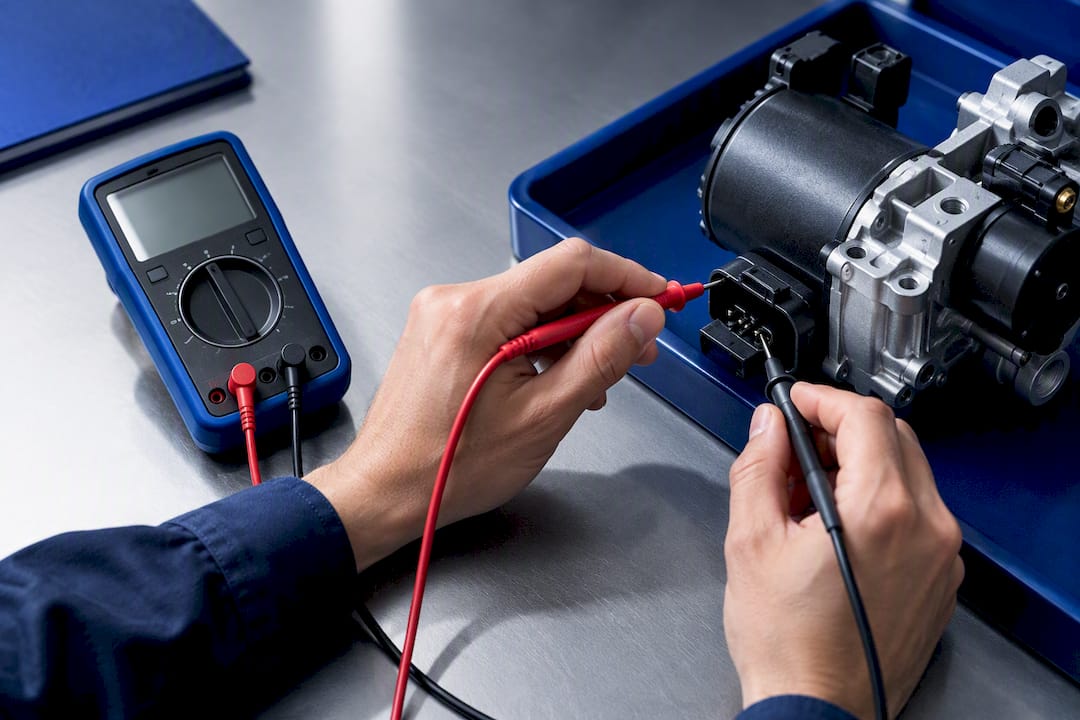
If those checks come back clean, measure pump current directly with a multimeter and test solenoid N373’s resistance against manufacturer spec, since a sticking solenoid can mimic a pump problem entirely. The solenoid valve replacement guide covers that test in more depth, and the fault code reference chart helps narrow things down by code before you replace anything.
Fluid changes, filter checks, and when to service the pump
Priming issues become far less common when the system’s serviced on schedule. Most Haldex fluid degrades faster than engine oil because it’s constantly shearing under clutch engagement, so treat the recommended interval as a limit, not a suggestion.
Practical maintenance points worth following:
- Change fluid and filter (or strainer, on older units) at the interval your manufacturer specifies, and don’t stretch it if the vehicle sees frequent low‑speed or towing use
- Use the fluid specification listed for your exact generation. Gen 4 and Gen 5 fluids aren’t always interchangeable despite looking identical
- Replace the filter or strainer at every fluid change, not just when it looks obviously clogged
- Keep the correct pump on hand for your fitment. The Gen 5 Porsche pump and Gen 5 Audi R8 pump are specific by part number, and fitting the wrong one causes exactly the priming problems this guide is meant to solve
For the fluid drain and refill process itself, the oil drain plug removal guide covers it step by step.
Where this guide’s procedures come from
This procedure was put together by Mindaugas at HaldexParts.co.uk, drawing on manufacturer documentation, published technical service bulletins, and hands‑on workshop practice across Gen 4 and Gen 5 fitments. Two related resources go further into adjacent jobs: the DIY Haldex pump replacement guide, which covers priming as part of a full pump swap, and the technician’s guide to how Haldex diagnoses faults, which pairs well with the scan tool method above.
The site specialises in OEM‑grade Haldex pumps, oils, filters, and complete service kits for various automotive groups, with free shipping on orders over a certain amount. None of the steps here substitute for checking your vehicle’s specific technical bulletins where they exist, but they reflect what actually works on the bench.
Why diagnostic priming should be your default, not your backup
The manual fill and drive method gets treated as the “proper” way to prime a Haldex pump in a lot of older forum threads, mostly because VCDS wasn’t as accessible fifteen years ago. That’s backwards now. A £20 OBDeleven dongle and a phone app give you objective pump current and percentage data that no amount of listening at the wheel arch can match.
Where conventional advice falls short is in treating all Haldex generations the same. Gen 5’s demand‑controlled design doesn’t behave like Gen 4’s accumulator system, and a priming routine written for one can waste your afternoon on the other without ever telling you why it isn’t working.
If you’re deciding where to put your effort first, it’s generation identification, not the priming method itself. Get that wrong and every step afterwards is a guess dressed up as a procedure. Get it right, and even the manual method becomes reliable because you know what “success” is actually supposed to look like for your specific pump.
— Mindaugas
Ready to order the right parts for your Haldex pump
Once you know your generation and what the job needs, sourcing the correct part matters more than the tool you used to diagnose it. If you’re refreshing an early housing, the pump nose tips for 1st and 2nd generation Haldex pumps address the wear point that causes most early pump failures. Running a Porsche fitment, the 5th generation Porsche pump is the correct OEM‑grade match by part number, and Audi R8 owners need the 5th generation Audi R8 pump rather than a generic Gen 5 substitute.
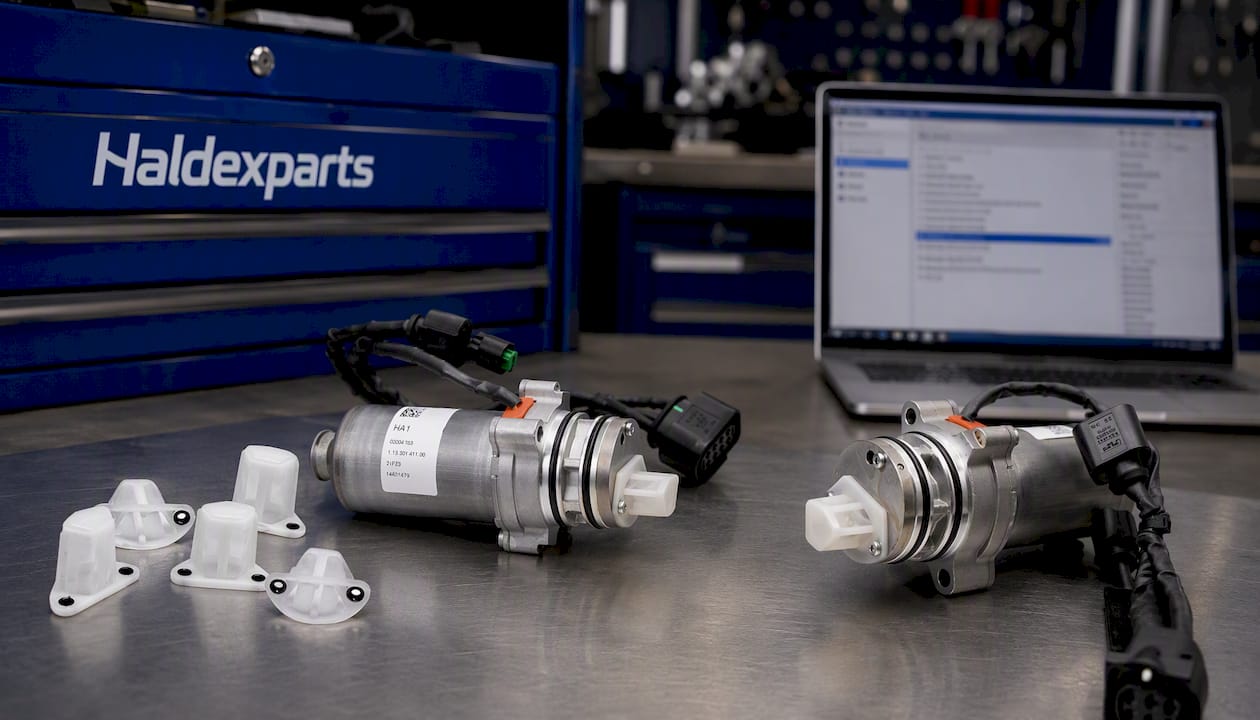
Every listing gives full fitment detail, so check your chassis code and controller part number against the product page before ordering; a mismatched part is the single most common cause of a priming job that never quite settles. Orders over £150 ship free, and if you’re unsure which pump or filter matches your Haldex generation, browse the full parts range to compare fitments side by side before you check out.
Sources
For safety‑critical guidance, consult the NHTSA technical service bulletin covering Haldex system behaviour. For generation‑specific pressure targets, see Automotive Tech Info’s Gen 4 breakdown. For hands‑on Gen 5 service steps, the MR‑Fix service wiki documents the exact workshop sequence.
- How to identify and service your VW or Audi Haldex AWD system | ECS Tuning
- VW Haldex 4Motion Generation IV - Automotive Tech Info
- Haldex 5th gen service - mr-fix.info Wiki
FAQ
How do you know if a Haldex pump is working?
A working pump cycles audibly, builds pressure smoothly, and shows steady live data on a scan tool rather than pinned or fluctuating readings. On many Gen 4 systems, healthy pressure settles near 30 bar, while cavitation noise or a continuous drone signals a problem.
How do you manually prime a Haldex pump?
Fill the housing until fluid overflows from the fill port, cycle the ignition several times without starting the engine, then start it and let it idle for a couple of minutes before taking a short, low‑speed test drive. Top the fluid up after each stage, since a dropping level usually means trapped air is escaping.
What are the signs that my Haldex pump is failing?
Continuous pump noise, an AWD warning light, stored fault codes, or no power reaching the rear axle after a proper priming attempt all point beyond a simple air issue. Check the filter, electrical connector, and the Haldex controller fuse before assuming the pump itself needs replacing, and see the fault code reference chart for code‑specific guidance.
Do transfer pumps need to be primed?
Yes. Any Haldex pump needs the circuit purged of air after fitting a new pump, filter, or after a fluid change, otherwise it can’t build the pressure needed for consistent clutch engagement. Diagnostic activation through VCDS or OBDeleven is the fastest way to confirm priming succeeded, though the manual fill and drive method works when no scan tool is available.
What does HaldexParts.co.uk sell for pump priming and replacement?
HaldexParts.co.uk stocks OEM‑grade Haldex pumps, oils, filters, and complete service kits matched to specific vehicle generations, including Gen 5 Porsche and Gen 5 Audi R8 fitments. Current pricing is listed on each product page, with free shipping on orders over £150.



