

A competent DIYer can service a Haldex coupling in a few hours with eight tools and a correct OEM service kit. The minimal toolset is a 5 mm Allen key, an 8 mm Allen key, a 48 mm (or 46 mm) filter housing socket, a 3/8-inch torque wrench, a gravity-fill hose or large syringe, a fluid catch tray, and the correct Haldex oil with a fresh filter and seal kit. Buy an OEM-spec service kit matched to your generation and vehicle before you jack the car up.
Essential items at a glance:
- 5 mm Allen key or bit socket (drain plug)
- 8 mm Allen key or bit socket (filter housing bolts)
- 48 mm or 46 mm 12-point filter housing socket (see generation notes below)
- 3/8-inch torque wrench and ratchet set
- Gravity-fill hose assembly or large 100 ml syringe with clear tubing
- Fluid catch tray and workshop roll
- Correct Haldex oil (e.g. G 052 175 A1 for Gen 2/3, G 055 175 A2 for Gen 4/5)
- Filter element, drain plug washers, and O-ring/seal kit
Pro Tip: Order your service kit before booking the job. Haldex oil is not stocked at most motor factors, and using the wrong spec can damage the pump within a few thousand miles.
Key takeaways
A Haldex service requires the correct Allen sizes, a generation-matched filter socket, a controlled fill method, and an OEM-spec oil and seal kit — skipping any one of these is the most common reason a DIY service fails.
| Point | Details |
|---|---|
| Essential tool sizes | 5 mm Allen (drain), 8 mm Allen (filter housing), 46 mm or 48 mm 12-point socket (filter cover). |
| Mandatory consumables | Correct-spec Haldex oil, new filter element, drain/fill washers, and filter housing O-ring. |
| Time estimate | Allow 1.5–2 hours for a competent DIYer including warm-up and fluid drain time. |
| Pump relearn required | Gen 4 and Gen 5 systems typically need a scan tool relearn after a fluid change to avoid fault codes. |
| Haldexparts for UK buyers | OEM service kits matched by generation and fitment, with free shipping on orders over £150. |
Table of Contents
- 1. What tools do you actually need for a Haldex service?
- 2. Parts and consumables you must replace every service
- 3. How to service a Haldex coupling: drain, replace, fill, verify
- 4. Specialist Haldex tools worth having in the UK
- 5. Diagnostics, fault codes, and the pump relearn you need to plan for
- 6. Symptoms that suggest your Haldex needs attention
- 7. UK safety, waste oil disposal, and what the law requires
- 8. When to DIY and when to hand it to a workshop
- OEM Haldex kits and tools: where to buy in the UK
- Sources
1. What tools do you actually need for a Haldex service?
The Gen 4 service procedure confirms the Allen and hex sizes that appear consistently across VW/Audi/Škoda/SEAT platforms. Here is each tool, what it does, and why you cannot substitute it.
| Tool | Size / spec | Function | Applicable generations |
|---|---|---|---|
| Allen key / bit socket | 5 mm | Drain plug removal and refitting | Gen 2, 3, 4, 5 |
| Allen key / bit socket | 8 mm | Filter housing bolt removal | Gen 2, 3, 4 |
| Filter housing socket | 48 mm, 12-point | Filter cover removal | Gen 4, 5 (most MQB) |
| Filter housing socket | 46 mm, 12-point | Filter cover removal | Gen 2, 3 (older housings) |
| Torque wrench | 3/8-inch drive | Drain plug and housing bolt torque | All generations |
| Gravity-fill hose | Screw-on valve type | Controlled fluid fill | All generations |
| Large syringe + tubing | 100 ml minimum | Budget fill alternative | All generations |
| Fluid catch tray | 1–2 litre capacity | Waste oil collection | All generations |
A note on the 46 mm vs 48 mm question. Older Gen 2 and Gen 3 housings on early TT and Golf 4Motion models often need a 46 mm socket, while most Gen 4 and Gen 5 units on MQB platforms (Golf R, S3, Leon Cupra) take a 48 mm. If you are unsure which generation you have, check the sticker on the rear differential or look up your VIN. Carrying both sizes, or buying an adaptor set, saves a wasted trip.
Pro Tip: Use a 3/8-inch drive torque wrench rather than a 1/2-inch. The smaller drive gives better feel at the low torque values typical of Haldex drain plugs and filter housing bolts, reducing the risk of stripping aluminium threads.
2. Parts and consumables you must replace every service
Getting the tools right is only half the job. Fitting the wrong oil or reusing a degraded O-ring is the most common cause of a failed DIY service.
Mandatory replacements:
- Haldex coupling oil — spec varies by generation. Gen 2/3 typically requires G 052 175 A1; Gen 4/5 uses G 055 175 A2. Never substitute with generic gear oil or ATF.
- Filter element — the filter traps metallic particles from normal clutch-pack wear. Reusing it defeats the purpose of the service.
- Drain plug sealing washer — aluminium crush washers deform on first use. Always fit a new one.
- Filter housing O-ring — the housing O-ring hardens with heat cycling. A weeping seal here contaminates the underbody and eventually drops the fluid level enough to damage the pump.
- Fill plug sealing washer — same logic as the drain plug washer.
Optional but worth doing at the same time:
- Pump seal kit (if the pump has high mileage or shows signs of weeping)
- Replacement filter housing bolts if threads show corrosion
OEM service kits on HaldexParts bundle the oil, filter, and seals matched to your generation and vehicle fitment, which removes the guesswork on part numbers entirely. For Gen 5 Audi/VW applications, the 0CQ598305 seal repair kit and oil set covers the pump seals alongside the standard service items.
3. How to service a Haldex coupling: drain, replace, fill, verify
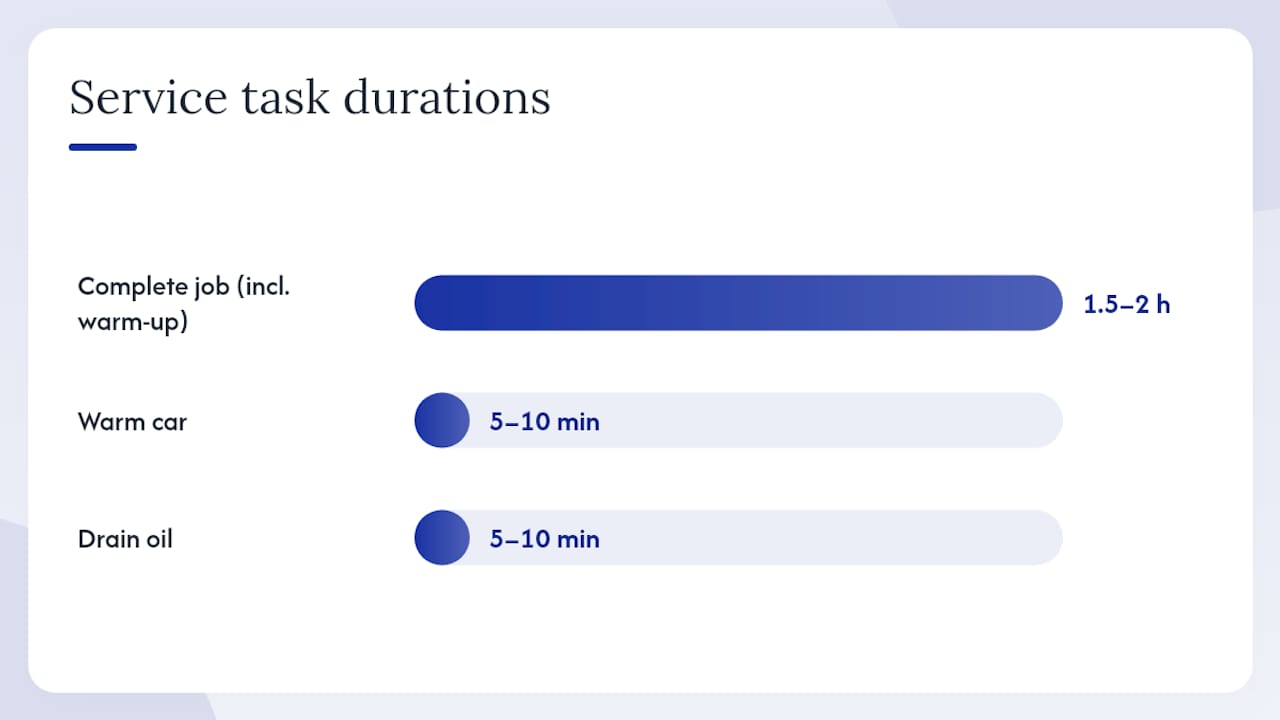
The full sequence is: drain → replace filter and seals → refill → verify/relearn. A competent DIYer should allow 1.5–2 hours for the complete job, including warm-up time.
Before you start: warm the car for 5–10 minutes. Warm oil drains faster and more completely than cold.
- Raise and support the vehicle safely. Use axle stands rated for the vehicle’s weight. Never work under a car supported only by a trolley jack.
- Position your catch tray under the rear differential drain plug.
- Remove the drain plug using a 5 mm Allen key. Allow the oil to drain fully (5–10 minutes).
- Remove the filter housing bolts with an 8 mm Allen key, then unscrew the filter housing cover with your 48 mm or 46 mm socket.
- Remove and discard the old filter element. Clean the housing cavity with a lint-free cloth.
- Fit the new filter element and new housing O-ring. Do not reuse the old O-ring even if it looks intact.
- Refit the filter housing cover and torque the bolts to the manufacturer’s specification for your generation (confirm via your OEM documentation or the Gen 4 service guide).
- Refit the drain plug with a new sealing washer. Torque to specification.
- Fill with the correct Haldex oil via the fill hole using your gravity-fill hose or syringe. Fill until oil just reaches the bottom of the fill hole thread.
- Refit the fill plug with a new sealing washer and torque to specification.
- Lower the vehicle and run a short test drive, then scan for fault codes.
Pro Tip: If you are using a syringe and clear tubing rather than a dedicated fill hose, the TTForum DIY thread describes a caulking-gun approach that works well and keeps the cost of the fill equipment under £5. Just confirm you are filling to the correct level, not just emptying the bottle.
4. Specialist Haldex tools worth having in the UK
Two specialist tools make this job noticeably cleaner and faster. Both are available in the UK via online marketplaces.
CTA Tools 8766 Haldex oil filter wrench
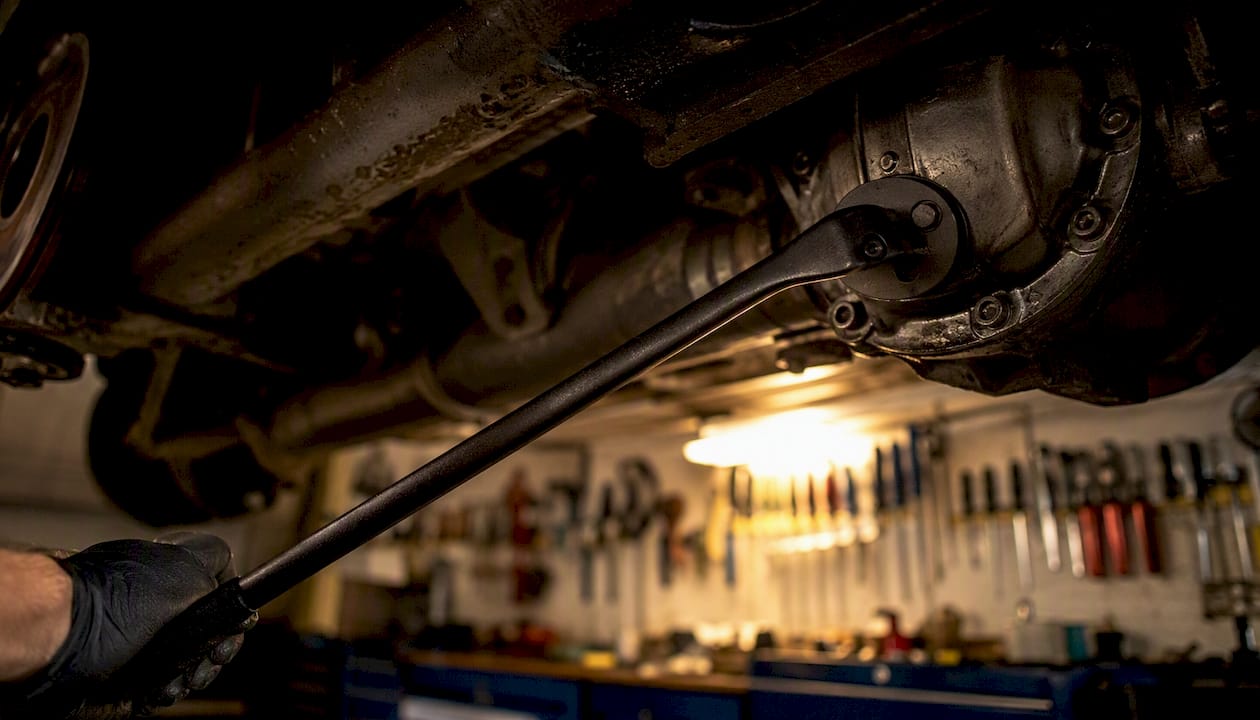
The CTA Tools 8766 uses a 48 mm x 12-point wrench end with an angled head and a 38 cm (15-inch) handle. The angled head is the key detail: the filter housing on a Golf R32 or Audi TT rear differential sits in a tight recess, and a straight socket simply cannot engage it cleanly. The long handle gives enough leverage to break the housing free without resorting to a breaker bar that risks cracking the housing. It is listed for VW and Audi rear differentials specifically, so confirm fitment to your generation before ordering.
CTA Tools 1028 gravity-fill hose assembly
The CTA Tools 1028 is a hose assembly with an open/close valve that screws directly onto the Haldex fluid bottle (G 060 175 A2 and compatible bottles). One end feeds into the differential’s fill hole; you control flow with the valve. This is a cleaner solution than a syringe for anyone doing the job more than once, and it eliminates the risk of air ingress that comes with improvised syringe setups. It is designed for VAQ and performance differential applications on MQB platforms.
Where to find these in the UK:
- Both tools appear on Amazon UK marketplace listings. Check the ASIN against the manufacturer part number to avoid third-party clones.
- Specialist automotive tool suppliers stock the CTA range; search by part number (8766, 1028) for the fastest result.
- Local garage equipment suppliers can sometimes source these on request.
Pro Tip: If you own both a Gen 3 and a Gen 4 car, or service multiple vehicles, buy both the 46 mm and 48 mm sockets. The £10–15 price difference is far cheaper than a stripped housing.
5. Diagnostics, fault codes, and the pump relearn you need to plan for
A fluid change alone does not always clear a Haldex fault light. On many Gen 4 and Gen 5 systems, the ECU monitors pump current draw and clutch-pack engagement, and a service event can trigger a relearn requirement.
Do you need a relearn after a fluid change?
On most Gen 4 and Gen 5 Haldex units, yes. The pump relearn sequence recalibrates the clutch engagement pressure to the fresh oil viscosity. Without it, the system may log a fault or default to a reduced AWD mode.
Diagnostic tool options:
- OEM-level scan tools (VCDS/VAG-COM for VW Group vehicles, IDS for Ford, SDD for Land Rover) give full access to Haldex adaptation channels and allow you to trigger the relearn sequence directly.
- Aftermarket OBD-II tools with extended manufacturer protocols (e.g. Autel, Launch) can read Haldex-specific fault codes on many platforms, though relearn capability varies by tool and firmware version.
- For a deeper look at which tools work for which generation, the Haldex diagnostic tools guide covers scan procedures and tool compatibility in detail.
Warning signs that point beyond a routine service:
- Fault codes for pump overcurrent or pump motor failure
- Codes indicating solenoid circuit faults
- Persistent AWD warning light after a relearn attempt
- Fluid that is black, smells burnt, or contains visible metallic particles
Any of these suggests a pump or solenoid issue rather than a service interval problem. Continuing to drive with a failed pump accelerates clutch-pack wear significantly.
6. Symptoms that suggest your Haldex needs attention
Haldex systems rarely fail without warning. These are the signs worth acting on promptly.
Common symptoms:
- Juddering under acceleration from a standstill — the most reported early symptom, particularly on tight turns. Often caused by degraded oil or a partially blocked filter.
- AWD or traction warning lamp — can indicate anything from low fluid to pump failure. Scan before assuming it is a simple service issue.
- Unusual noise from the rear differential — a whining or grinding noise under load points to pump wear or low fluid level.
- Erratic traction behaviour — the rear axle engaging inconsistently or not at all in conditions where AWD should activate.
Quick checks before ordering parts:
- Visual inspection under the car for oil weeping around the filter housing or drain plug.
- Check fluid level at the fill plug (warm the car first).
- Listen for pump noise with the engine running and a helper turning the steering to full lock.
- Check the pump connector for corrosion or a loose pin.
For a thorough breakdown of what causes Haldex failures and how to distinguish a service issue from a component failure, the Haldex failure causes guide is worth reading before you start.
When to use a workshop: if a scan reveals pump overcurrent codes, solenoid faults, or if the fluid is heavily contaminated, the job has moved beyond a DIY service. Pump replacement requires the same tools plus additional disassembly and, on some generations, a press for the pump seal.
7. UK safety, waste oil disposal, and what the law requires
Haldex oil is a mineral-based gear oil and classified as hazardous waste under UK regulations. Pouring it down a drain or into general waste is illegal.
Disposal options:
- Household Waste Recycling Centres (HWRCs) — most UK local authority sites accept small quantities of used engine and gear oil in sealed containers, free of charge. Check your local council’s website for accepted volumes and opening hours.
- Authorised waste contractors — garages and independent mechanics generating larger volumes must use a registered waste carrier. The Environment Agency’s public register lists authorised collectors.
Workshop safety checklist:
- Wear nitrile gloves and eye protection when draining or filling.
- Use a proper oil catch tray with a minimum 2-litre capacity.
- Keep absorbent workshop roll or oil-dry granules to hand for spills.
- Label your waste oil container clearly before transporting it.
- Do not mix Haldex oil with engine oil in the same container — it complicates recycling.
- Use axle stands rated for your vehicle’s kerb weight, positioned on the manufacturer’s jacking points.
Before handling Haldex fluid, review the Volkswagen oil SDS safety sheet for first-aid measures and storage requirements. The SDS covers flash point, skin exposure limits, and spill response, all of which apply to Haldex coupling oil.
Safety note: Under the UK Environmental Protection Act 1990 and the Hazardous Waste Regulations 2005, improper disposal of used oil carries a fine of up to £5,000 for individuals. Use an HWRC or authorised collector.
8. When to DIY and when to hand it to a workshop
The routine drain-and-refill with a filter change is well within reach for anyone who has done basic servicing before. You need the right tools, the correct oil spec, and a scan tool for the relearn. That is the honest threshold.
Where it gets more complicated is pump replacement. The pump sits deeper in the unit, the seal replacement on Gen 4 and Gen 5 requires careful reassembly, and a mistake here means a very expensive repair. If your scan shows pump fault codes rather than just a service interval flag, the cost of a workshop doing the pump work is almost always lower than the cost of getting it wrong at home.
Diagnostic access is the other limiting factor most DIYers underestimate. VCDS or an equivalent VW Group scan tool is not cheap if you are buying it for one job. If you do not already own one, factor that cost into your decision. Borrowing from a local VW/Audi club or using a mobile diagnostic service for the relearn step is a practical middle ground.
The AWD service best practices guide covers the broader workshop considerations if you want to go deeper on procedure and safety margins.
OEM Haldex kits and tools: where to buy in the UK
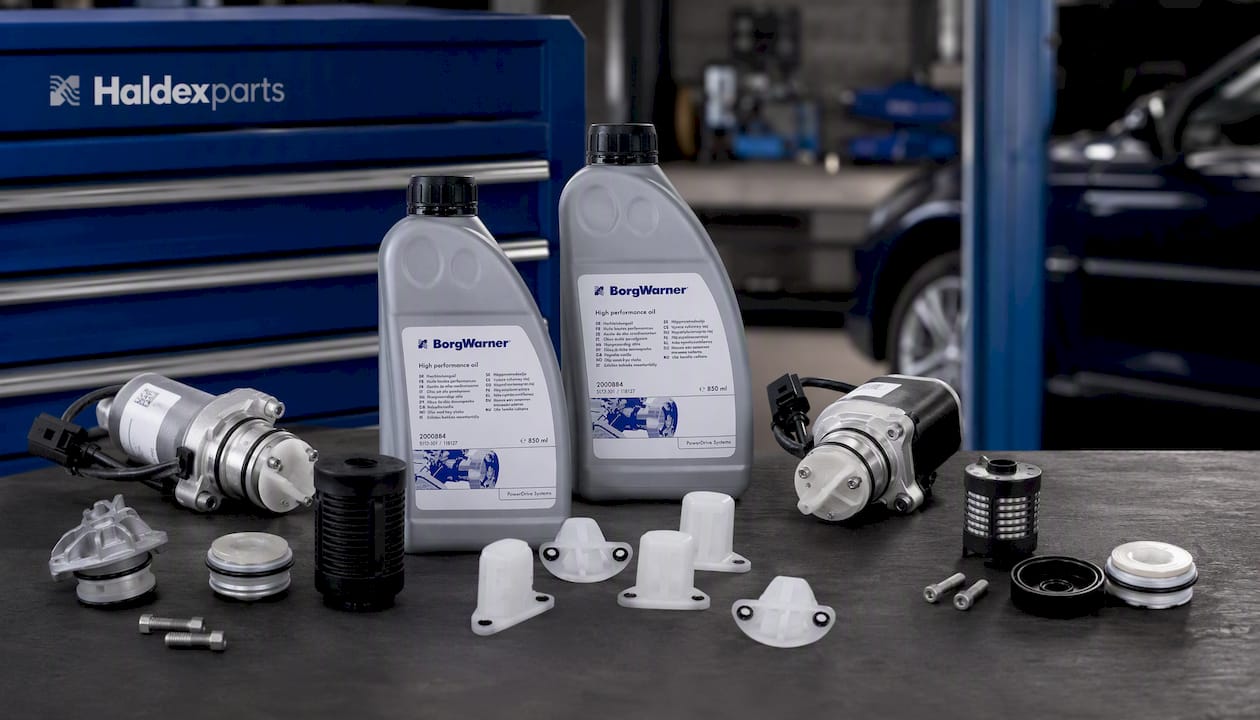
Haldexparts stocks OEM-grade service kits, oils, filters, and pumps for Haldex generations 2 through 5, covering Audi, VW, Škoda, SEAT, Ford, Land Rover, Volvo, Saab, Opel, and Vauxhall. Every kit is matched by generation and vehicle fitment, so you are not guessing at part numbers.
The service kits collection is the fastest route to the correct oil, filter, and seal set in one order. Dedicated pages for Haldex oils, filters, and replacement pumps let you order individual components when you only need one item. Orders over £150 qualify for free UK shipping, which typically covers a full service kit plus a spare filter. Use your vehicle registration or VIN when selecting a kit to confirm the correct generation fitment before checkout.
Sources
- How to Service Haldex Generation 4 Full Guide
When ordering tools, search by manufacturer part number (8766, 1028) on Amazon UK or specialist tool suppliers to avoid generic substitutes. For parts, use your vehicle’s VIN on the Haldexparts fitment lookup to confirm the correct generation before adding to your basket.



