

Check the Haldex pump for a removable oil filter canister. If one is present, you have a Generation 1, 2, 3, or 4 unit. If the pump has only a small screen or strainer and no separate filter, you almost certainly have a Generation 5. That single visual check resolves the question for the vast majority of UK cars before you touch a VIN plate or open a parts catalogue.
Quick identification checklist:
- Crawl under the rear of the car and locate the Haldex coupling on the rear differential or prop shaft.
- Look for a removable filter canister screwed into the pump body. Present = Gen 1–4. Absent = Gen 5.
- Read the white label plate on the pump housing for a part-number prefix (0BR, 0AY, or 0CQ are common VAG families).
- Cross-reference the VIN fourth character with the model year to narrow the generation window.
- Confirm against a controller compatibility list or your parts supplier’s fitment guide.
Likely generation by common UK model at a glance:
- VW Golf R / Bora 4Motion (Mk4, 2001–2003): Gen 1 or Gen 2
- VW Golf R32 / Mk5 platform (2003–2008): Gen 2 or Gen 3
- VW Golf R Mk6 / Tiguan Mk1 (2008–2012): Gen 4
- VW Golf R Mk7 / Tiguan Mk2 / Audi TT 8S / Q3 F3 (2012 onwards): Gen 5
- Volvo XC60, XC90, V70 AWD (pre-2012): Gen 4 in most cases
- Volvo XC60 / V60 (2012 onwards): Gen 5
Pro Tip: Before you jack the car, check the build date on the door-jamb sticker. A car built before mid-2012 on a VAG platform is almost always Gen 4 or earlier; post-2012 is almost always Gen 5. That narrows your search before you get your hands dirty.
Key takeaways
Haldex generation identification comes down to three checks: the presence or absence of a filter canister, the part-number prefix on the pump label, and the vehicle model year confirmed by VIN.
| Point | Details |
|---|---|
| Filter check is fastest | A removable filter canister means Gen 1–4; a screen only means Gen 5. |
| Part-number prefix confirms generation | 0BR/0AY = Gen 3/4; 0CQ = Gen 5 on VAG vehicles. |
| Model year narrows the window | VIN tenth character gives model year; cross-reference with the model mapping table. |
| Service procedure differs by generation | Gen 1–4 need filter replacement; Gen 5 needs screen cleaning and careful fastener retention. |
| Relearn is mandatory after service | Complete a software relearn via VCDS or equivalent after every fluid and filter change. |
Table of Contents
- How Haldex generations differ: a technical overview
- How to identify each generation by sight
- Which Haldex generation does your UK car have?
- How to identify generation by part number, VIN, or control-unit markings
- How servicing differs between generations
- Common symptoms, fault codes, and quick diagnostics
- Controller upgrades, remanufactured pumps and replacement options
- What to do next: UK action checklist and parts sources
- The part most guides get wrong about Haldex identification
- Sources
How Haldex generations differ: a technical overview
Haldex Traction has produced five distinct generations since 1998, each representing a meaningful engineering step. Understanding those steps is what makes generation identification useful rather than just academic.
Generation 1 (1998) introduced the reactive mechanical pump concept. Drive was sent rearward only after front-wheel slip was detected, because the pump was driven by the speed difference between the front and rear prop shafts. It worked, but the lag was noticeable.
Generation 2 (2001) added an electric pre-charge pump alongside the mechanical pump. This allowed the clutch to be partially pre-loaded before slip occurred, reducing the delay. The filter and basic hydraulic layout remained similar to Gen 1.
Generation 3 (2006) refined the pre-charge system and improved ECU integration. The unit became more compact, and calibration improved, but the fundamental architecture was still a hybrid of mechanical and electric actuation.
Generation 4 (2007) was the first genuinely proactive design. An electric pump replaced the mechanical unit entirely, and the ECU could pre-load the clutch based on sensor inputs before any slip happened. Response time dropped significantly. This is the generation most commonly found on UK VAG and Volvo cars from the late 2000s.
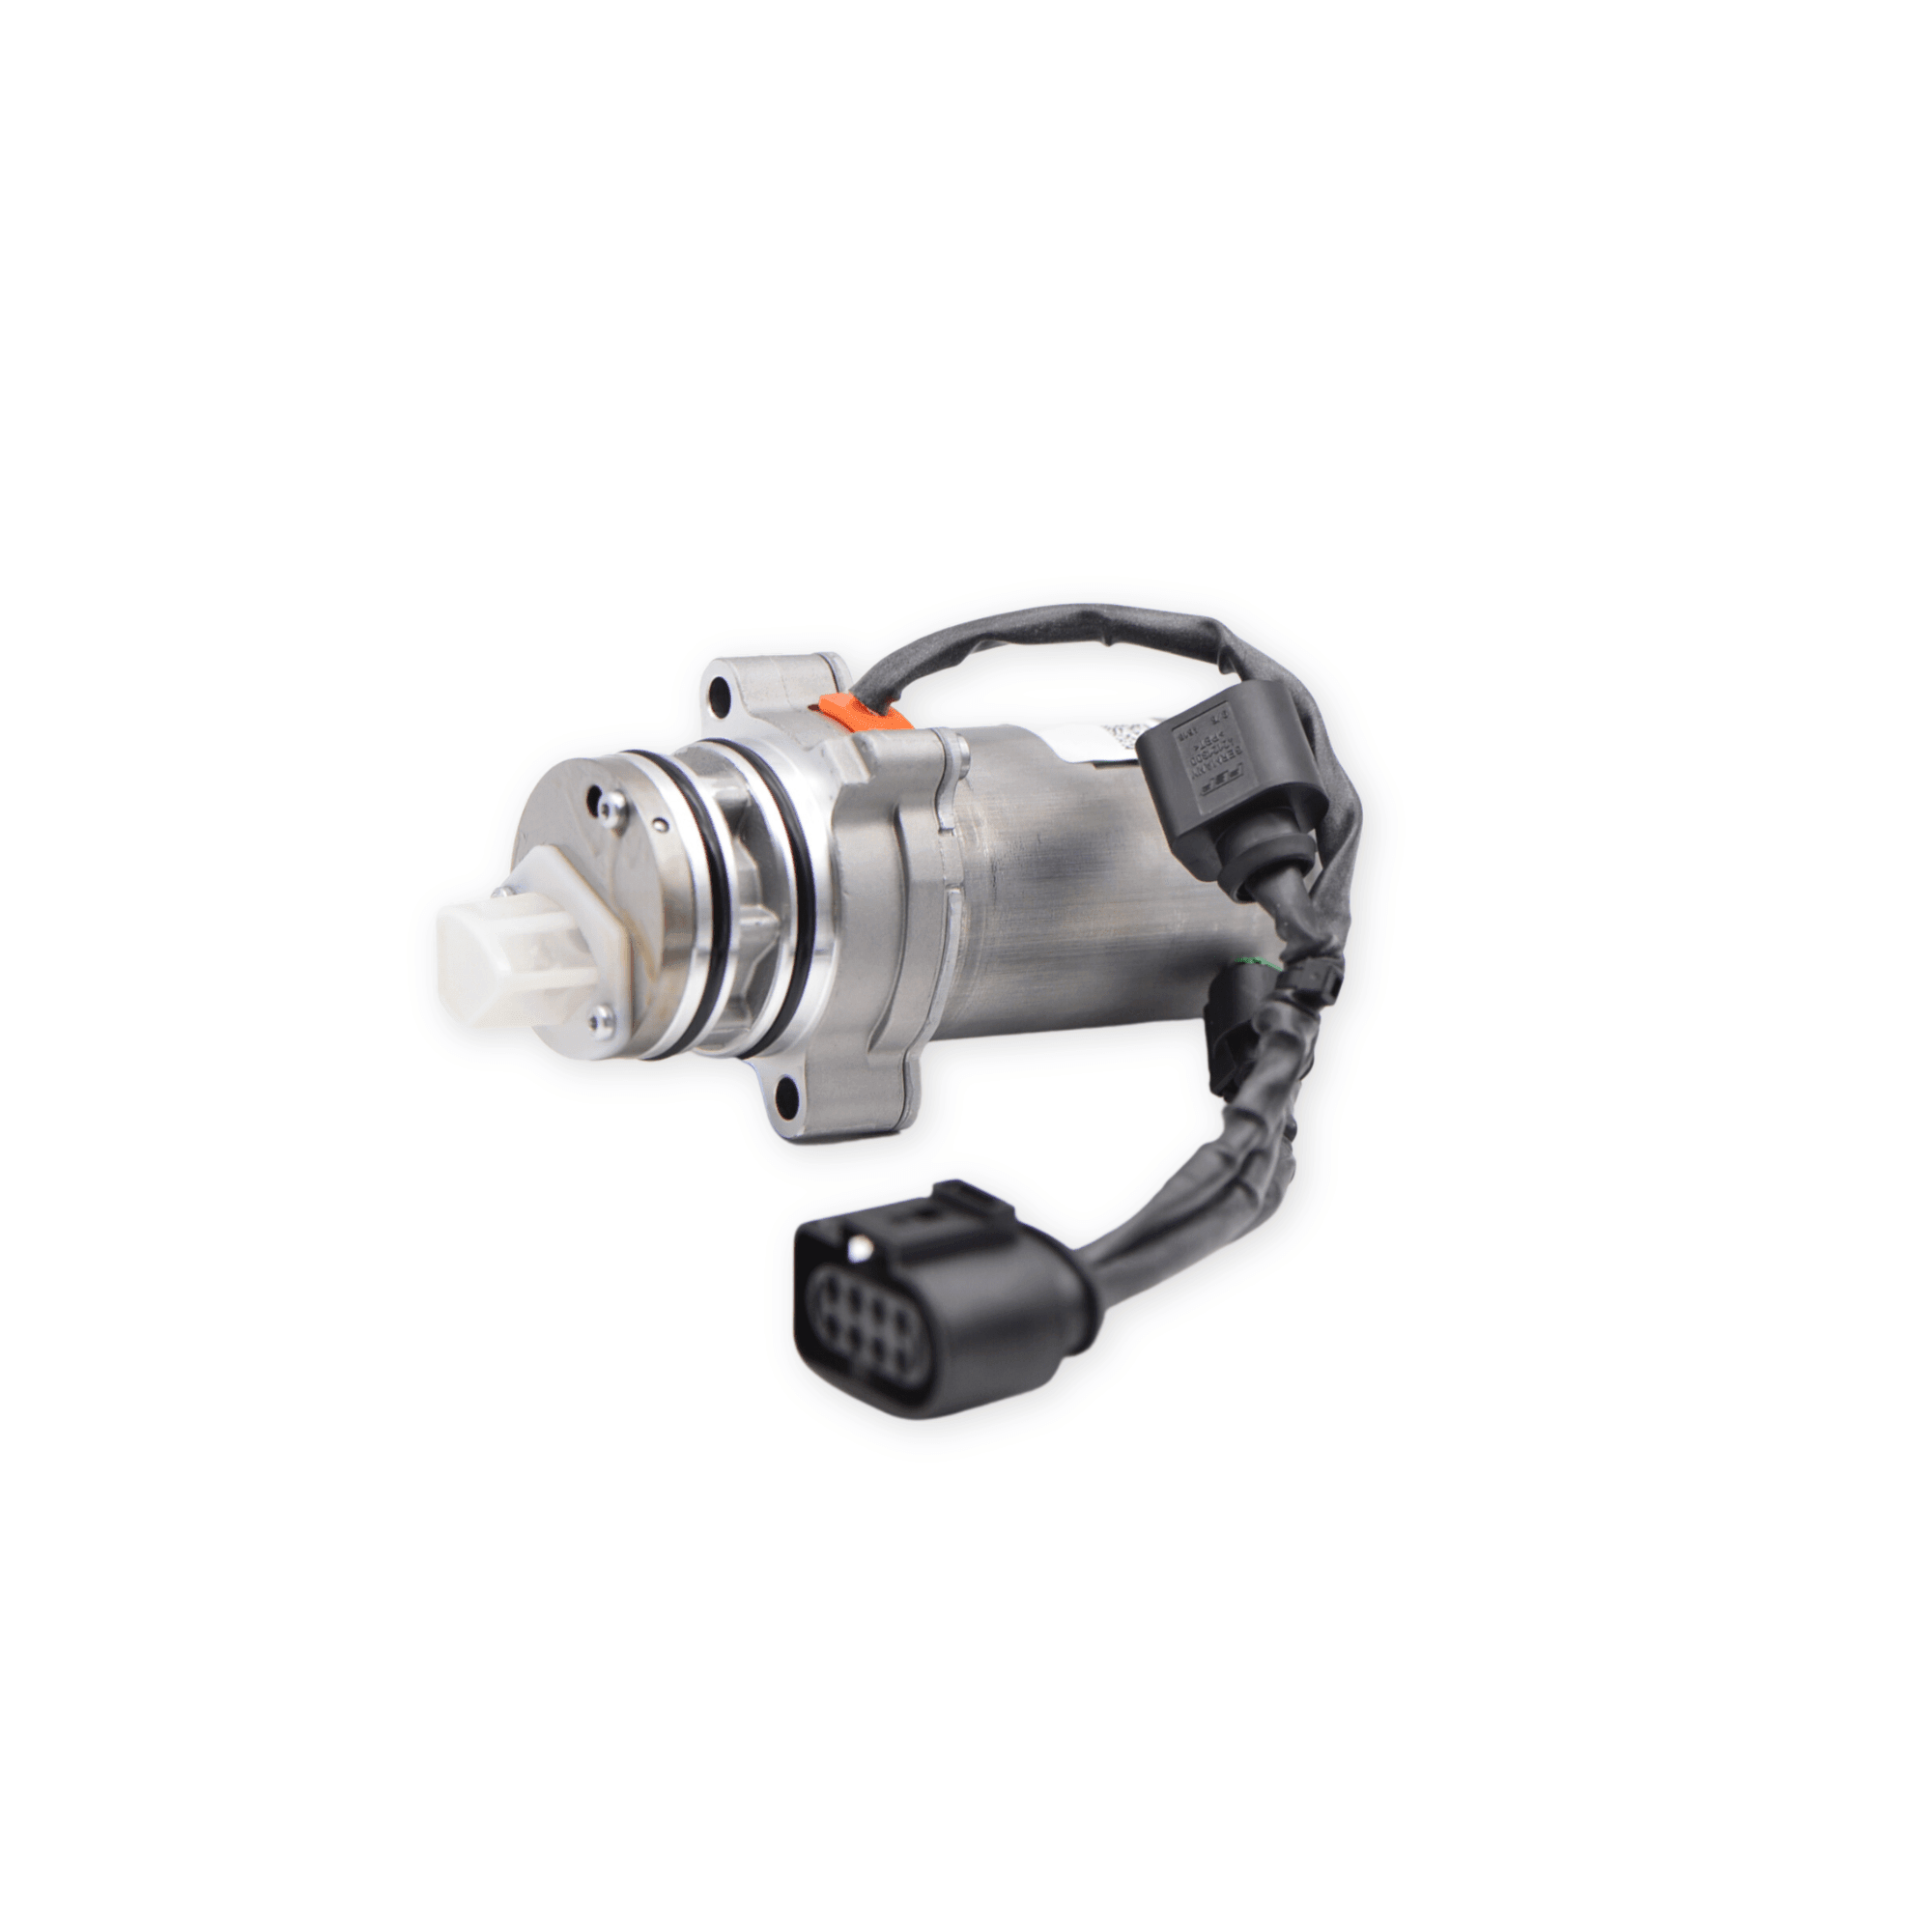
Generation 5 (2012) arrived after BorgWarner acquired the Haldex Traction division. The architecture was simplified: the ECU was integrated directly into the pump housing, the number of separate hydraulic components was reduced, and the traditional serviceable filter was replaced with a pump screen. That last change is the single most useful identification marker.
One point worth understanding before you diagnose anything: Haldex is not permanent AWD. It is an on-demand coupling that sends torque to the rear axle when required. Owners who assume their car is in constant four-wheel drive often misread symptoms and over-specify repairs.
Core technical differences at a glance:
- Filter: Gen 1–4 use a replaceable oil filter; Gen 5 uses a pump screen only.
- Pump type: Gen 1–2 use a mechanical pump with electric pre-charge; Gen 3–4 use a fully electric pump; Gen 5 integrates the pump and ECU into one housing.
- Clutch actuation: Gen 1–2 reactive; Gen 3–4 proactive; Gen 5 proactive with integrated control.
- ECU location: Separate module in Gen 1–4; integrated into the pump body in Gen 5.
- Service complexity: Gen 1–4 require filter replacement; Gen 5 requires screen cleaning and careful handling of the screen fasteners.
How to identify each generation by sight
The fastest workshop identification method is a visual inspection of the pump unit itself. You do not need a diagnostic tool for the first check.
Where to find the unit: On VAG vehicles (VW, Audi, Škoda, Seat), the Haldex coupling sits at the rear axle, typically bolted to the rear differential housing. On Volvo models, the coupling is similarly positioned at the rear axle. On Ford Kuga and Land Rover Freelander 2, the unit is mounted at the rear of the transfer case or rear axle assembly. A torch and a brief crawl under the car is usually enough to locate it.
Visual cues by generation:
Pump nose shape, label plates, and the presence of a combined oil temperature/pressure sensor are the repeatable visual cues technicians use to distinguish Gen 2, Gen 4, and Gen 5 units in VAG applications. The Gen 4 pump has a visible combined sensor port on the side of the housing; Gen 5 does not carry that external sensor in the same location because the sensing is integrated.
The white label plate on the pump body carries the part number. On VAG cars, look for a 10-digit part number beginning with 0BR (Gen 3/4 era) or 0CQ (Gen 5). On Volvo, the label format differs but the physical location is the same: on the side of the pump housing, usually facing the vehicle centreline.
Pro Tip: When inspecting the unit, place a drip tray underneath before you touch anything. Even a brief inspection can dislodge a loose drain plug or disturb a weeping seal. Avoid using a pressure washer to clean the area beforehand; water ingress into the ECU connector is a common cause of fault codes that have nothing to do with the clutch itself.
Visual inspection checklist:
- Locate the coupling at the rear axle.
- Check for a filter canister screwed into the pump body.
- Note the pump nose shape and housing size.
- Look for a combined sensor port on the pump side.
- Read the white label plate for the part-number prefix.
- Check whether the ECU is a separate bolted module or integrated into the pump body.
Which Haldex generation does your UK car have?
Model-year mapping is the fastest shortcut before you physically inspect the unit. The table below covers the most common UK models. Treat it as a starting point, not a definitive answer, because facelifts and platform transitions create overlaps.
Published model lists confirm that Gen 4 and Gen 5 distribution spans VW/Audi/Seat/Škoda and Volvo ranges, with model-year overlaps where platform changes moved a model from one generation to the next. The Golf R is a good example: Mk6 cars built before mid-2012 are Gen 4; Mk7 cars from late 2012 are Gen 5. A car registered in 2012 could be either, depending on its build date.
Key caveats on model mapping:
- Build date matters more than registration year. A car registered in January 2013 may have been built in late 2012 on the older platform.
- Some Volvo models were sold in the UK with both Gen 4 and Gen 5 units during the same model year as production transitioned.
- Ford Kuga and Land Rover Freelander 2 use a BorgWarner-derived coupling that shares the Haldex architecture but carries different part-number prefixes. For Haldex-compatible vehicle confirmation, always verify the part number on the unit itself.
- VIN lookup via an authorised dealer or ETKA parts database will confirm the exact controller fitted, which is the most reliable method when the model year falls in an overlap window.
How to identify generation by part number, VIN, or control-unit markings
Visual inspection narrows the field; part-number and VIN checks confirm it. Here is the step-by-step process.
Step 1: Read the pump housing label
The white or silver adhesive label on the pump body carries a 10-digit OEM part number. On VAG vehicles, the prefix identifies the generation:
- 0BR prefix: typically Gen 3 or Gen 4 controller family
- 0AY prefix: Gen 4 family (common on Audi TT 8J and Golf Mk6 R)
- 0CQ prefix: Gen 5 family (Golf Mk7 R, Audi 8V/8S, Tiguan Mk2)
Controller part-number families 0BR, 0AY, and 0CQ map directly to generation variants and fitment windows for VAG vehicles. Reading the prefix takes under a minute and is the most reliable single check after the filter/screen visual.
Step 2: Check the ECU module label (Gen 1–4)
On Gen 1–4 cars, the ECU is a separate module bolted to or near the pump. It carries its own part number, which can be cross-referenced against controller compatibility tables. The module is usually accessible without removing the pump.
Step 3: Decode the VIN for model year
The VIN’s tenth character encodes the model year. On UK-registered cars, this follows the standard ISO 3779 encoding: for example, character “A” = 2010, “B” = 2011, “C” = 2012, “D” = 2013. Knowing the model year places the car in the correct generation window from the mapping table above.
Step 4: Use a VIN lookup or parts database
ETKA (the VAG electronic parts catalogue) and equivalent tools used by VAG dealers will return the exact controller part number fitted to a specific VIN. Independent workshops can access this via subscription. Regional Haldex service and controller pages also provide part-number tables and VIN decoding advice for technicians confirming the installed generation. The Haldexcontroller compatibility list is a free public resource that cross-references part numbers to generation and fitment.
Step 5: Cross-check with a Haldex diagnostic tool
VCDS (VAG-COM Diagnostic System) will read the controller identification string directly from the module. The software version and hardware number displayed in the control-unit identification screen confirm the generation without any physical label reading.
Useful lookup resources:
- ETKA / dealer VIN lookup for exact controller part number
- Haldexcontroller.com compatibility tables (free, covers VAG)
- VCDS controller identification screen
- Haldexparts.co.uk fitment guide (searchable by model and generation)
How servicing differs between generations
Getting the service procedure wrong is the most common and most expensive Haldex mistake. The generation determines which parts you need, which fluid to use, and whether a software relearn is required.
Filter vs screen: the critical split
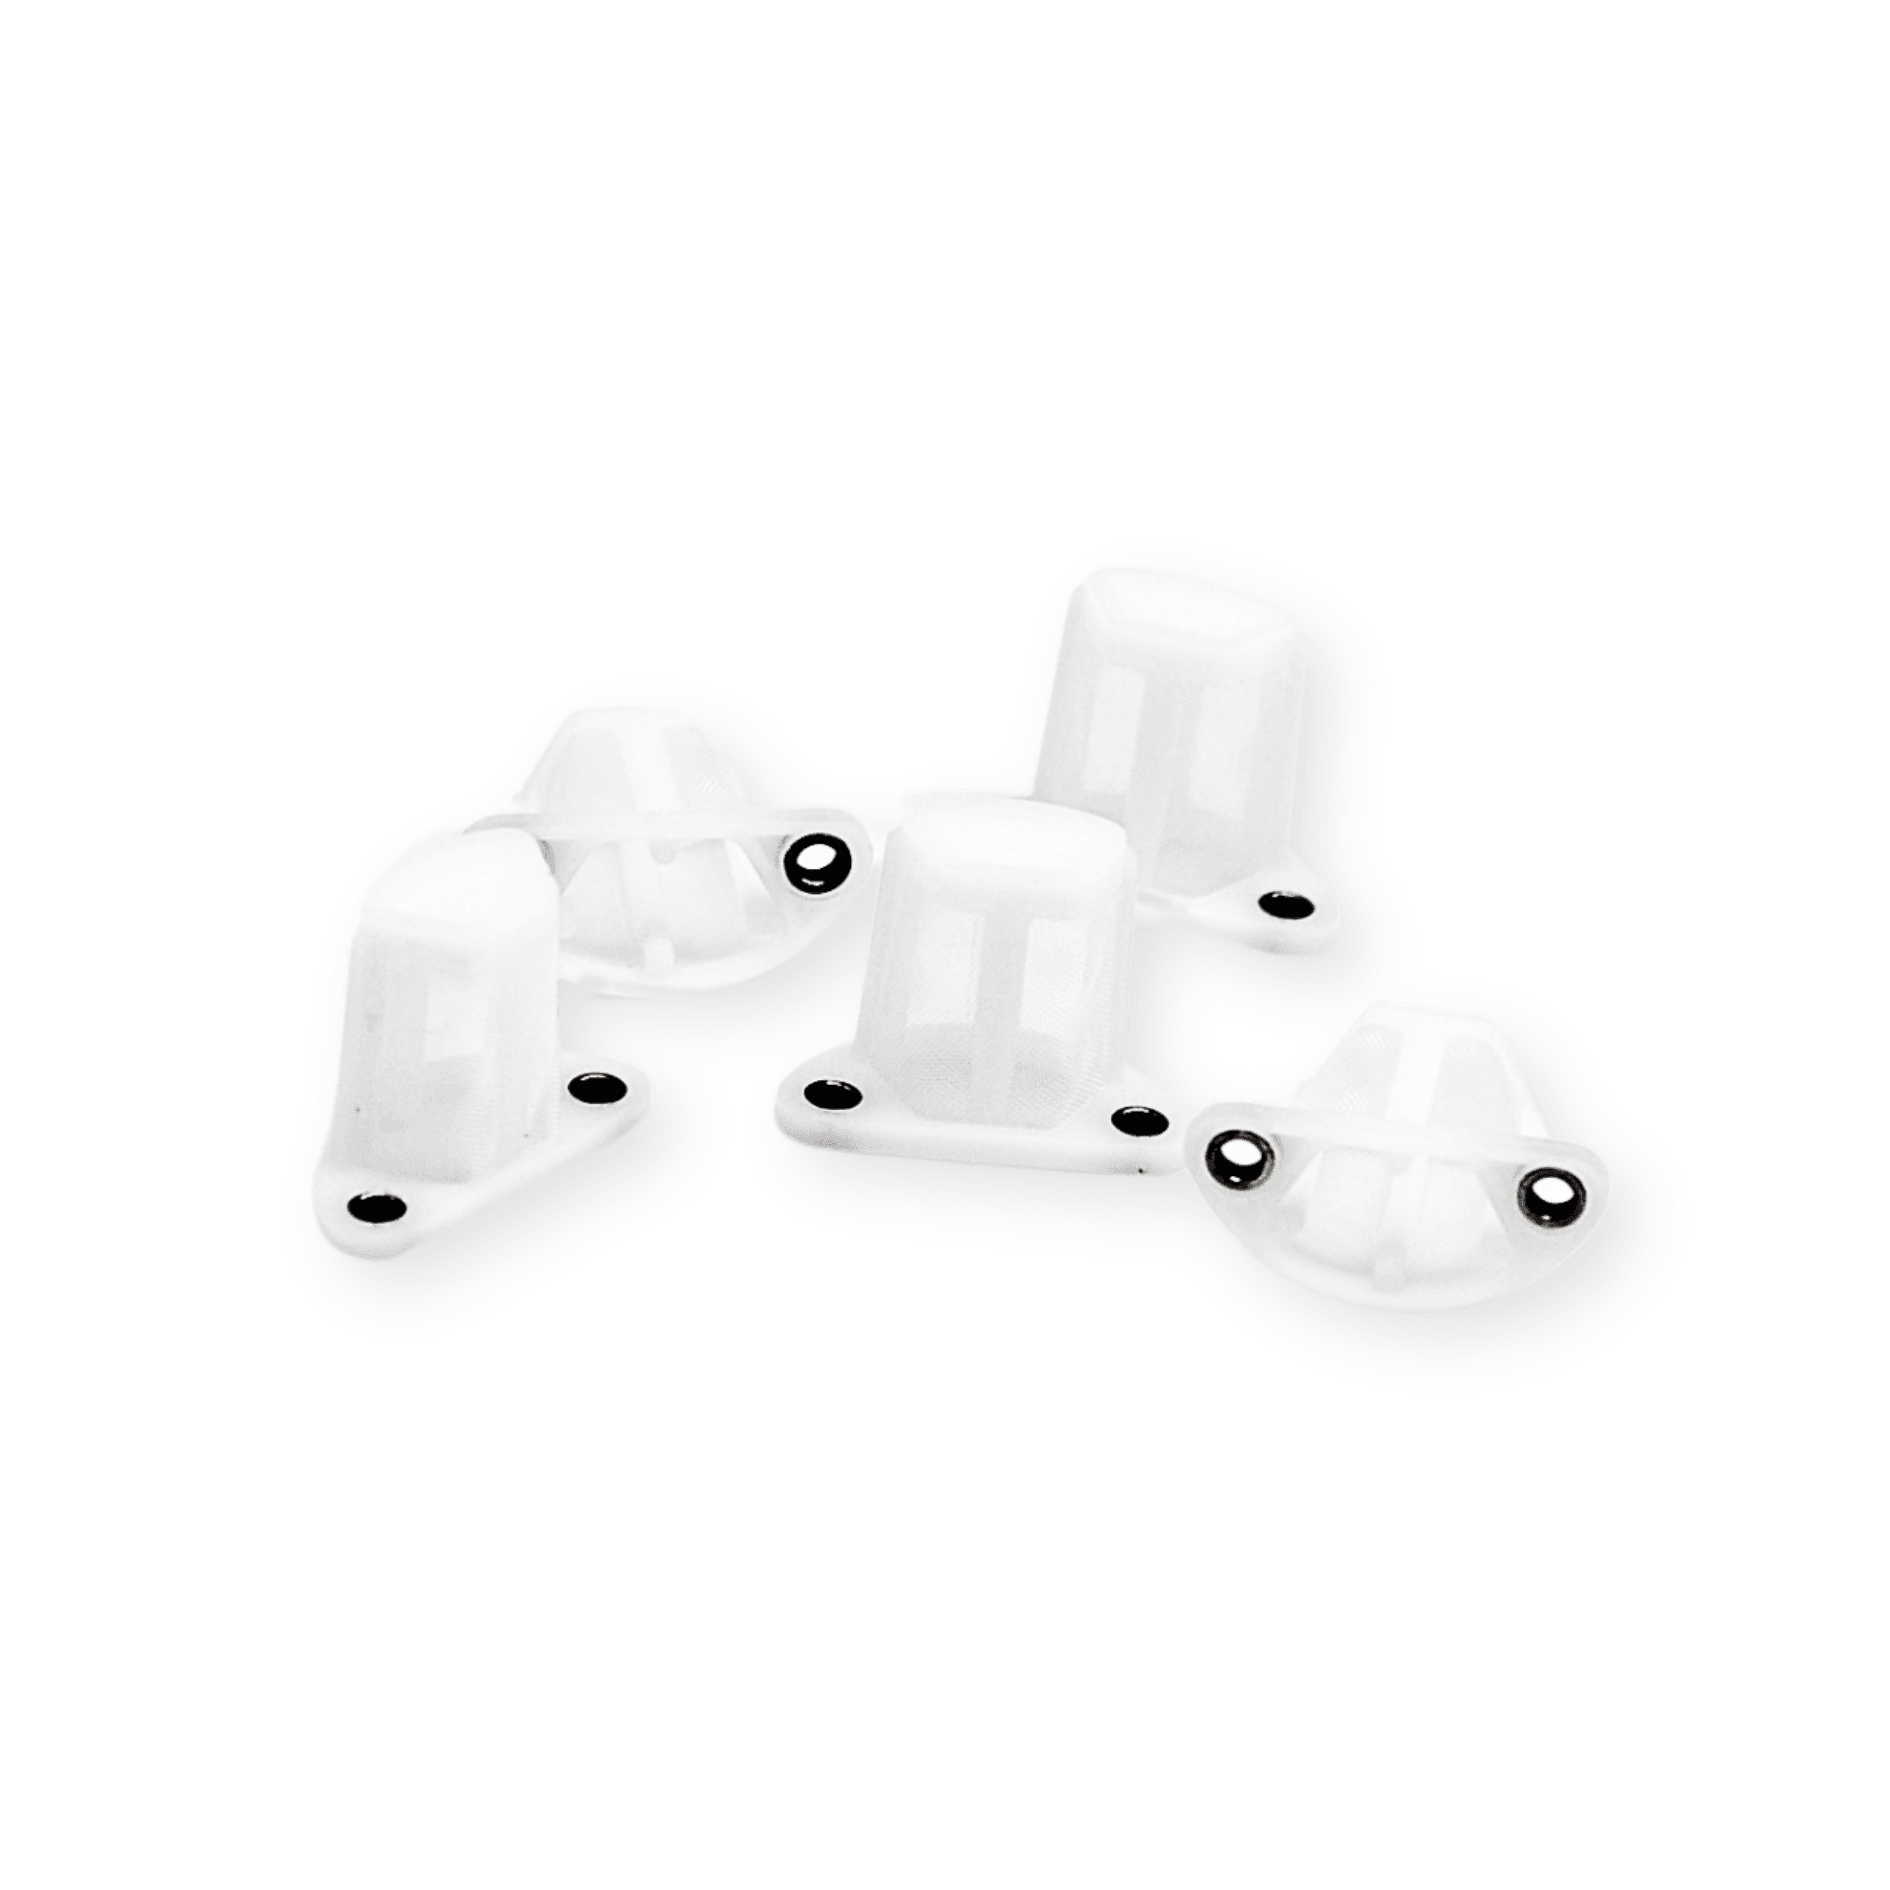
Gen 1–4 units carry a replaceable oil filter, either a paper element or a cotton-gauze type depending on the generation and supplier. This filter must be replaced at every service. Gen 5 units have no replaceable filter. Instead, a pump screen (strainer) is fitted inside the pump body. The screen must be removed, cleaned carefully, and refitted. The screen screws and the screen itself may not be available separately through OEM channels, so handle all fasteners carefully and retain every component during the service.
Fluid types and intervals
The correct fluid for most VAG Haldex units is Haldex-specific AWD fluid, commonly specified as G 055 175 A2 or equivalent. Using standard gear oil or differential fluid is a common error that accelerates clutch wear. Volvo, Ford, and Land Rover applications may specify different fluids; always confirm against the vehicle-specific service data before filling.
Typical service intervals for UK driving conditions:
- Gen 1–3: every 20,000–30,000 miles or every 2 years, whichever comes first
- Gen 4: every 30,000–40,000 miles or every 3 years
- Gen 5: every 40,000 miles or every 4 years (screen clean rather than filter replacement)
These are general guidelines. High-mileage vehicles or those used in demanding conditions benefit from shorter intervals. For context on how high-mileage car maintenance requirements change with age and use, the principles apply directly to Haldex service planning.
Workshop service checklist (all generations):
- Drain the Haldex fluid completely (drain plug on the base of the coupling).
- Remove and replace the filter (Gen 1–4) or remove, clean, and refit the screen (Gen 5).
- Inspect the drain plug magnet for metallic debris; excessive swarf indicates clutch wear.
- Refill with the correct fluid to the specified level (a fill tool or syringe is typically required; the fill port is not always accessible with a standard funnel).
- Torque the drain and fill plugs to specification.
- Perform a software relearn using VCDS or equivalent.
The relearn step is not optional. A software relearn is required after fluid and filter service to reset the clutch engagement parameters. Skipping it leaves the system operating on stale calibration data, which can cause judder or delayed engagement even after a perfect mechanical service. On VAG cars, VCDS handles this in the Haldex control module’s adaptation channel.
For the correct Haldex solenoid valve replacement procedure alongside a fluid service, the solenoid is a common wear item on Gen 3 and Gen 4 units and is worth inspecting at every service.
Haldexparts stocks generation-specific service kits covering filter, oil, and ancillary components for Gen 1–5, as well as Haldex-specific oils and replacement filters for Gen 1–4 units.
Common symptoms, fault codes, and quick diagnostics
Most Haldex problems announce themselves in one of four ways: a warning light, a judder or vibration when cornering, an oil leak from the coupling, or a noticeable delay in rear-axle engagement on slippery surfaces.
First physical checks before reaching for a diagnostic tool:
- Check the fluid level at the fill plug. Low fluid is the most common cause of poor engagement.
- Inspect the coupling housing for oil weeping around the seals or drain plug.
- Check the ECU connector for corrosion or water ingress, particularly on cars that have been pressure-washed underneath.
- Look for loose wiring at the wheel-speed sensors, which feed the Haldex ECU.
Common fault codes and what they typically indicate:
- Pump motor fault / pump circuit open or short: The electric pump has failed or its wiring is damaged. Common on Gen 3 and Gen 4 units with high mileage.
- Clutch pressure fault: The pressure sensor is reading outside expected parameters. Could be a failed sensor, a blocked hydraulic circuit, or low fluid.
- Solenoid valve fault: The proportional solenoid that controls clutch pressure is sticking or has failed. Common on Gen 3/4 after 80,000–100,000 miles.
- Wheel-speed sensor implausible signal: A faulty ABS sensor is feeding bad data to the Haldex ECU, causing it to disengage or log a fault.
- Control unit internal fault: The ECU itself has failed. More common on Gen 5 units where the ECU is integrated into the pump and cannot be replaced separately without a full pump assembly.
For detailed pressure sensor diagnostics, the sensor is a frequent first failure point on Gen 4 units and is worth testing before condemning the pump.
Quick isolation tests:
- Read live data in VCDS: pump motor current draw, clutch pressure, and oil temperature all display in real time. A pump drawing no current when commanded is a pump or wiring fault, not a clutch fault.
- Swap the pressure sensor with a known good unit before ordering a pump.
- Check for DTCs in the ABS/ESP module as well as the Haldex module; a wheel-speed fault in ABS will often trigger a secondary Haldex code.
Repair vs replace decision checklist:
- Metallic debris on the drain plug magnet: consider remanufactured pump or specialist rebuild.
- Pump motor fault with no wiring fault found: pump replacement or remanufacture.
- Solenoid fault: replace solenoid valve (relatively low cost, DIY-accessible on Gen 3/4).
- ECU fault on Gen 1–4: replace or remap the separate ECU module.
- ECU fault on Gen 5: full pump assembly replacement or specialist remanufacture required.
- Seal leak only: seal repair kit is available for Gen 5 pumps and is significantly cheaper than a full pump replacement.
Controller upgrades, remanufactured pumps and replacement options
Replacing or upgrading a Haldex pump or controller is straightforward in principle but has compatibility traps that catch out even experienced technicians.
Remanufactured pumps are the most cost-effective replacement route for Gen 3 and Gen 4 units. A remanufactured pump is rebuilt to OEM specification, typically with new seals, a new pump motor, and a cleaned or replaced solenoid. The advantage over a new OEM unit is cost; the caveat is that quality varies between suppliers. Stick to units that carry a warranty and are supplied with the correct fluid for a first fill.
Controller swaps (Gen 1–4) are viable because the ECU is a separate module. A replacement controller must match the part-number family of the original. Fitting a 0AY controller to a car that left the factory with a 0BR unit can cause calibration mismatches or outright non-communication. Always confirm the replacement part number against the original label before ordering.
Gen 5 pump and ECU integration removes the option of a standalone controller swap. The ECU and pump are one assembly. If the ECU fails, the entire pump assembly must be replaced or sent for specialist remanufacture. This makes Gen 5 repairs more expensive but also simpler in terms of parts sourcing: one part number covers the whole unit.
Compatibility caveats:
- Software version must match the vehicle’s coding. A used pump from a different model year may carry incompatible software, requiring a dealer or specialist to recode it.
- VIN confirmation is particularly important for Gen 5 swaps; the integrated ECU may be VIN-locked on some models.
- For performance upgrades, aftermarket controller remaps are available for Gen 4 units and allow adjustment of clutch pre-load and engagement maps. These are popular on Golf R and Audi TT track cars.
Pro Tip: When sourcing a replacement Gen 4 controller, cross-reference the 0BR or 0AY part number against the Haldex controller compatibility list before purchase. A £30 saving on a mismatched unit costs far more in diagnostic time.
When an upgrade is worthwhile: if you are running a Gen 4 car on track or in performance driving, a controller remap that increases rear torque bias is a genuine improvement. For standard road use, OEM-equivalent replacement is the right call every time.
What to do next: UK action checklist and parts sources
Once you have identified the generation, the path forward is straightforward.
Ordered action list:
- Confirm the generation visually (filter present = Gen 1–4; screen only = Gen 5).
- Verify by reading the part-number prefix on the pump label (0BR/0AY = Gen 3/4; 0CQ = Gen 5).
- Cross-check against the VIN model year and the model mapping table above.
- Decide: routine service (fluid and filter/screen), component repair (solenoid, sensor, seal kit), or pump/controller replacement.
- Order the correct kit for your generation from Haldexparts.
- Perform the service or book a specialist, then complete the software relearn.
UK parts and resources:
Haldexparts stocks OEM-grade service kits, pumps, oils, and filters for Gen 1–5 across Audi, VW, Škoda, Seat, Volvo, Ford, Land Rover, Opel, Saab, and Vauxhall. Products are searchable by generation and model fitment, which removes the guesswork from ordering. Free shipping applies on orders over £150. For a Land Rover Freelander 2 AWD pump seal kit or a Saab/Opel/Vauxhall coupling oil and filter kit, specific product pages are available on the site.
For diagnostic tool access, VCDS (Ross-Tech) is the standard choice for VAG platforms in the UK. Volvo VIDA or VIDA/DICE covers Volvo models. Generic OBD2 readers will not access the Haldex module on most cars.
For specialist repair, look for a VAG specialist or AWD specialist rather than a general garage. The relearn procedure and live-data monitoring require the correct software, and a general technician without VCDS access cannot complete the job correctly regardless of mechanical skill.
Cost expectations (UK, 2026): Service kit prices vary by generation and model; check current pricing at Haldexparts.co.uk. Remanufactured pump units for Gen 3/4 typically run into the low-to-mid hundreds of pounds. Gen 5 full pump assemblies are more expensive. Specialist labour for a full service including relearn is typically one to two hours at a VAG specialist’s rate.
For context on how high-mileage vehicles are serviced and what wear-related fitment issues to anticipate on older Haldex-equipped cars, the principles translate directly to UK workshop practice.
The part most guides get wrong about Haldex identification
Most online Haldex identification guides open with a model-year table and stop there. That approach is fine until you encounter a 2012 Golf R, a late-build Tiguan, or any Volvo that straddled a platform transition. The model year tells you the probability; it does not tell you what is actually bolted to the car.
The filter check is more reliable than any table because it is physical evidence. You are looking at the actual unit, not inferring from a registration date. The part-number prefix is more reliable still, because it identifies the specific controller family fitted to that specific car. The model-year table is a shortcut for planning, not a substitute for the two-minute inspection.
There is a second thing guides consistently underplay: the relearn. Owners and even some technicians treat a Haldex service as a drain-and-fill job, equivalent to changing engine oil. It is not. The clutch engagement parameters are stored in the ECU, and they drift as the fluid ages and the clutch wears. A fresh fill with stale calibration data produces a system that feels worse than before the service, which is how “I just serviced it and now it judders” threads proliferate on forums. The relearn resets those parameters to match the new fluid and the current clutch condition. It takes three minutes with VCDS. Skipping it wastes the rest of the work.
The third underrated point: Gen 5 screen handling. The screen is not a consumable in the way a filter is. It is a precision component with small fasteners that are not always available separately. Technicians who treat it like a disposable item and lose a screw in the drip tray create a far more expensive problem than the one they were solving. Slow down, use a magnetic parts tray, and retain every fastener.
If you are a DIY owner, the identification and service process is genuinely accessible on Gen 1–4 cars. Gen 5 is accessible too, but the relearn requirement means you need VCDS access or a specialist for the final step. Plan for that before you drain the fluid.
Sources
The following resources are the most reliable for confirming generation, part numbers, and service procedures for UK-market vehicles.
- Haldex Traction
- How To Identify and Service Your VW or Audi Haldex AWD System – ECS Tuning
- All systems go as Haldex put under the spotlight - TPS



