

Yes, a Gen 2 Haldex oil and filter service is a realistic DIY job, provided you follow three non-negotiables: warm the oil to 20–40°C before draining, keep the vehicle perfectly level during refill, and use the correct OEM-matched parts. Get those right, and you protect the pump and clutch pack from the wear that ends in a costly replacement. A kit like Haldexparts’s Gen 2 pump, filter and oil bundle removes most of the parts guesswork.
TL;DR:
- Using OEM-matched parts and maintaining proper oil temperature during the drain are crucial to protecting the Haldex pump and clutch pack from early wear.
- Confirm your vehicle has a second-generation Haldex system with the correct code, such as 0AV, and gather all necessary tools and parts before starting to avoid delays.
- Schedule the service between 20,000 and 40,000 miles, with more frequent intervals for vehicles used in wet, muddy, or high-stress conditions; neglecting it risks costly pump failure.
- Proper leveling of the vehicle and following the step-by-step process, including checking oil temperature and refilling until oil weeps out, ensures a successful and leak-free service.
- Using the right full kit from Haldexparts guarantees compatibility and prevents mistakes that cause leaks or faulty operation.
Table of Contents
- Parts and tools you need before you start
- How often should you service a Gen 2 Haldex unit?
- How do you service a Haldex Gen 2 system step by step?
- What do fault codes and oil temperature checks tell you?
- When should you remove and clean the Haldex pump?
- Common Haldex faults after a service and how to verify the fix
- Practical tips that save you a second attempt
- Which Haldex Gen 2 parts and guides does Haldexparts offer?
- What actually trips up first-time Haldex DIYers?
- Get the exact Gen 2 kit this guide is built around
- Sources
Parts and tools you need before you start
Before anything comes off the underside of the car, confirm you actually have a second-generation unit. Gen 2 housings carry codes such as 0AV stamped into the casing, and ordering the wrong filter or oil for a different generation is the single most common parts mistake DIYers make, according to ECS Tuning’s identification guide.
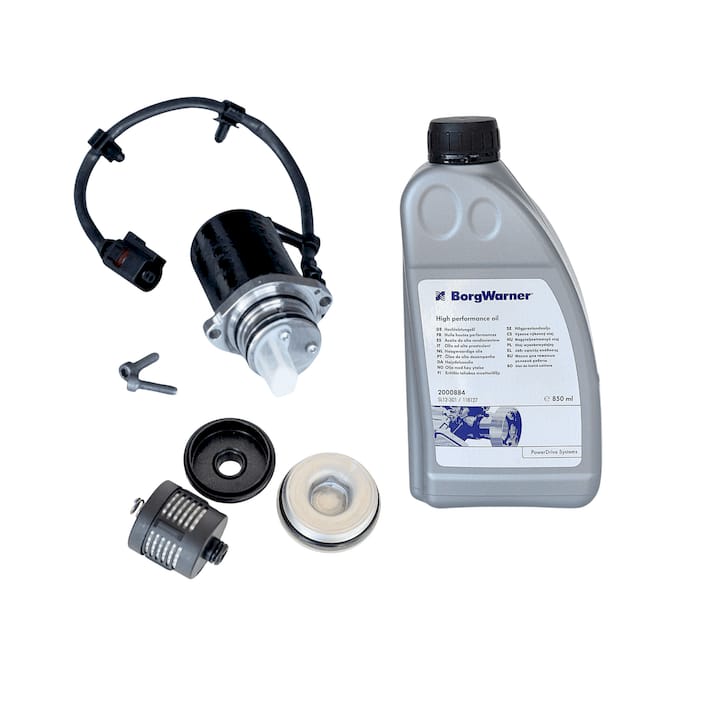
Once you’ve confirmed the generation, gather the parts and tools in one go so the job doesn’t stall halfway through with the car up on stands.
Parts:
- Haldex filter (02D598574) plus a fresh crush washer for the drain and fill bolts
- BorgWarner high-performance oil (2000884 / G060175A2), sold as an 850ml oil-only bottle if you’re skipping the pump
- Replacement drain and fill bolts if yours show any thread wear
Tools:
- 24mm socket or a dedicated Haldex filter wrench for the housing cap
- Narrow-profile ratchet for the tight bay clearance around the unit
- 5mm and 8mm hex keys for the drain and fill bolts
- Torque wrench capable of low Newton-metre readings
- Fluid transfer pump or a large syringe for refilling
- Ramps or axle stands, plus a spirit level or phone level app
Forum regulars on the Audi TT Forum consistently point to a specialised filter wrench, such as the CTA Tools 8766 or an equivalent, because standard sockets round off the housing cap when access is tight. Add basic PPE, an oil catch tray rated for at least a litre, and a sealed container for the used fluid so you can dispose of it at a registered recycling point rather than down a drain.
How often should you service a Gen 2 Haldex unit?
Most manuals and workshop guidance put the interval somewhere between 20,000 and 40,000 miles, though hard-driven cars, tow vehicles, and anything used regularly in wet or muddy conditions want the shorter end of that range. Track days and gravel driving shorten it further because both load the pump harder and introduce more particulate into the fluid.
Cost is where DIY earns its keep. A full filter-and-oil service using own-brand consumables typically runs to the price of the kit itself, while an oil-only top-up costs noticeably less if the filter still looks clean. A dealer or independent specialist charging labour on top of parts will usually land well above that, which is fine if you’d rather not get under the car, but hard to justify if you’re comfortable with basic tools.
- DIY cost: parts only, roughly the price of a filter/oil kit
- Dealer service: parts plus labour, often several times the DIY figure
- Cost of neglect: a failed Haldex pump is one of the more expensive single-component replacements on these platforms
Skipping the service doesn’t save money long-term. Contaminated fluid stops protecting the internal clutch pack under load, and neglected units accelerate wear on the pump itself, turning a cheap oil change into a four-figure repair.
How do you service a Haldex Gen 2 system step by step?
This is the sequence a competent home mechanic can complete in an afternoon, working methodically rather than rushing the refill stage.
1. Connect your diagnostic tool and check oil temperature. Plug in VCDS, ODIS, or an equivalent VAS-based tool and navigate to the Haldex control module’s measuring blocks. Look for the oil temperature channel and don’t touch the drain bolt until it reads within the 20–40°C window. Technicians consistently target this range because warm fluid drains faster and more completely than cold oil, which tends to cling to the housing walls and internal gears.
While you’re connected, scan for stored fault codes. Note anything present now so you have a baseline to compare against once the service is finished.
2. Get the car level and support it safely. This matters more than most first-timers expect. If you’re using ramps that only lift the rear wheels, or the front sits slightly higher than the back, the fluid level you achieve during refill will be wrong even if you follow every other step correctly. Use a spirit level on the sill or floor pan and adjust axle stands until the car reads properly flat in both directions.
3. Remove the fill bolt first, then the drain bolt. Removing the fill bolt before you crack the drain lets air into the system as fluid leaves, so it drains cleanly rather than glugging and splashing. Position your catch tray, then remove the drain bolt with your 5mm or 8mm hex key and let the old oil run out fully. This takes longer than you’d think. Give it a couple of minutes rather than assuming it’s empty after the initial rush stops.
4. Remove the filter housing cap and old filter. Using your 24mm socket or filter wrench, crack the housing cap loose. Expect resistance here, another reason a dedicated wrench earns its keep in a cramped engine bay. Lift out the old filter, noting the orientation of the internal spring so the new one seats the same way. A filter that’s gone dark grey or black confirms it was doing its job trapping debris, and it’s exactly why community DIYers change filter and oil together rather than one without the other.
5. Fit the new filter and lubricate the O-ring. Dip the new filter’s O-ring in fresh Haldex oil before seating it. A dry or twisted seal is one of the most frequent causes of a leak appearing within days of a service, so don’t skip this even though it feels like a minor detail. Refit the housing cap and torque it to roughly 35 Nm.
6. Refit the drain bolt with a new crush washer, torqued to around 30 Nm. Reusing a crushed washer is a false economy; it’s a few pence against the certainty of a slow seep later.
7. Refill through the fill hole until the oil weeps out. There’s no dipstick on this system, so fullness is judged entirely by sight: the unit is full once fluid begins to drip from the fill hole itself. Expect to use somewhere in the region of 700 to 800 ml, though the exact figure varies slightly by vehicle. A transfer pump or large syringe works well for DIY filling, and forum threads describe a simple brass barb insert as a reliable improvised filler when the official VAG charging tool (VAS 6291) isn’t available. Either method works; the OEM tool just speeds things up and avoids any risk of thread damage on the fill port.
8. Refit the fill bolt and torque it correctly. Match the torque spec you used on the drain bolt unless your workshop reference states otherwise.
Pro Tip: Keep a torch angled into the fill hole as you top up. Watching the fluid line rise and catching the first drip the moment it appears is far more reliable than guessing when to stop, especially in a dim garage.
9. Start the engine, check for leaks, and take a short drive. Run the car for a few minutes with the engine idling, checking both bolts and the housing cap for any sign of seepage. Then take it for a short drive that includes a few tight, low-speed turns on a surface with some grip, which helps distribute the fresh fluid through the system.
10. Reconnect your diagnostic tool and clear old codes. Rescan for faults, clear anything that was present before the service if it hasn’t reappeared, and confirm the oil temperature channel is reading sensibly with the engine at operating temperature.
What do fault codes and oil temperature checks tell you?
The 20–40°C window isn’t arbitrary. Cold Haldex oil is noticeably thicker, and draining it below that range leaves a meaningful amount of old fluid trapped in the housing and gear cavities, diluting the benefit of the whole service. Reading this figure through your diagnostic tool’s measuring blocks (labelled differently across VCDS, ODIS, and other VAS-based software, but usually grouped under the Haldex or all-wheel-drive control module) takes seconds and removes the guesswork.
Watch for these while scanning:
- Codes referencing the clutch mechanism, often pointing to wear inside the coupling itself
- Pump motor codes, which can indicate a failing pump or a wiring issue rather than a fluid problem
- Valve-related entries (commonly logged against components such as N373) that suggest an electrical or solenoid fault rather than anything a fluid change will fix
A basic engagement test involves driving on a loose or gravelly surface at low speed and feeling for the rear axle taking up drive under acceleration; a complete lack of any change in behaviour front to rear suggests the system isn’t engaging at all. If codes return within a few miles of a fresh service, or the engagement test shows nothing, that’s your signal to look beyond fluid and toward the pump or wiring rather than repeating the oil change.
When should you remove and clean the Haldex pump?
Pull the pump when you find visible debris in the old filter, the fluid smells burnt or looks metallic, or the pump has been making a whining or grinding noise before the service. A clean filter with fresh-smelling oil rarely justifies going this far.
- Unplug the pump’s electrical connector at the multi-pin socket, then remove the mounting bolts holding the pump housing to the Haldex unit.
- Twist and pull the pump free, working it gently rather than levering, since the housing seats on O-rings that damage easily if forced sideways.
- Clean the strainer inside the pump inlet thoroughly, checking for metal particles that would indicate internal wear rather than simple sludge.
- Lubricate the replacement O-rings with fresh Haldex oil before reinstalling, then torque the mounting bolts to the workshop-specified figure.
- Run the pump motor basic setting through your diagnostic tool’s basic settings menu to trigger the relearn cycle. Expect the pump to cycle audibly for a short period as the control module recalibrates its baseline; don’t disturb the car until the cycle completes and the tool confirms it finished successfully.
Common Haldex faults after a service and how to verify the fix
A service that goes wrong usually shows itself within the first few miles, not weeks later. Persistent clutch-related codes despite fresh fluid often point to physical wear inside the coupling pack rather than anything a service addresses. Pump motor codes that return immediately after a relearn cycle suggest an electrical fault rather than a mechanical one.
- Weak or absent rear-axle engagement on loose surfaces after the service, suggesting a fluid level or air-lock issue during refill
- A whining noise from the pump area that wasn’t present before, which can mean the pump wasn’t seated correctly during reassembly
- Fluid seeping from the filter cap or drain bolt within the first day, almost always a torque or crush-washer problem
- Codes referencing valve components that keep returning despite a clean fluid change, pointing toward an electrical or solenoid issue rather than a Haldex system repair at the fluid level
Genuine differential damage, as opposed to a simple Haldex fault, tends to show up as a persistent clunk or vibration under load that doesn’t correlate with any stored Haldex code at all. That’s a job for a specialist, not another fluid change.
Practical tips that save you a second attempt
Small details separate a clean job from a leaking one. A car that looks level to the eye often isn’t; use an actual level rather than trusting your judgement, particularly on ramps that only raise one end of the vehicle.
- Check level with a spirit level on a flat panel, not by eye, especially on single-axle ramps
- Seat the filter’s internal spring in the same orientation it came out in, or the housing cap won’t thread down evenly
- Lubricate every O-ring with fresh Haldex oil before fitting, and always replace crush washers rather than reusing them
- Thread the fill barb or transfer tool in gently; cross-threading the fill port turns a routine service into a repair
Pro Tip: Decant the old oil straight into a sealable, labelled container as it drains rather than pouring it later. Haldex oil left sitting in an open catch tray for even a short time picks up dust and makes it harder to tell at a glance whether the old fluid was genuinely contaminated.
Dispose of the used oil through a registered recycling point rather than a household bin or drain; most councils and auto parts retailers accept used gear and hydraulic oils free of charge.
Which Haldex Gen 2 parts and guides does Haldexparts offer?
Matching the right kit to the job stops you buying parts twice. For a complete service covering pump, filter, and oil in one order, the BorgWarner Haldex AWD Pump, Filter & Oil Kit for Gen 2 covers 0AV598549A, 02D598574, and 2000884 in a single purchase.
- If your pump is already sound and you only need filter and oil, the same product listing covers that combination without the pump
- If you’re only topping up or keeping a spare bottle on hand, the 850ml oil-only bottle (G060175A2) covers generations two through five
- For drain and fill plug specifics with photos, Haldexparts’s own drain plug removal guide walks through the exact bolt positions
- To understand why contaminated fluid shortens pump life, the flushing guide covers the mechanism in more depth
What actually trips up first-time Haldex DIYers?
The mistakes are rarely mechanical skill problems, they’re patience problems. People skip the temperature check because the car “feels warm enough” after a short drive, then wonder why the drain runs slow and the refill never quite settles. Others eyeball the level instead of checking it properly, or twist the filter O-ring while pushing it into place instead of letting it seat naturally.
None of this takes more than an extra ten minutes to do properly. If codes persist after a careful service and a proper relearn cycle, that’s the point to stop guessing and book a specialist, rather than repeating the same job hoping for a different result.
— Mindaugas
Get the exact Gen 2 kit this guide is built around
Matching part numbers to a Gen 2 housing by hand, then hoping the filter and oil you’ve ordered actually fit, is where most DIY services stall before they start. The Gen 2 listings are arranged around the exact SKUs used throughout this procedure, so there’s no cross-referencing between three different part catalogues before you can even order.
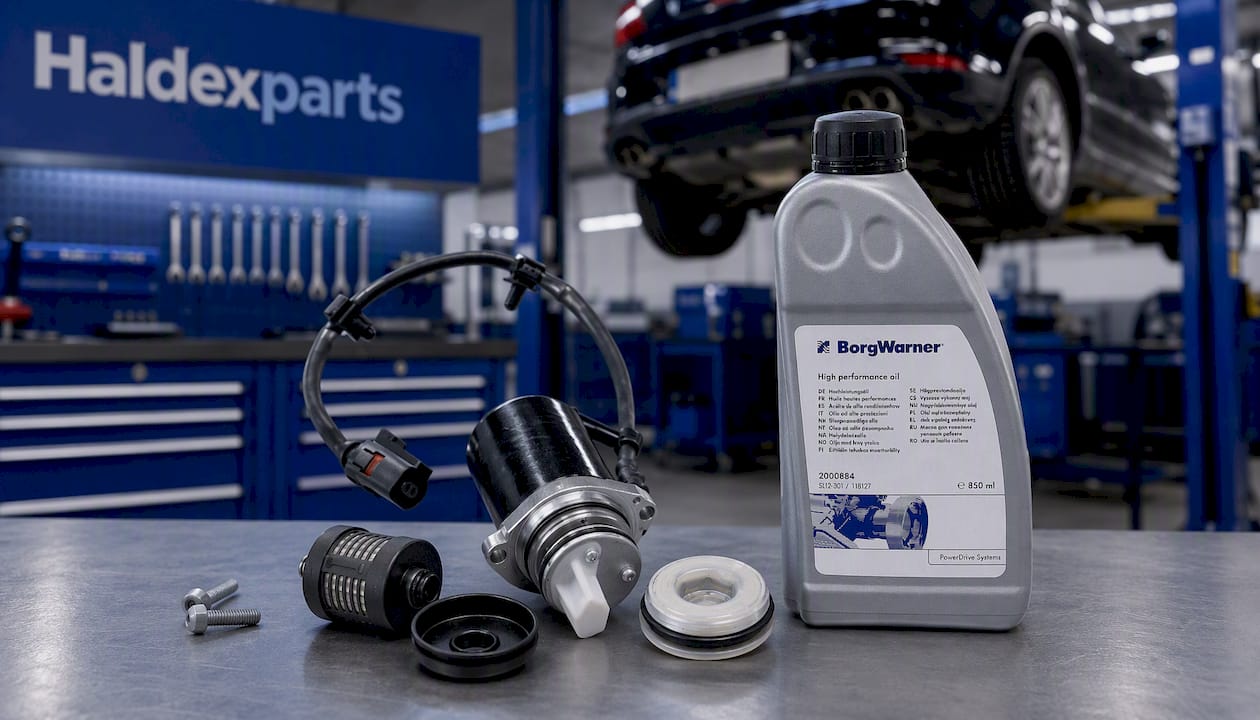
The BorgWarner Haldex AWD Pump, Filter & Oil Kit for 2nd Gen bundles 0AV598549A, 02D598574, and 2000884 together for a full service in one order, and it fits Audi, VW, Škoda, and SEAT applications sharing the Gen 2 housing. If your pump’s still healthy and you just need filter and oil, the same kit page lists that combination too, and orders over £150 qualify for free shipping. Double-check your housing code against your vehicle before ordering, since Gen 2 parts don’t cross over to earlier or later generations. Head to the Gen 2 kit page to check fitment for your specific model and place your order.
Sources
- How to Service Haldex Generation 2 Full Guide
- Haldex oil change | Audi TT Forum
- How To Identify and Service Your VW or Audi Haldex AWD System



