

A Haldex coupling is an electronically controlled, hydraulic multi-plate clutch mounted at the rear axle that connects a front-wheel-drive platform to the rear wheels when the system determines extra traction is needed. It is part-time AWD, front-biased by design, and not the same as a permanent mechanical centre differential. Early systems ran almost entirely on the front axle in normal driving, routing torque rearward only on demand. If you own a Haldex-equipped car, three things matter immediately:
- Check the service history. Haldex oil and filter intervals are frequently missed, and neglected fluid is the leading cause of pump failure.
- Know your generation. Service procedures, parts, and failure modes differ significantly between Gen I and Gen V.
- Confirm part numbers before ordering. The BorgWarner traction division now owns and distributes this technology, and OEM part numbers vary by generation and vehicle platform.
Key takeaways
A Haldex coupling is a hydraulic, electronically controlled AWD coupling that transfers torque to the rear axle on demand, not permanently, making correct servicing the single most important factor in long-term reliability.
| Point | Details |
|---|---|
| Part-time AWD by design | Haldex is front-biased; it engages the rear axle reactively or proactively depending on generation. |
| Generation determines service approach | Gen IV needs filter replacement and pump relearn; Gen V needs strainer inspection and software-accurate diagnostics. |
| OEM oil is non-negotiable | Using the wrong fluid causes ECU misreads, overheating, and pump failure; always use G060175A2 for Gen II–V. |
| Metal in fluid means stop driving | Metal particles or a burnt smell in drained oil signals clutch or pump damage requiring immediate repair. |
| Haldexparts for OEM parts | Haldexparts supplies BorgWarner pumps, friction plate sets, and OEM Haldex oil with generation-specific fitment guidance. |
Table of Contents
- How the Haldex differential transfers torque
- Haldex generations: what changed and what it means for you
- Which vehicles use a Haldex coupling?
- Haldex versus permanent AWD: the real trade-offs
- Signs your Haldex unit is failing
- Haldex service intervals and what a service involves
- Repair options and what drives the cost
- Gen IV/V service checklist: parts, tools, and steps
- The part of Haldex advice most people get wrong
- OEM Haldex parts, ready to order from Haldexparts
- Sources
How the Haldex differential transfers torque
The core hardware is a wet multi-plate clutch pack sitting between the propshaft and the rear differential. Hydraulic pressure clamps those plates together; more pressure means more torque to the rear axle. What varies between generations is how that pressure is generated and controlled.
Principal components:
- Multi-plate wet clutch pack
- Hydraulic pump (mechanically driven in Gen I/II, electric in Gen III/IV, centrifugal in Gen V)
- Working piston and control valve or proportional valve
- Haldex control module (J492 on VAG platforms), reading wheel speed, ABS, and engine torque data from the CAN bus
The control flow runs like this: wheel speed sensors and the ABS module detect slip or predict it; the Haldex ECU reads that data via CAN; it commands the pump or valve to build hydraulic pressure; the piston clamps the clutch pack; torque transfers to the rear wheels. In older reactive generations, the pump only built pressure after slip was detected, so there was a brief delay before the rear axle engaged. Proactive systems (Gen IV onwards) pre-charge the accumulator so pressure is already available the moment the ECU calls for it. The difference in feel is real: reactive systems could produce a noticeable lurch or understeer on a slippery corner entry, while proactive systems feel far more composed.
Under normal motorway driving, the clutch is essentially open and the car behaves as a front-driver. That is by design, not a fault.
Haldex generations: what changed and what it means for you
Haldex Traction introduced the coupling in 1998, first appearing on the Audi TT, Audi S3 8L, and VW Golf 4Motion. BorgWarner subsequently acquired the traction division. Five generations followed, each with meaningful mechanical changes.
| Generation | Pump type | Engagement | Key service items | Notable change |
|---|---|---|---|---|
| Gen I | Mechanical (cam-driven) | Reactive | Oil, cartridge filter | First production coupling |
| Gen II | Mechanical (improved) | Reactive | Oil, cartridge filter | Revised valve control |
| Gen III | Electric motor | Proactive | Oil, filter, pump | First electric pump |
| Gen IV | Electric pre-charge + accumulator | Proactive (~30 bar) | Oil, filter, pump relearn | Accumulator, proportional valve |
| Gen V | Centrifugal governor | Software-driven | Oil, strainer | Accumulator removed |
Generation IV maintains accumulator pressure near 30 bar using an electric pre-charge pump, which enables genuinely proactive torque transfer. The filter on Gen IV is internal and often overlooked during routine servicing. Generation V removed the accumulator entirely, regulating clutch pressure through pump motor speed and a centrifugal governor. That simplification reduced parts count but shifted the system’s reliability onto software maps and the pump motor itself, making strainer clogs a more common failure point.
The shift from Gen III to Gen IV is the single most consequential change for owners. It introduced the pump relearn procedure: after replacing the pump or draining the system, a diagnostic tool must perform a basic settings reset or the pump will not operate correctly.
Which vehicles use a Haldex coupling?
Haldex couplings suit transverse-engine platforms where a Torsen centre differential cannot physically fit. Longitudinal platforms (most Audi quattro models, for instance) use mechanical centre differentials instead. Typical Haldex adopters include:
- Audi: TT (8N, 8J), S3 (8L, 8P), A3 quattro, Q3
- Volkswagen: Golf 4Motion (Mk4–Mk7), Tiguan, Touareg (early), Sharan
- Škoda: Octavia Scout, Yeti, Karoq
- SEAT: Leon Cupra 4, Ateca
- Volvo: selected XC60, XC70, V70 AWD models
- Ford: Galaxy AWD, some Kuga variants
- Land Rover: Freelander 2 (uses a similar coupling arrangement)
Exact model years and trim levels vary, so always verify via VIN lookup or the model/parts finder at Haldexparts before ordering. A visual check helps too: the Haldex unit sits at the rear differential housing and is identifiable by the electrical connector and hydraulic lines running to it.
Haldex versus permanent AWD: the real trade-offs
Advantages:
- Compact packaging suits transverse platforms where a centre diff will not fit
- Front-biased default reduces fuel consumption compared with permanently driven four-wheel systems
- Proactive electronic control (Gen IV/V) delivers fast, predictable rear engagement
- Lighter overall drivetrain weight than a full-time AWD setup
Disadvantages:
- Front-biased default means early reactive systems could understeer before the rear engaged
- Reliance on hydraulic fluid, pump health, and electronics creates specific service points that permanent mechanical systems do not have
- Clutch pack wear and pump failure are real failure modes with meaningful repair costs
- Not suited to sustained off-road use or high-torque track applications without upgrades
For a year-round commuter in mixed weather, Haldex delivers meaningful traction benefit with minimal fuel penalty. For a driver who wants consistent, mechanical AWD feel at the limit, a permanent system is more predictable. The honest answer is that a well-maintained Haldex system works very well for its intended use case; a neglected one is a liability.
Signs your Haldex unit is failing
Catching a Haldex problem early is far cheaper than replacing the whole unit. Common failure patterns include clogged strainers on Gen V, pump burnout, and clutch plate wear. The symptoms to watch for:
- Persistent front-wheel spin with no rear engagement on a slippery surface — the clearest sign the coupling is not transferring torque
- Fault codes for pump open circuit, pump motor overload, or valve faults (readable via VCDS, ODIS, or a capable OBD tool)
- Jerking or clunking from the rear during low-speed cornering or parking manoeuvres
- Metal particles in the Haldex oil when draining — a red flag requiring immediate investigation
- Strange whining or grinding from the rear differential area, particularly under load
- Burnt smell from the rear of the car after spirited driving
For diagnostic steps: read AWD/Haldex module codes first using VCDS or ODIS. Gen IV service guides document specific fault codes tied to pump and valve faults., so a capable diagnostic tool is not optional. Check oil temperature and level before draining. Inspect drained fluid for contamination, metal, or a burnt smell. On Gen V, inspect the pump strainer specifically. If you find metal in the fluid or a persistent pump fault code, do not drive the car further until the cause is identified. A failed Haldex coupling that locks up or loses drive to the rear unexpectedly is a safety issue, not just a performance one. For noise-specific diagnosis, a Haldex noise troubleshooting guide can help narrow down whether the source is the pump, clutch pack, or rear differential itself.
Haldex service intervals and what a service involves
The manufacturer’s stated service interval varies by vehicle and generation, but workshop practice across the industry points to every 30,000–40,000 miles or every two to three years as a sensible guideline, whichever comes first. High-stress use (track days, frequent towing, winter driving on salted roads) warrants shorter intervals.
A complete Haldex service covers:
- Warm the coupling to bring oil temperature into the 20–40 °C range before draining
- Drain the oil and inspect it for metal, contamination, or burning
- Replace the filter (Gen I–IV) or inspect and clean the strainer (Gen V)
- Refit with new crush washers and drain plug gaskets
- Refill with the correct OEM-specified Haldex oil to the specified volume
- Torque drain and fill plugs to OEM specification
- Perform pump relearn / basic settings via diagnostic tool (Gen IV/V)
- Road test and re-scan for fault codes
Using the wrong oil is one of the most damaging mistakes an owner can make. Non-specified oils cause the Haldex ECU to misread slip conditions, leading to incorrect engagement, overheating, and eventual pump failure. The BorgWarner OEM Haldex oil G060175A2 (product code 2000884, 850 ml) covers 2nd through 5th generation systems and is the correct specification for most modern applications.
A competent DIYer with a torque wrench, a syringe for refilling, and a VCDS or similar diagnostic interface can handle a Gen IV service. The pump relearn step is non-negotiable for Gen IV/V — skipping it leaves the pump operating on incorrect parameters and shortens its life. If you are not confident with diagnostic software, a mobile mechanic who can bring the right tools to your driveway is a practical alternative to a full workshop visit.
Repair options and what drives the cost
Haldex repairs fall into four categories, roughly in ascending order of cost and complexity:
Filter or strainer service is the cheapest intervention and often resolves early symptoms of sluggish engagement or minor fault codes. Parts cost is low; labour is straightforward on most platforms.
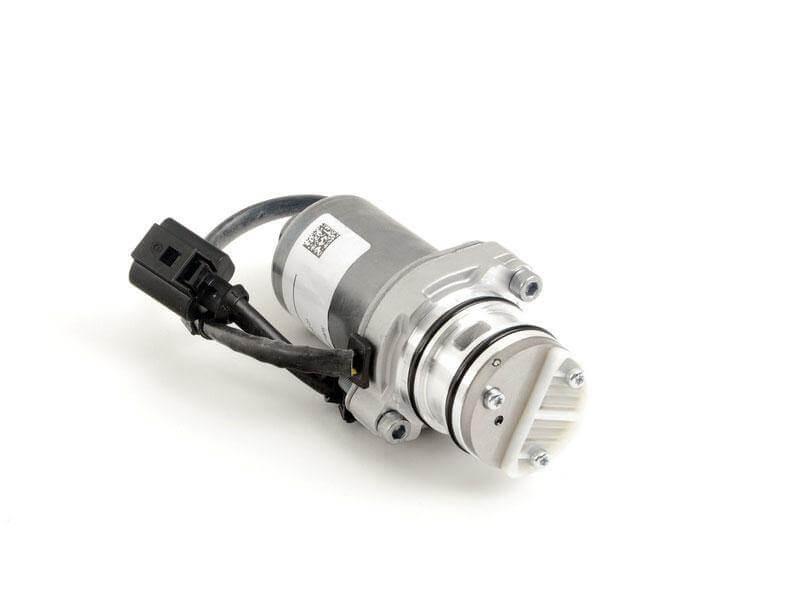
Pump replacement becomes necessary when the pump motor has burned out or the pre-charge pump on Gen IV fails to maintain accumulator pressure. The BorgWarner pre-charge pump (part number 0AY598549A) is the OEM-grade replacement for many Gen IV applications. After fitting, a diagnostic pump relearn is mandatory. Gen IV/V units handle roughly 500–600 Nm before upgrades are advised for higher-torque applications, so if you have modified the engine significantly, factor that into the repair decision.
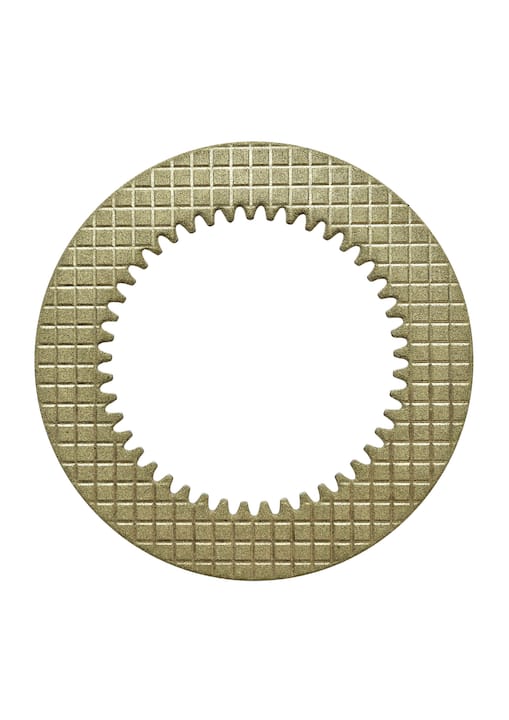
Clutch plate replacement is warranted when the friction plates are worn beyond tolerance or contaminated beyond cleaning. A set of ten friction discs (part 106792) covers Gen IV and Gen V applications. This repair is more involved but avoids the cost of a full unit exchange.
Full coupling exchange makes sense when the housing is damaged, multiple components have failed simultaneously, or a remanufactured unit is cheaper than sourcing individual parts. Remanufactured units are available but vary in quality; OEM-grade components from a known supplier are the safer long-term choice.
Cost drivers include generation (Gen IV/V parts are more expensive than Gen I/II), labour time for pump access and electronics, the need for diagnostic relearns, and whether you are using OEM or aftermarket parts. For trade-quality parts guidance, understanding the difference between OEM-grade and budget alternatives is worth the research before committing to a repair.
Gen IV/V service checklist: parts, tools, and steps
This checklist is aimed at experienced DIYers and workshop technicians preparing for a Gen IV or Gen V service. Confirm your generation and VIN fitment before ordering any part.
Parts required:
- BorgWarner AWD pre-charge pump 0AY598549A — for Gen IV applications on Audi, VW, Škoda, SEAT (verify VIN fitment)
- Friction plate set 106792 — set of 10 discs for Gen IV and Gen V clutch pack refresh
- BorgWarner Haldex oil G060175A2 (2000884, 850 ml) — OEM high-performance oil for 2nd–5th generation systems; refill volume for Gen IV is approximately 650–700 ml
- Replacement filter (Gen IV internal filter) or strainer inspection kit (Gen V)
- Drain plug crush washers and fill plug gaskets
Tools required:
- Diagnostic interface capable of Haldex module access and pump relearn (VCDS, ODIS, or equivalent)
- Hex/Allen key set for filter housing and drain plugs
- Torque wrench (calibrated to OEM drain plug specification)
- Syringe or hand pump for accurate fluid refilling
- Oil drain receptacle and clean rags
- Vehicle safety stands (never work under a car on a jack alone)
High-level procedure:
- Confirm generation via VIN lookup and verify part fitment
- Warm the coupling; check oil temperature is within 20–40 °C via diagnostic tool before draining
- Drain oil and inspect for metal particles, burning, or contamination
- Replace filter (Gen IV) or inspect strainer (Gen V); fit new gaskets and crush washers
- Fit new friction plates if clutch pack refresh is part of the service
- Refill with OEM Haldex oil to the correct volume; torque plugs to OEM specification
- Connect diagnostic tool and perform pump relearn / basic settings reset
- Road test and re-scan the Haldex module for residual fault codes
Pro Tip: Never use standard gear oil or rear differential oil in the Haldex circuit. Even a small amount of the wrong fluid can cause the ECU to misread slip, triggering incorrect engagement and accelerating pump wear. Always use the OEM-specified Haldex fluid and double-check the part number against your VIN before filling.
For a deeper walkthrough of fault-code interpretation during the diagnostic steps, the Haldex fault diagnosis guide covers module-level reading and common code patterns in detail.
The part of Haldex advice most people get wrong
There is a persistent idea in enthusiast forums that Haldex is somehow inferior AWD, a compromise bolted onto a front-driver to tick a marketing box. That framing misses the point entirely. Haldex was engineered for a specific job: delivering meaningful rear-axle traction on transverse platforms where a mechanical centre differential physically cannot go. On that job, a well-maintained Gen IV or Gen V system performs very well.
The real problem is not the design. It is the service neglect that follows from owners treating it like a sealed unit that never needs attention. The oil degrades, the filter clogs, the pump works harder to maintain pressure, and eventually it burns out. A pump replacement costs considerably more than three or four oil-and-filter services would have. The maths are not complicated.
The other underappreciated point is the diagnostic relearn. Workshops that replace a Gen IV pump without performing the basic settings reset are setting the customer up for a repeat failure. The pump calibrates its operating parameters during the relearn; without it, it runs outside its design envelope from day one. This is not a quirk or an optional step. It is part of the repair.
What the conventional advice also tends to understate is how much generation matters for diagnosis. A Gen V strainer clog presents very differently from a Gen IV accumulator pressure fault, and treating them the same way wastes time and money. Know your generation before you buy a single part.
OEM Haldex parts, ready to order from Haldexparts
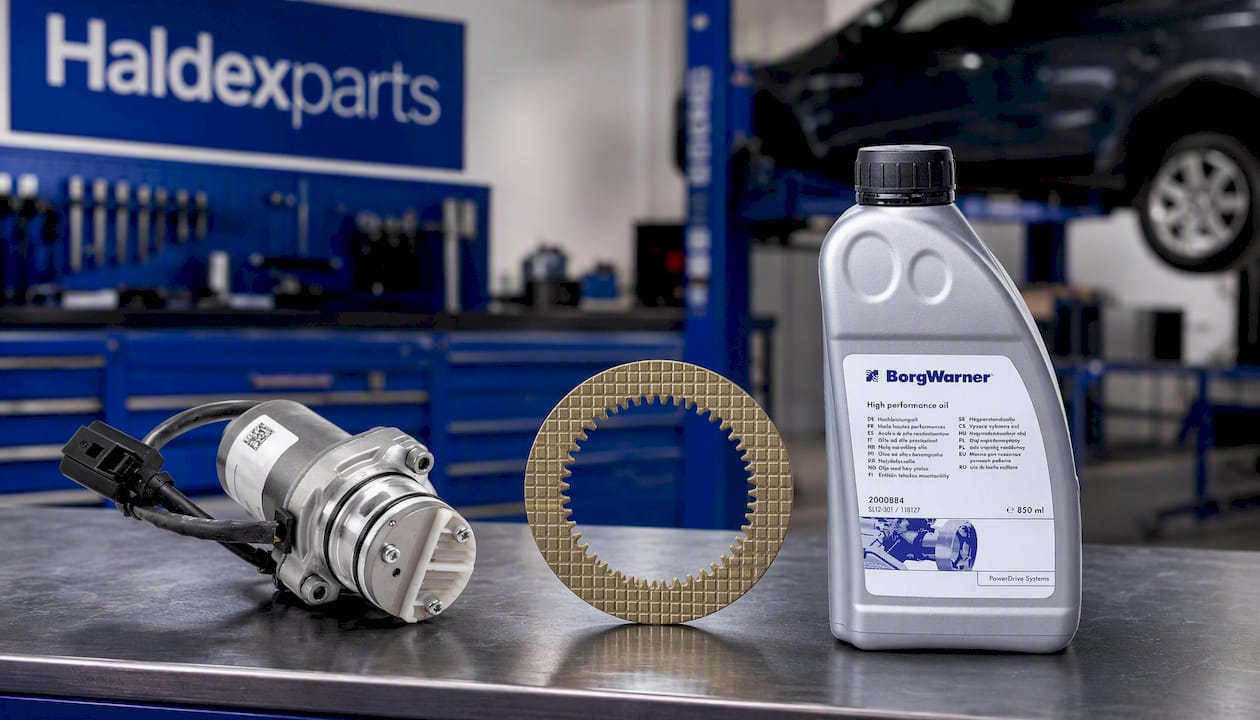
Haldexparts stocks OEM-grade BorgWarner components for the most common Haldex generations, including the Gen IV pre-charge pump (0AY598549A), the Gen IV/V friction plate set (106792), and BorgWarner Haldex oil G060175A2 in 850 ml bottles covering 2nd–5th generation systems. Every part is selectable by brand and generation, with full product details to support VIN verification before you commit to an order. Browse the full range of Haldex service kits or use the parts finder at Haldexparts to confirm fitment for your specific vehicle.
Sources
- Haldex Traction
- Syncro vs Haldex (Gen 1 to 5) vs Torque Vectoring: The Ultimate Guide to the VW Transmission - STR Performance
For torque specifications and factory service intervals, always consult the OEM workshop manual for your specific vehicle. When performing a Gen IV or Gen V pump relearn, follow the procedure documented in your diagnostic tool manufacturer’s guide (VCDS, ODIS, or equivalent) rather than relying on generic online instructions, as the exact steps vary by software version and vehicle variant.



