Haldex controller tuning is the process of modifying pump duty cycles and torque split maps within the AWD controller to tailor all-wheel-drive response to specific driving conditions and preferences. Done correctly, it transforms a conservative factory setup into a system that reacts faster, distributes torque more aggressively, and adapts to everything from daily commuting to track days. Tools like OpenHaldex-S3, Haldex.Flash, and Syvecs modules make this level of control accessible to both enthusiasts and professional technicians. This haldex controller tuning guide covers every stage: hardware selection, installation, map configuration, safety limits, and fault diagnosis.
What tools and hardware do you need for haldex controller tuning?
The right hardware is the foundation of any successful Haldex controller setup. Three controller families dominate the aftermarket: OpenHaldex (covering Gen 1, 2, 4, and 5 VAG applications), Syvecs MQB modules distributed through Cicio Performance, and Road Rage Performance tools designed for VAG platform vehicles. Each connects inline between the OEM wiring loom and the Haldex unit itself.
Plug-and-play installation takes under 10 minutes for most controllers. Firmware flashing adds a further 5–10 minutes via ESP Web Tools over USB-C or Wi-Fi. No rebooting is required between adjustments, which makes live tuning genuinely practical.
Beyond the controller itself, you will need:
- A laptop or smartphone with the relevant app (OpenHaldex uses a browser-based interface; Syvecs uses proprietary Windows software)
- A USB-C cable or Wi-Fi connection depending on the module
- A CAN bus analyser such as SavvyCAN for diagnostic logging
- A multimeter for wiring verification
| Controller | Compatibility | Connection | Approx. Install Time |
|---|---|---|---|
| OpenHaldex-S3 | Gen 1, 2, 4, 5 VAG | Wi-Fi / USB-C | 10–15 minutes |
| Syvecs MQB | MQB platform VAG | USB / CAN | 20–30 minutes |
| Road Rage Performance | VAG (various) | Wi-Fi | 10–20 minutes |
Pro Tip: Verify that your 12V supply and earth wiring uses a minimum of 0.5mm² gauge, and keep CAN bus lines twisted throughout the loom run. Poor wiring causes controller brownouts and erratic AWD behaviour that no software fix will resolve.
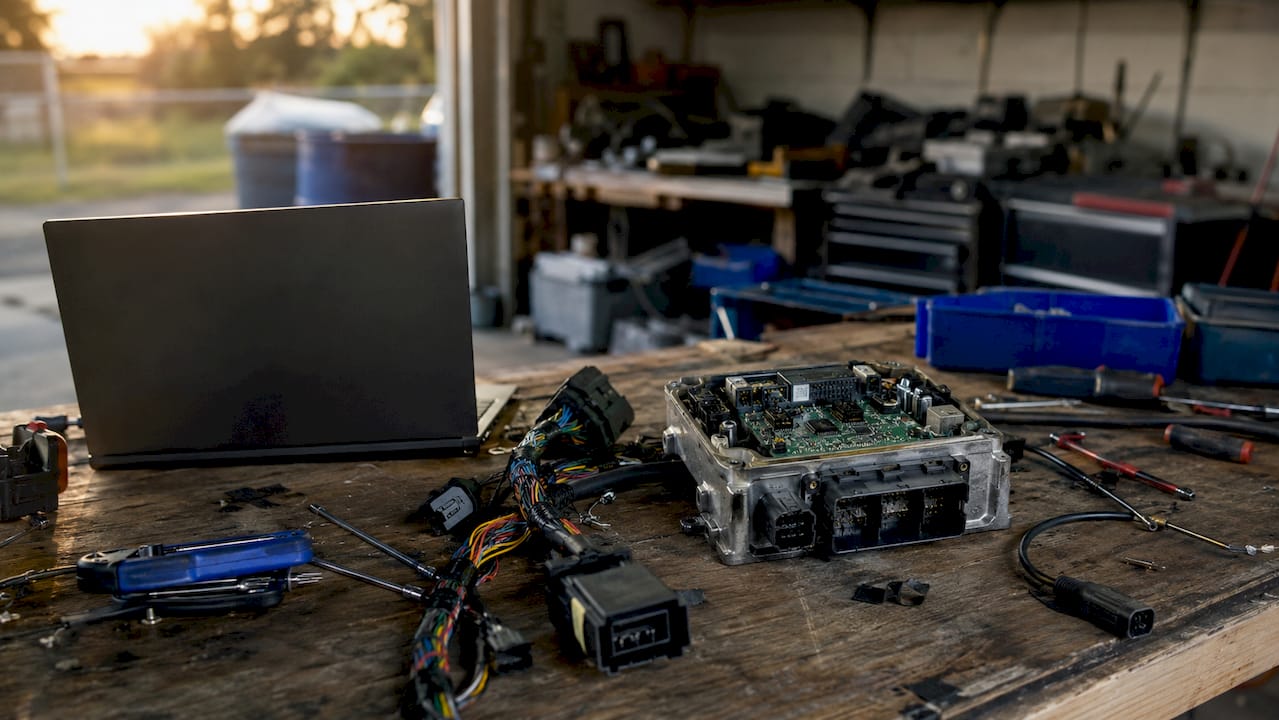
How to install and set up a tunable haldex controller
Physical access to the Haldex connector varies by platform. On most VAG models, the connector is reached either beneath the rear seat base or at the underbody near the rear differential. Confirm the vehicle is on a level surface with the ignition off before disconnecting anything.
Follow this sequence for a clean installation:
- Disconnect the OEM Haldex connector from the unit.
- Plug the inline controller harness between the OEM connector and the Haldex unit.
- Route the controller’s power and earth leads to a switched 12V source and a solid chassis earth point.
- Secure the controller module away from heat sources and moving components.
- Connect via USB-C or Wi-Fi and open the tuning interface.
- Flash the latest firmware. For OpenHaldex, base map 1.29.3 firmware is the recommended starting point for most users.
- Select your initial map (Street or Stock equivalent) before the first drive.
Once installed, the live tuning interface displays a throttle percentage versus vehicle speed matrix. Each cell holds a pump duty value expressed as a percentage. Raising the value in a given cell increases torque demand to the rear axle under those conditions. Start with small increments of 5–10% per cell rather than jumping to maximum values.
Pro Tip: After every firmware flash or map change, cycle through all drive modes for at least 2 seconds each at startup. Skipping this step causes the controller to load an incorrect map despite the dashboard showing the right mode.
The hydraulic pressure dynamics of your specific generation matter here. Higher pump duty raises pre-charge pressure, which shortens clutch engagement time. Understanding that relationship helps you predict how map changes will feel on the road before you test them.
What are the best practices and safety considerations?
Haldex controllers modify torque demand perception through software-controlled clutch engagement. They do not mechanically lock the rear axle. Misunderstanding this distinction is the most common cause of hardware damage among first-time tuners.
Attempting to replicate a 50/50 torque split by maximising pump duty at all speeds risks overheating the clutch packs and the pump simultaneously. Factory safety tolerances remain critical even when running aftermarket controllers. The hardware was designed with thermal limits that software cannot override without consequence.
Key principles to follow:
- Always begin with a manufacturer-supplied base map, not a blank table
- Reserve aggressive high-duty maps for high-load scenarios such as track sessions or drag launches
- Log oil temperature if your controller supports it and return to a conservative map if temperatures climb beyond normal operating range
- Never run maximum pump duty settings on public roads during daily driving
Warning: Sustained excessive pump duty settings cause accelerated wear on the clutch pack friction plates and can destroy the pre-charge pump within a single aggressive session. If you notice unusual heat, noise, or slipping after tuning, revert to the stock map immediately and inspect the pump condition before driving further.
Pro Tip: Use the Haldex engagement guide to understand exactly which input signals trigger clutch engagement. Knowing the trigger logic helps you target the right cells in the map matrix rather than raising duty values across the board.
How to fine-tune haldex maps for different driving styles
The tuning map is a two-dimensional matrix. One axis represents throttle position as a percentage; the other represents vehicle speed. Each intersection holds a pump duty value. Adjusting low-speed, high-throttle cells increases launch traction. Adjusting high-speed cells affects mid-corner stability and exit grip.
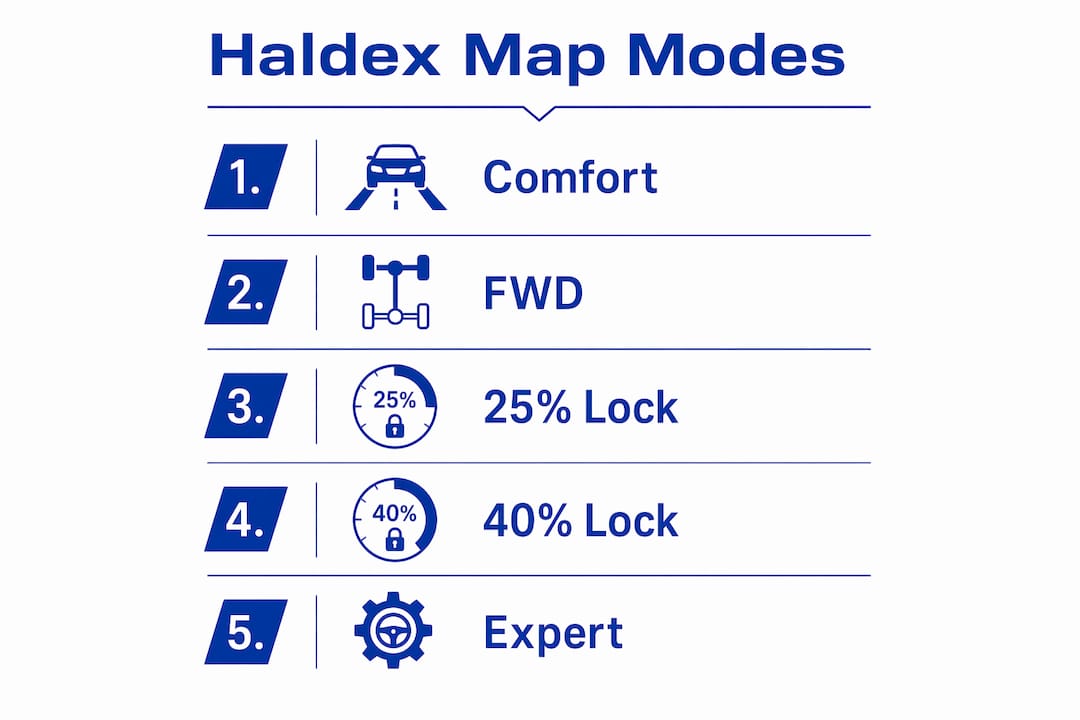
Popular software packages offer pre-set modes including Stock, FWD, 25% lock, 40% lock, 50% lock, and Expert. Expert mode gives full access to every cell in the matrix and requires OEM CAN signals for throttle and speed inputs to function accurately. Mode switching is possible via on-board buttons, Wi-Fi commands, or CAN messages.
| Map Mode | Intended Use | Pump Duty Range | Notes |
|---|---|---|---|
| Comfort / Stock | Daily driving | Low across all cells | Mirrors OEM behaviour |
| Street / Track | Mixed use | Moderate at high throttle | Good balance of grip and wear |
| Drag Only | Standing starts | Maximum at low speed | Not suitable for sustained use |
| Expert | Custom profiles | Fully configurable | Requires advanced knowledge |
Road Rage Performance software adds features such as launch control and selective 2WD mode for controlled burnouts, while remaining compatible with existing ECU and TCU tunes. These capabilities make it a strong choice for vehicles already running engine remaps.
For live adjustments without a laptop, some controllers support an external potentiometer wired to the module. Turning the dial shifts between pre-loaded profiles on the fly. Smartphone apps via Wi-Fi achieve the same result with greater granularity. Both approaches suit track day use where conditions change between sessions.
The throttle control relationship between ECU output and Haldex pump demand is worth studying if you are running a remapped engine. A more aggressive throttle map changes the effective input signal to the Haldex controller, which means your pump duty cells may need recalibrating after an engine remap to maintain the intended torque split behaviour.
Common troubleshooting and errors after tuning
Most post-tuning faults fall into three categories: communication errors, abnormal pump behaviour, and driveline noise. Identifying which category you are dealing with determines the correct diagnostic path.
Symptoms to watch for:
- Fault codes relating to the Haldex control unit appearing in VCDS or OBD-II scanners
- Erratic AWD engagement or disengagement under consistent throttle inputs
- Overheating warnings or unusually high oil temperatures
- Clunking or grinding from the rear differential area after map changes
Communication faults almost always trace back to wiring. Recheck the CAN bus connections and confirm the twisted pair configuration is intact throughout the loom. A loose earth connection produces intermittent brownouts that generate fault codes without any obvious cause.
Use SavvyCAN to pull controller logs and compare actual pump duty outputs against your intended map values. A discrepancy between the two points to a firmware issue or a CAN signal problem rather than a mechanical fault. Consult the Haldex failure causes guide for a structured approach to diagnosing hardware-level faults that tuning may have accelerated.
The Learn Haldex feature cycles actual torque engagement values to adapt to mechanical wear, producing predictable torque transfer that matches the controller’s setpoints exactly. Running this function after any significant map change or hardware service improves consistency and reduces unexplained engagement variation.
Pro Tip: If severe symptoms appear after a map change, roll back to the factory base map before attempting further diagnosis. Continuing to drive on a problematic custom map risks compounding the damage and making root cause analysis far harder.
Key takeaways
Effective Haldex controller tuning requires understanding the system’s software-controlled clutch logic, using correct hardware, and respecting thermal limits at every stage of the process.
| Point | Details |
|---|---|
| Start with a base map | Always use a manufacturer-supplied map such as 1.29.3 firmware before making custom adjustments. |
| Verify wiring first | Minimum 0.5mm² gauge and twisted CAN bus pairs prevent brownouts and communication faults. |
| Cycle drive modes at startup | Spend at least 2 seconds in each mode after flashing to load maps correctly before driving. |
| Reserve aggressive maps for high-load use | Running maximum pump duty during daily driving accelerates clutch pack and pump wear. |
| Use Learn Haldex after changes | The learn function adapts to component wear and ensures torque transfer matches your setpoints. |
What i have learned from getting haldex tuning wrong first
The most common mistake I see is treating the Haldex system as if it were a mechanical limited-slip differential. It is not. The controller raises torque demand to the rear axle by increasing hydraulic pressure to the clutch pack. The moment you push pump duty beyond what the thermal system can sustain, you are not gaining traction. You are destroying clutch plates.
My own early tuning sessions involved running a 50% lock profile on a daily driven Golf R during winter. The results felt impressive for about three weeks. Then the coupling started slipping under hard acceleration, and the oil came out looking like it had been through a furnace. The repair bill was a sharp lesson in respecting factory limits.
What actually works is incremental adjustment combined with systematic logging. Change one row of cells at a time, drive a consistent test route, and log the outputs before touching anything else. The multi-vehicle service planning guide from Haldexparts is a useful reference for building a maintenance schedule around your tuning intervals, because tuned systems need more frequent oil and filter changes than stock setups.
The Learn Haldex function is genuinely underused. Running it after every service or significant map change takes five minutes and meaningfully improves torque transfer consistency. Most enthusiasts skip it because it is not dramatic. That is exactly why their results are inconsistent.
My final advice: treat aggressive maps as a tool for specific conditions, not a permanent setting. A well-calibrated Street mode that you run 95% of the time will keep your drivetrain alive far longer than a maximum-attack profile that feels exciting but quietly shortens the life of every component downstream.
— Mindaugas
Keep your haldex system ready for every tuning session
Tuning delivers results only when the underlying hardware is in good condition. A worn pump, degraded oil, or a clogged filter will undermine even the most carefully calibrated map.
Haldexparts stocks OEM-grade Haldex service kits covering pumps, oils, and filters for Audi, VW, Ford, Land Rover, and more. Free shipping applies to orders over £150, and the product listings include vehicle-specific fitment data so you order the right parts first time. Whether you are preparing for a tuning session or recovering from one, keeping fresh oil and a clean filter in the system is the single most cost-effective thing you can do for long-term AWD reliability.
FAQ
What is haldex controller tuning?
Haldex controller tuning is the process of modifying pump duty and torque split maps within an aftermarket inline controller to change how aggressively the AWD system engages the rear axle. It does not mechanically lock the differential but alters the software-controlled clutch engagement behaviour.
Which controllers are compatible with VAG haldex systems?
OpenHaldex-S3 covers Gen 1, 2, 4, and 5 VAG applications, while Syvecs MQB modules suit MQB platform vehicles and Road Rage Performance tools support a broad range of VAG models. Compatibility depends on the generation of Haldex unit fitted to your specific vehicle.
How long does haldex controller installation take?
Plug-and-play installation takes under 10 minutes for most controllers, with firmware flashing adding a further 5–10 minutes via USB-C or Wi-Fi connection.
Can aggressive haldex maps damage the pump?
Yes. Sustained high pump duty settings cause overheating of the clutch packs and accelerated wear on the pre-charge pump. Factory thermal limits apply regardless of the controller fitted, and aggressive maps should only be used during high-load conditions such as track sessions.
What does the learn haldex function do?
The Learn Haldex feature cycles actual torque engagement values to adapt to mechanical wear in the clutch pack, producing torque transfer outputs that match the controller’s setpoints precisely and improving consistency across varied driving conditions.