

A Haldex coupling overheats when internal friction or external heat raises the hydraulic oil above the unit’s protective threshold. At the protective temperature threshold, the control unit depressurises the clutch pack, releases the rear axle, and the car reverts to front-wheel drive. That is not a gradual limp mode. It is instant, and it can happen mid-corner.
If you are reading this after a warning light or a sudden change in handling, here is what to do right now:
- Stop the high-load activity immediately: end the track session, stop towing, or pull off the steep climb.
- Pull over safely if AWD behaviour has already changed under power.
- Run a scan tool on the AWD control module and capture any stored fault codes and recorded temperatures before the unit cools and the data shifts.
- Do not repeat high-load runs until you have checked fluid condition, the intake screen, and any electrical connectors.
Pro Tip: If you have an OBD reader that accesses manufacturer-specific modules (not just generic OBD-II), read the Haldex module live data immediately after the event. Temperature values logged at the point of shutdown are far more useful to a workshop than a cold reading taken an hour later.
Table of Contents
- Why does a Haldex overheat? The root causes explained
- What you will feel, see, and read on a scan tool
- How the Haldex protection system actually works
- Step-by-step diagnostic checklist before you replace anything
- Service intervals, fluid guidance, and preventing overheating
- When to service and when to replace components
- UK parts, kits, and what to order before your workshop visit
- How to inspect the Haldex clutch pack yourself
- Key components prone to overheating: a visual reference
- Key takeaways
- The mistake workshops keep making
- OEM-grade Haldex service kits and parts for UK owners
- Further reading and diagnostic resources
Why does a Haldex overheat? The root causes explained
Heat builds inside a Haldex coupling from two directions: the unit generates it internally, and the environment adds to it from outside. Understanding which is happening on your car determines the fix.
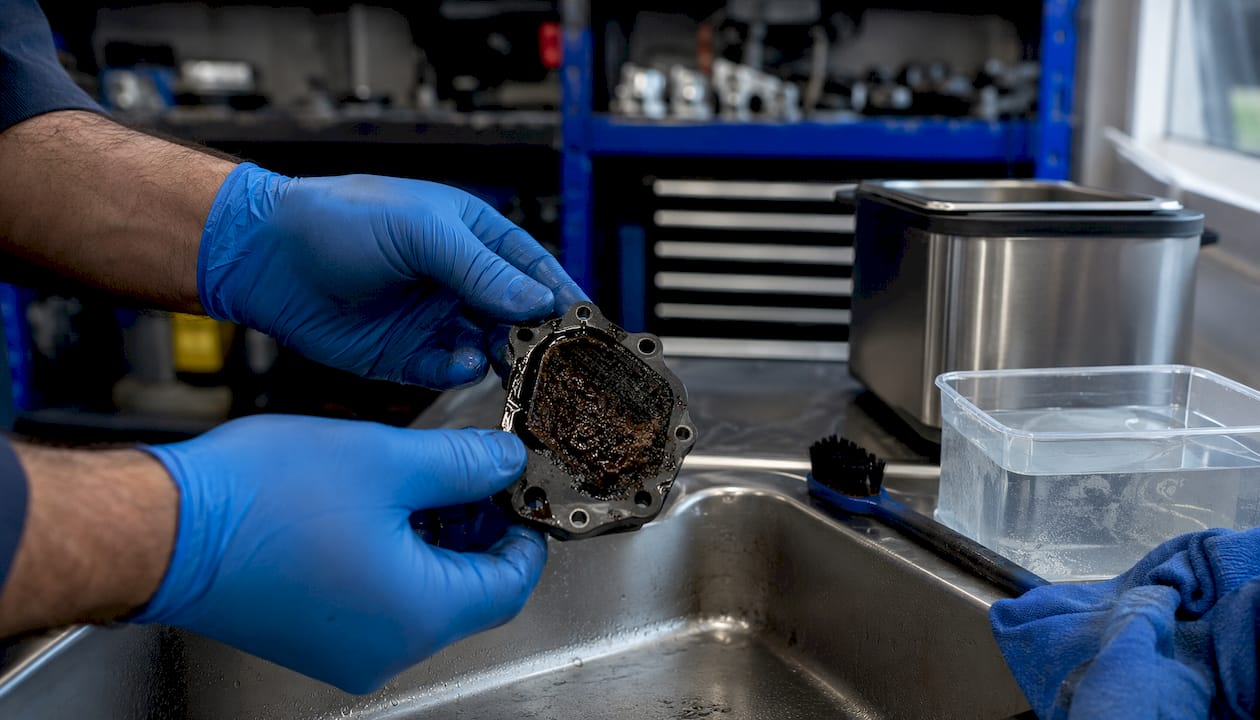
Internal heat generation
The clutch pack is the primary source. When the front and rear axle speeds differ, the clutch plates slip against each other and shear the hydraulic oil between them. That shear generates heat. Under normal road use the slip is brief and the oil dissipates the heat without issue. On a track, in deep snow with mismatched tyres, or during a long steep tow, the slip is sustained. The oil temperature climbs steadily, and the pump works harder to maintain hydraulic pressure, adding its own heat to the system.
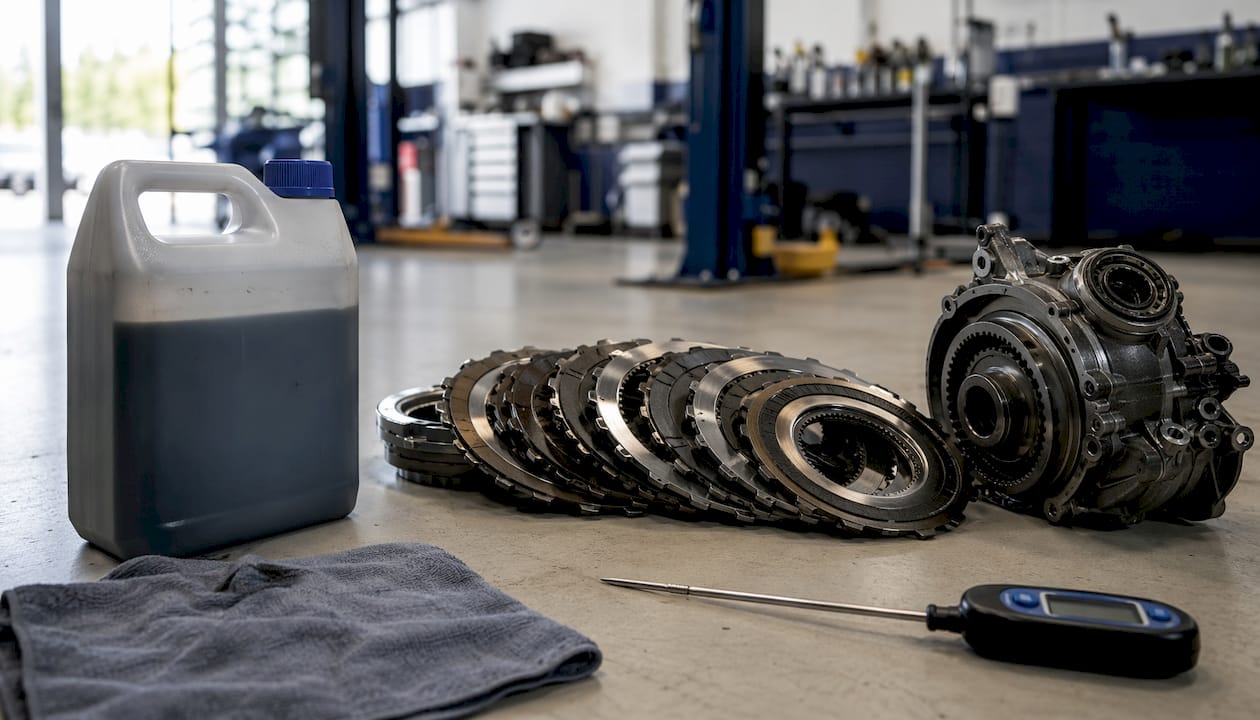
Degraded oil makes this worse. As Haldex hydraulic fluid ages, its viscosity characteristics change and its ability to carry heat away from the clutch pack diminishes. The pump then works against higher internal resistance, generating more heat for the same output.
Contamination and blocked screens
A clogged intake screen is one of the most common causes of pump overheating. Clutch material and fine metal particles shed into the oil over time, and on Gen 4 and Gen 5 units there is no traditional external filter to catch them. The debris accumulates on the internal mesh screen attached to the pump inlet. A partially blocked screen starves the pump of oil, the pump works harder to compensate, and it overheats. Left long enough, the pump motor burns out entirely.
External heat sources
Exhaust proximity is a well-documented cause, particularly on Volvo and some VAG platforms where the rear exhaust routing runs close to the Haldex case. The radiant heat raises the unit’s baseline temperature before any clutch slip occurs. On a hot summer track day, the combination of ambient temperature, exhaust heat, and internal friction can push the oil over the threshold within a single lap. Enthusiasts running these cars at circuits commonly install aluminium heat shields or ceramic-coated exhaust sections to address this.
The cause-and-effect pairs worth keeping in mind:
- Track use → sustained clutch slip → internal shear heat
- Blocked intake screen → pump starvation → pump overheating
- Exhaust proximity → raised baseline temperature → threshold reached sooner
- Degraded or wrong-spec oil → increased friction → higher operating temperature
- Tyre mismatch (front/rear diameter difference) → constant slip even at motorway speeds → chronic low-level heat accumulation
What you will feel, see, and read on a scan tool
The most obvious symptom is a sudden loss of AWD. The car does not gradually feel less planted; it switches to front-wheel drive without warning. On a straight road this is merely disconcerting. In a fast corner it can be genuinely dangerous, because the handling balance changes instantly.
On the dashboard, an AWD or traction control warning light typically illuminates. Some vehicles show a specific AWD fault indicator; others simply show the traction control light with no further detail until you plug in a scan tool. The Haldex ECU stores fault codes that describe the nature of the fault, and reading them is the single most useful first step.
The fault code commonly associated with thermal shutdown is a function limitation due to over-temperature. Forum documentation shows that this code sometimes cannot be cleared until the unit has cooled down, which is itself a useful diagnostic indicator. If the code clears immediately on a cold unit, a sensor or wiring fault is more likely than genuine overheating.
Physical signs to look for: a hot, slightly burnt smell from underneath the car, oil weeping from the unit casing, or discoloured fluid on inspection. If the underside near the Haldex shows heat discolouration on the casing or nearby heat shielding, exhaust proximity is worth investigating.
How the Haldex protection system actually works
The VAG technical service paper describes the control logic in detail. The Haldex control unit monitors the hydraulic oil temperature via a temperature sender and adjusts the regulating valve (pintle valve) to compensate for viscosity changes as the oil warms. This is normal adaptive behaviour. The problem arises when the temperature exceeds the protective threshold.
At approximately 100°C, the control unit depressurises the clutch pack entirely. The clutch plates disengage, drive to the rear axle is cut, and the vehicle operates as front-wheel drive until the system cools and resets.
This is a deliberate, all-or-nothing protection, not a gradual reduction in rear torque. Community accounts consistently describe the transition as abrupt, with little or no advance warning on the instrument cluster. That is why pre-emptive heat management matters for track use: by the time the car tells you there is a problem, the protection has already activated.
When the protection triggers falsely
Not every 00453 code means the oil actually reached 100°C. Corroded connectors, a damaged temperature sender wiring harness, or a faulty sensor can all produce false over-temperature readings. The control unit acts on what the sensor reports, not what the oil actually is. Verifying the physical temperature against ECU-logged values, using an independent infrared thermometer on the casing or a live data log captured during the event, is a cost-effective step before ordering any parts.
Step-by-step diagnostic checklist before you replace anything
Running through this sequence in order prevents unnecessary part replacements and isolates the real fault. The technician’s diagnostic guide from Haldexparts covers the fault-code interpretation side in more detail.
- Read the AWD module with a scan tool. Capture all stored fault codes, freeze-frame data, and any logged temperature values. Note the code numbers and timestamps. Generic OBD-II readers will not access the Haldex module; you need a VAG-capable tool (VCDS, OBDeleven, or a workshop with manufacturer-level access).
- Check the electrical supply. Measure battery voltage and supply voltage to the pump motor under load. A weak battery or corroded earth can cause the pump to underperform and generate excess heat. Inspect the pump connector and wiring harness for corrosion, chafing, or pushed-back pins.
- Inspect the temperature sensor and its wiring. If the fault code appeared without a clear high-load event, test the sensor resistance against specification and check the connector for moisture ingress. A false reading here is cheaper to fix than a new pump.
- Check the fluid condition. Drain a small sample from the Haldex unit. Fresh fluid is a pale amber colour. Dark, metallic, or burnt-smelling fluid indicates contamination or overheating has already occurred. Heavily contaminated fluid means the clutch pack has been shedding material.
- Remove and inspect the intake screen. This is the step most often skipped. A partially blocked screen explains pump overheating even when the fluid looks acceptable. Clean it thoroughly; if it is damaged, replace it.
- Confirm pump motor operation. Command the pump on via the scan tool’s output tests and verify it spins. A pump that does not respond to a command has an electrical or mechanical failure. A pump that spins but produces low pressure points to internal wear or a hydraulic leak.
- Decision point. If electrical or sensor faults are found, fix those before touching mechanical components. If fluid is heavily contaminated, flush the system and inspect the clutch pack for material shedding before fitting any new parts.
Pro Tip: Before booking a workshop, write down the fault code numbers, the conditions when the fault appeared (track, towing, motorway), and the approximate mileage since the last Haldex service. That information halves the diagnostic time and reduces the chance of a workshop replacing parts by guesswork.
Service intervals, fluid guidance, and preventing overheating
Regular servicing is the single most effective way to prevent Haldex system heat issues. The table below gives a practical baseline; shorten every interval for track or towing use.
| Service item | Standard interval | Track/tow interval | Notes |
|---|---|---|---|
| Hydraulic oil change | — | — | Use only Haldex-specified fluid |
| Filter/screen inspection | — | — | Clean screen at every oil change for track cars |
| Full system flush | After contamination or overheating event | After every season | Replace fluid and filter together |
| Clutch pack inspection | At pump replacement or heavy contamination | Annually for track use | Look for material shedding and scoring |
- Use only the hydraulic fluid specified for your Haldex generation. Aftermarket additives are not approved and can alter viscosity characteristics in ways that accelerate wear.
- After any confirmed overheating event, flush the system completely. Do not simply top up or change the oil without also cleaning the intake screen and replacing the filter.
- If your exhaust routing sits close to the Haldex casing, consider a heat shield or ceramic exhaust coating. This is a well-established fix among track enthusiasts and costs far less than a pump replacement.
- For track days specifically, consider high-performance Haldex oil with a higher thermal tolerance, and inspect the screen before and after each event.
Pro Tip: When you drain the Haldex oil, hold a magnet near the drain plug before cleaning it. Metallic particles clinging to the plug are an early warning of clutch pack wear, even before the fluid looks visibly contaminated.
When to service and when to replace components
Servicing fixes the majority of overheating cases. Replacement is necessary when a component has failed beyond recovery.
- Try servicing first when: the fault code appeared after a high-load event, the fluid is contaminated but not heavily metallic, the intake screen is blocked, or the electrical supply or sensor wiring shows a fault. These are all recoverable situations.
- Replace the pump when: it does not respond to a commanded output test, the motor draws abnormal current, or it produces no measurable pressure after the system has been cleaned and flushed. A pump that has been run on a blocked screen for an extended period is usually beyond service.
- Inspect the clutch pack when: the drained fluid contains significant metallic particles or visible clutch material. A clutch pack that has shed material into the oil will contaminate a new pump within a short time if the system is not properly cleaned. Signs of scoring or glazing on the plates indicate replacement is needed.
- Replace the control module only after ruling out wiring faults. Module failures do occur, but a corroded connector or damaged earth produces identical symptoms at a fraction of the cost.
A reputable UK workshop should verify sensor temperature against live data, check supply voltage to the pump under load, and clean the intake screen before fitting any new component. If a workshop quotes a pump replacement without mentioning the screen or fluid flush, ask explicitly whether those steps are included.
UK parts, kits, and what to order before your workshop visit
The parts most commonly needed after a Haldex overheating event fall into a short list:
- Service kit (oil + filter/screen): the starting point for any overheating investigation. Confirm the kit matches your Haldex generation (Gen 1–5 differ significantly in pump design and oil specification).
- Pump motor: required when the pump has failed electrically or mechanically. Check whether the listing specifies OEM or remanufactured, and confirm the generation fitment against your VIN.
- Seal kit: needed if the pump housing or output shaft shows leakage. Often bundled with oil in a combined kit.
- Pressure and temperature sensors: if diagnostics point to a false over-temperature reading, the sensor and its connector are the first parts to order.
Before ordering anything, have your vehicle VIN, Haldex generation, and the fault codes to hand. Generation fitment is the most common ordering error: a Gen 4 pump will not fit a Gen 5 application, and the oil specifications differ. Most reputable UK suppliers list generation compatibility clearly on the product page.
For UK owners, free shipping on orders over £150 from a specialist supplier makes it practical to order a complete service kit for a single workshop visit rather than sourcing parts piecemeal.
How to inspect the Haldex clutch pack yourself
A DIY clutch pack inspection requires the unit to be removed from the vehicle. This is a job that demands a ramp or axle stands, basic hand tools, and a clean workspace. It is within reach of a competent home mechanic, but take your time.
Step 1: Drain the fluid first. Before removal, drain the Haldex oil and note its condition. Dark, metallic fluid tells you what to expect inside.
Step 2: Remove the unit. Disconnect the propshaft, electrical connectors, and mounting bolts. Support the unit as you lower it; it is heavier than it looks.
Step 3: Remove the pump assembly. The pump sits on the end of the unit. Unscrew the retaining bolts and withdraw the pump carefully. Inspect the intake screen at this point; debris here confirms contamination has reached the clutch side.
Step 4: Access the clutch pack. With the pump removed, the clutch pack is accessible from the pump end of the housing. Carefully withdraw the plate stack, keeping the plates in order.
Step 5: Inspect each plate. Look for scoring, glazing (a shiny, polished surface where there should be a friction texture), blue heat discolouration, or visible material loss at the plate edges. Light wear is normal. Scoring, glazing, or significant material loss means the pack needs replacement.
Step 6: Check the housing bore. Run a clean cloth around the inside of the housing. Metallic grit or embedded debris indicates the system needs a thorough flush before reassembly.
Step 7: Reassemble with new fluid and a clean screen. Never reuse the old fluid after a clutch pack inspection. Fit a new filter or clean screen, torque all fasteners to specification, and refill with the correct Haldex-specified oil.
Key components prone to overheating: a visual reference
Understanding which parts carry the most heat risk helps you focus inspections in the right places.
| Component | Location | Heat risk | What to look for |
|---|---|---|---|
| Clutch pack | Inside the Haldex housing, rear axle | High | Scoring, glazing, blue discolouration, material shedding |
| Pump motor | Bolted to the end of the Haldex housing | High | Burnt smell, seized shaft, no response to command |
| Intake screen/mesh filter | Pump inlet, inside the housing | High | Debris blockage, metallic particles, torn mesh |
| Temperature sender | Threaded into the housing or harness-mounted | Medium | Corrosion, damaged connector, resistance out of spec |
| Hydraulic oil | Fills the housing | Medium | Dark colour, metallic sheen, burnt smell |
| Exhaust pipe/heat shield | Underbody, near the Haldex casing | External | Missing or damaged shielding, heat discolouration on casing |
The pump and intake screen are the components most frequently damaged by overheating events. The clutch pack is the primary heat source. The temperature sender is the component most likely to produce a false alarm. Keeping that hierarchy in mind when diagnosing saves time and money.
Key takeaways
A Haldex coupling overheats when sustained clutch slip, contaminated fluid, a blocked intake screen, or external exhaust heat raises the hydraulic oil above the 100°C protective threshold, triggering an instant reversion to front-wheel drive.
| Point | Details |
|---|---|
| Protective threshold is 100°C | The control unit depressurises the clutch pack at this temperature; the car reverts instantly to FWD. |
| Blocked intake screen is the most common cause | Clean or replace the screen at every oil change; never fit a new pump without cleaning it first. |
| Service intervals matter | Change Haldex oil and inspect the filter regularly; shorten every interval for track or towing use. |
| False codes are common | Fault 00453 can be triggered by a faulty sensor or corroded connector; verify with live data before replacing parts. |
| Haldexparts for UK sourcing | Haldexparts stocks OEM-grade service kits, pumps, and oils with generation-specific fitment for UK owners and workshops. |
The mistake workshops keep making
The single most repeated error in Haldex overheating cases is fitting a new pump into a contaminated system. The old pump failed because the intake screen was blocked and the fluid was full of clutch debris. The new pump goes in, the screen is not cleaned, the fluid is not flushed, and the replacement pump fails within a few thousand miles for exactly the same reason. The workshop charges again. The owner is frustrated.
The fix is not complicated: clean the screen, flush the system, replace the fluid and filter, then fit the new pump. That sequence costs almost nothing extra in labour and prevents the repeat failure entirely. Yet it is skipped more often than it should be, usually because the job is quoted on parts cost rather than on doing it properly.
The second most common misdiagnosis is treating a false over-temperature code as a confirmed thermal event. A corroded connector on the temperature sender produces the same 00453 code as genuine oil at 100°C. Checking the connector and sensor resistance takes ten minutes. Ordering a pump takes days and costs considerably more. Always confirm the physical temperature against the ECU-logged value before committing to a mechanical repair.
If you are booking a workshop for a Haldex overheating fault, put both of these points on the job sheet explicitly. A good technician will already know them. Asking the question tells you a great deal about the workshop.
OEM-grade Haldex service kits and parts for UK owners
Sourcing the right parts for a Haldex overheating repair is straightforward when you use a specialist. Haldexparts stocks a full range of Haldex service kits covering oil, filters, and seals for Gen 1 through Gen 5 applications across Audi, VW, Skoda, Seat, Volvo, Ford, and Land Rover platforms. Every kit is listed with generation fitment, so you are not guessing at compatibility.
For owners who need a pump replacement after a confirmed failure, the pump motor collection covers OEM and remanufactured options with the same generation-specific detail. Orders over £150 qualify for free UK shipping, which means a complete service kit typically ships free in a single order. Before you buy, confirm your Haldex generation from the VIN and have your fault codes ready. The Haldexparts product pages carry the specification detail you need to match the right kit to your vehicle. Browse the service kit range at haldexparts.co.uk and get the correct parts ordered before your workshop appointment.
Further reading and diagnostic resources
- HALDEX.pdf — billswebspace.com: Original Haldex technical documentation covering the depressurise threshold and control logic.
- VAG SSP 206: Four-Wheel Drive with Haldex Coupling — vaglinks.com: VAG self-study programme detailing pump, accumulator, regulating valve, and temperature sender operation. Essential reading for understanding the control system.
- 00453 Over-temperature fault thread — TTForum: Real-world case studies of the over-temperature code, including false-positive sensor cases and cooldown behaviour.
- Haldex heat shield and ventilation — SwedeSpeed: Practical enthusiast solutions for exhaust proximity heat, including aluminium shielding and air ducting.
- Haldex pump failure causes — Mechalex: Workshop-level explanation of contamination-driven pump failure and screen blockage.
- Haldex oil and filter service intervals — Autotecnic: Practical UK workshop guidance on service intervals and the consequences of skipping them.
- How Haldex diagnoses faults: a technician’s guide — Haldexparts: Fault-code interpretation and live-data reading guidance from a Haldex specialist.
Before following any model-specific instructions or ordering parts, confirm your Haldex generation using your VIN. Generation differences between Gen 1 and Gen 5 affect oil specification, pump design, filter type, and control logic. Using the wrong service kit is one of the more avoidable causes of repeat failures.



