

Service your Seat’s Haldex coupling regularly every few years depending on use and model, whichever comes first. The single most important thing you get right is using the correct Haldex coupling oil while checking or cleaning the pump screen. Skip the screen and you’re only doing half the job.
Three elements decide whether a Haldex service actually works:
- The correct oil. Haldex coupling fluid is engineered to manage friction across a multi‑plate clutch pack, not to lubricate gears — using generic differential oil can make the coupling slip or behave erratically.
- Pump screen or filter attention. Later Haldex generations use a replaceable filter; earlier ones rely on a pump pre‑screen that clogs with debris over time regardless of what the owner’s manual says about being “sealed for life”.
- Correct fill verification. The level is confirmed by drip‑out through the fill plug, not by a dipstick or a guess, and SEAT’s own workshop manual sets out exactly this procedure.
If your Haldex system throws a warning light, logs a stored fault code, or the rear axle feels inconsistent under load, stop planning a fluid change and get it scanned first. A fluid service won’t fix a failing pump or a seized clutch pack, and pouring good oil into a system with a mechanical fault just delays the diagnosis.
Key Takeaways
A correctly executed Seat Haldex service combines the right OEM‑spec coupling oil, pump screen or filter attention, and drip‑out level verification every few years depending on use and model.
| Point | Details |
|---|---|
| Confirm generation first | Check part numbers and build year before ordering any oil or filter kit. |
| Never skip the screen | A fluid change without pump screen or filter inspection only solves half the problem. |
| Fill plug before drain plug | Always confirm the fill plug moves before you drain the old oil out. |
| Verify level by drip‑out | Follow the SEAT workshop manual’s fill‑plug drip‑out method, not a dipstick guess. |
| Buy generation‑matched kits | Haldexparts organises oils, filters and pump kits by vehicle and generation to avoid mismatched parts. |
Where to read more before you start
- The SEAT workshop manual chapter on Haldex clutch oil gives the definitive fill, check and torque procedure for the Leon Mk2, and is worth reading in full before you pick up a tool.
- The Mechalex Haldex oil change guide breaks down service intervals and pump screen inspection across VAG models with useful generation context.
- The Haldexparts service kits collection is the fastest way to confirm which parts your specific generation actually needs before you order anything.
Table of Contents
- What is a Seat Haldex service and which models need one?
- Why does the Haldex generation change how you service it?
- How often should you service your Haldex system?
- What tools and parts do you need before starting?
- How do you actually carry out the service, step by step?
- What are the warning signs of a failing Haldex system?
- How much does a Seat Haldex service cost and take?
- What does the SEAT workshop manual actually say about this procedure?
- What do experienced technicians get wrong about Haldex servicing?
- Where can you buy the correct Haldex parts and kits?
- Frequently asked questions
- Sources
What is a Seat Haldex service and which models need one?
A Haldex coupling is an on‑demand hydraulic clutch pack that engages the rear axle when the front wheels start to slip, rather than driving all four wheels constantly like a mechanical differential setup. It sits at the rear of the drivetrain, fed by its own small pump and reservoir, and it only asks for attention when that reservoir’s oil breaks down or its internal screen clogs.
Most Seat owners never think about it because it works silently until it doesn’t. The clutch pack inside needs fluid that resists shear and heat far better than standard gear oil, which is why using the wrong fluid is one of the most common and most avoidable causes of premature wear.
Seat models commonly fitted with Haldex all‑wheel drive:
- Seat Leon 4Drive (Mk2 and Mk3 generations, various petrol and diesel engines)
- Seat Alhambra 4Drive
- Seat Ateca 4Drive
- Certain Seat Tarraco 4Drive variants
How to confirm your car has it:
- Check the boot badge or spec sheet for “4Drive”
- Look up your VIN or engine code against the parts catalogue for your model year
- Physically inspect underneath, near the rear subframe. A Haldex unit is a compact housing with an electrical connector for the pump motor and a distinct fill/drain plug pair
- Cross‑reference the relevant chapter of the SEAT workshop manual for your model. For the Leon Mk2, that’s final group 0AV covering the differential and Haldex clutch oil level
If you’re unsure which chapter applies, a specialist Haldex service guide can help cross‑reference generation and model before you order parts.
Why does the Haldex generation change how you service it?
Get the generation wrong and you’ll order the wrong kit, or worse, skip a step your car actually needs. Later Haldex generations commonly include a pump pre‑screen and, in some cases, a genuinely replaceable filter, while earlier units are simpler mechanically but still depend entirely on clean fluid and a clear screen to work properly.
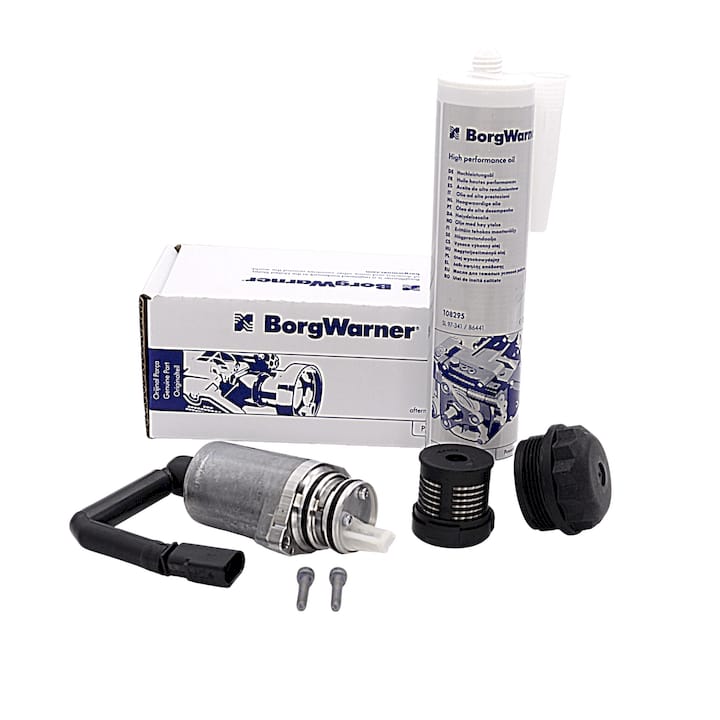
That distinction changes your shopping list and your procedure. A filtered generation gives you a discrete part to swap out. A screen‑only generation means you’re removing the pump, inspecting the gauze, and cleaning it by hand, which takes longer and demands more care not to damage the housing.
Quick generation identification checklist:
- Check the part number stamped on the pump housing or coupling body against your parts catalogue
- Cross‑reference your build year and chassis code. Generation changes generally track model facelifts rather than calendar years exactly
- Look for a visible filter housing separate from the pump body. Its presence usually signals a later, filtered generation
- If in doubt, order a generation‑specific service kit that lists compatible part numbers rather than guessing from age alone
Independent workshop guidance is consistent on one point: servicing that only covers the drain and refill misses a real source of failure when the screen or filter is due for attention too, particularly on generations where the pump pre‑filter has never been touched. Vehicles without a serviceable filter fitted still need their pump screen checked. They just require a different level of disassembly to get there, as some specialist Haldex workshops note when discussing servicing intervals for filterless models.
How often should you service your Haldex system?
The honest answer is “it depends on how you drive,” but the working range most specialists agree on is every few years depending on use and model or roughly three years. Some workshops push that down to 20,000 miles specifically for VAG models with heavier use, while others stretch closer to 40,000 for gentler driving.
Towing, frequent hard acceleration from standstill, and lots of stop‑start traffic all put extra heat and shear stress on the clutch pack, which degrades the oil faster than the mileage alone suggests. If your Seat spends its life on a daily motorway commute, you’re at the gentle end of that range. If you tow a trailer or drive off‑road regularly, service nearer the 20,000 mile mark.
Symptoms that suggest your Haldex is overdue, not just due:
- Rear axle engagement feels delayed or inconsistent, especially pulling away on a loose or wet surface
- A faint whining or grinding noise from the rear of the car under acceleration
- Stored fault codes relating to the Haldex pump or coupling pressure, picked up on a diagnostic scan
- The AWD warning light illuminates, even intermittently
Two safety points worth taking seriously:
Always secure the vehicle properly on axle stands or a ramp rated for the weight; never rely on a jack alone while working underneath. And always remove the fill plug before you touch the drain plug. If the fill plug is seized or won’t budge, don’t drain the system, because you’ll have no way to refill it and confirm the level afterwards.
What tools and parts do you need before starting?
Nothing here is exotic, but turning up without the right kit halfway through a drain is how a two‑hour job becomes an overnight one.
Parts checklist:
- Correct OEM‑spec Haldex coupling oil, matched to your generation, not generic gear oil
- A generation‑matched Haldex service kit including filter or pump screen components where applicable, or standalone replacement filters if you’re only swapping that part
- New drain and fill plug washers. Reusing crushed washers is a common cause of slow weeps afterwards
- A pump seal kit only if you’re planning pump removal or replacement
Tools checklist:
- Axle stands or a proper ramp, plus a jack rated for the vehicle
- A fluid transfer pump for the refill, since gravity alone won’t push oil back through a small fill hole efficiently
- A torque wrench, because both plugs have specific torque figures in the workshop manual and overtightening cracks the housing
- Hex or Allen key set sized to your plug heads
- An inspection light or head torch, and ideally a basic OBD diagnostic tool capable of reading Haldex‑specific fault codes
Pro Tip: Order your service kit by exact part number rather than by vehicle model alone. Two Leons built eighteen months apart can carry different Haldex generations, and a mismatched filter kit simply won’t fit the housing. If you own a workshop servicing several Seats and other AWD models, planning parts by generation across the whole job list saves a second trip to the bench.
For readers running a small workshop juggling several vehicles at once, a multi‑vehicle service planning approach keeps parts and generations from getting mixed up on the bench.
How do you actually carry out the service, step by step?
The core sequence is: secure the car, drain the old oil, inspect and clean or replace the screen or filter, refill to the drip‑out point, and torque everything to spec before a short diagnostic check.
- Secure the vehicle on stands or a ramp with the wheels chocked. Confirm you can access both the fill plug (usually top or side of the housing) and the drain plug (typically at the bottom).
- Remove the fill plug first. This is non‑negotiable. If it won’t move, stop, apply penetrating fluid, and try again rather than draining a system you can’t refill.
- Remove the drain plug and let the old oil fully empty into a suitable container. Note its colour and smell. Dark, gritty, or burnt‑smelling oil confirms the service was overdue.
- Inspect the pump screen or filter. On filtered generations, unclip and replace the filter element entirely. On screen‑only units, this typically means removing the pump to access the gauze, cleaning it with brake cleaner, and checking for metal particles that shouldn’t be there.
- Refit the drain plug with a new washer, torqued to the figure specified in your model’s workshop manual, not by feel.
- Refill through the fill plug using your transfer pump, adding oil slowly until it drips back out of the fill hole. That drip‑out is your level confirmation, exactly as SEAT’s workshop procedure for the Leon Mk2 specifies.
- Refit the fill plug with its new washer, again torqued to spec.
- Run a diagnostic check if you have the tools, priming the pump and confirming it registers correct pressure with no stored faults. If you removed and refitted the pump itself, this step matters even more, since an airlocked pump can sound fine but deliver no real pressure.
Getting the fill plug off before the drain plug isn’t a suggestion, it’s the difference between a routine service and a car stuck on stands overnight with no oil in the housing.
Pro Tip: If you’re unsure whether you’ve reached true drip‑out level, wait a full sixty seconds after the last drip before refitting the plug. Trapped air can create a false stop that leaves the housing slightly underfilled.
Removing the pump for screen access varies by model, and a step‑by‑step drain plug removal guide is worth reading beforehand if you haven’t done one on your specific Seat before. In some tight engine bays, partial trim or rear seat removal can improve access to wiring and connectors near the coupling, and general guidance on removing interior trim panels is a useful reference if you need to work around seats or trim to reach connectors safely.
What are the warning signs of a failing Haldex system?
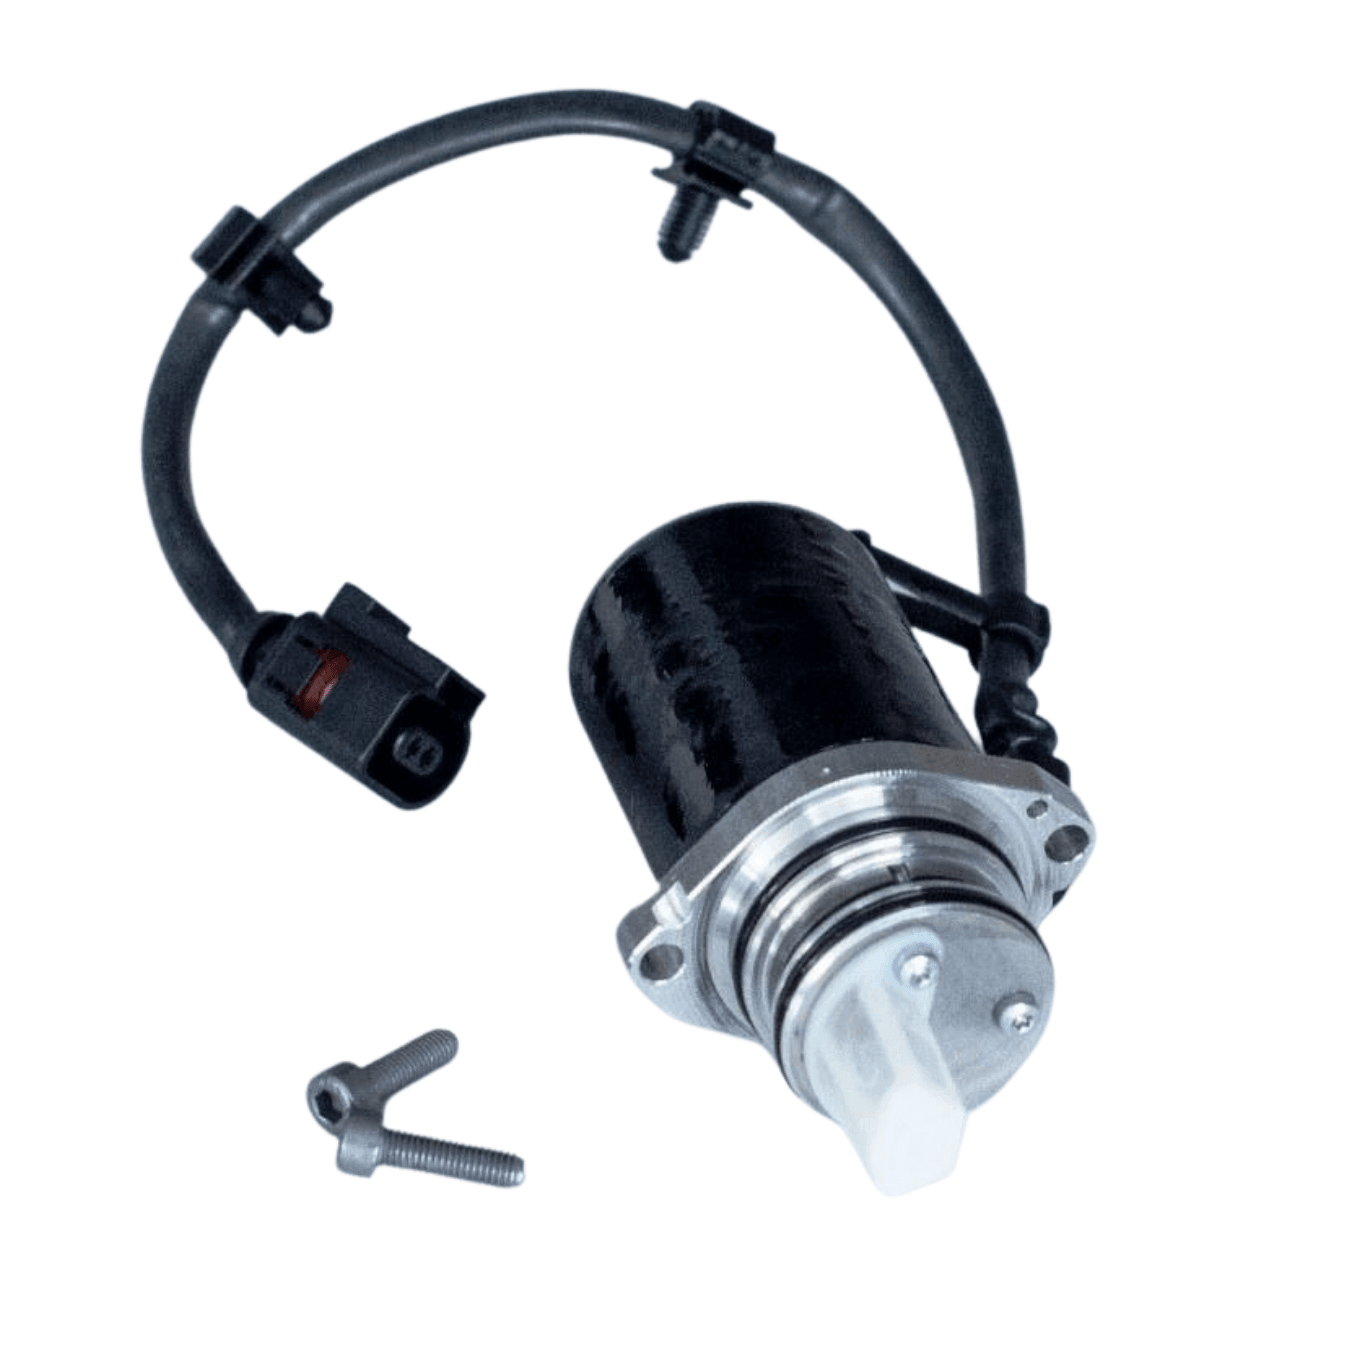
The frustrating truth about Haldex pump failure is that it often happens quietly, without a single dashboard warning light. Forum reports from technicians and enthusiasts repeatedly describe pumps that fail silently, with clogged pump gauze as the common root cause, and drivers only noticing once rear engagement has become noticeably poor.
Run through this checklist before assuming you need a new pump:
- Scan for stored pump or pressure fault codes using an OBD tool capable of reading Haldex‑specific parameters, not just generic engine codes
- Listen for the pump motor engaging. A healthy pump gives a brief, audible whir when the system primes; silence or a grinding rattle both point to trouble
- Road‑test on a loose surface (gravel, wet grass verge) and feel whether the rear axle engages promptly or lags noticeably
- Inspect drained oil for metal flakes or an unusually dark, burnt colour, both signs the clutch pack has been running hot for some time
Red flags that point to repair or replacement, not just a fluid service:
- Pump fault codes that return immediately after clearing them
- Visible metal debris in the drained fluid
- A pump that won’t prime or hold pressure even with fresh oil and a clean screen
- Mechanical noise from the coupling itself, not just the pump motor
The sensible decision path is straightforward: service and clean everything first, retest with diagnostics, and only move to pump motor or coupling replacement if the faults persist after a proper service. Jumping straight to a new pump without ruling out a clogged screen wastes money more often than people expect. A closer look at how technicians actually interpret Haldex fault codes is worth reading if your scan tool throws something unfamiliar.
How much does a Seat Haldex service cost and take?
A straightforward drain and refill takes most confident DIYers around one to two hours, including the time to secure the car properly and let the oil fully drain. Add pump removal for a screen clean and you’re realistically looking at half a day, particularly on a car you haven’t worked on before. Full pump replacement, done properly with diagnostic verification afterwards, is closer to a significant amount of time even for someone experienced.
Workshop labour rates vary considerably by region and specialist versus main dealer pricing, so treat any total as a rough guide rather than a quote.
| Service level | What’s included | Difficulty | Estimated time |
|---|---|---|---|
| Basic drain and refill | Oil drain, refill to drip‑out level, no screen access | Moderate, needs a transfer pump and stands | 1–2 hours |
| Full service with screen/filter | Drain, refill, plus pump removal, screen clean or filter replacement | Higher, requires more disassembly | 3–5 hours |
| Pump motor replacement | Full unit swap, seal kit, priming, diagnostic verification | Advanced, ideally with diagnostic tool access | 4–8 hours |
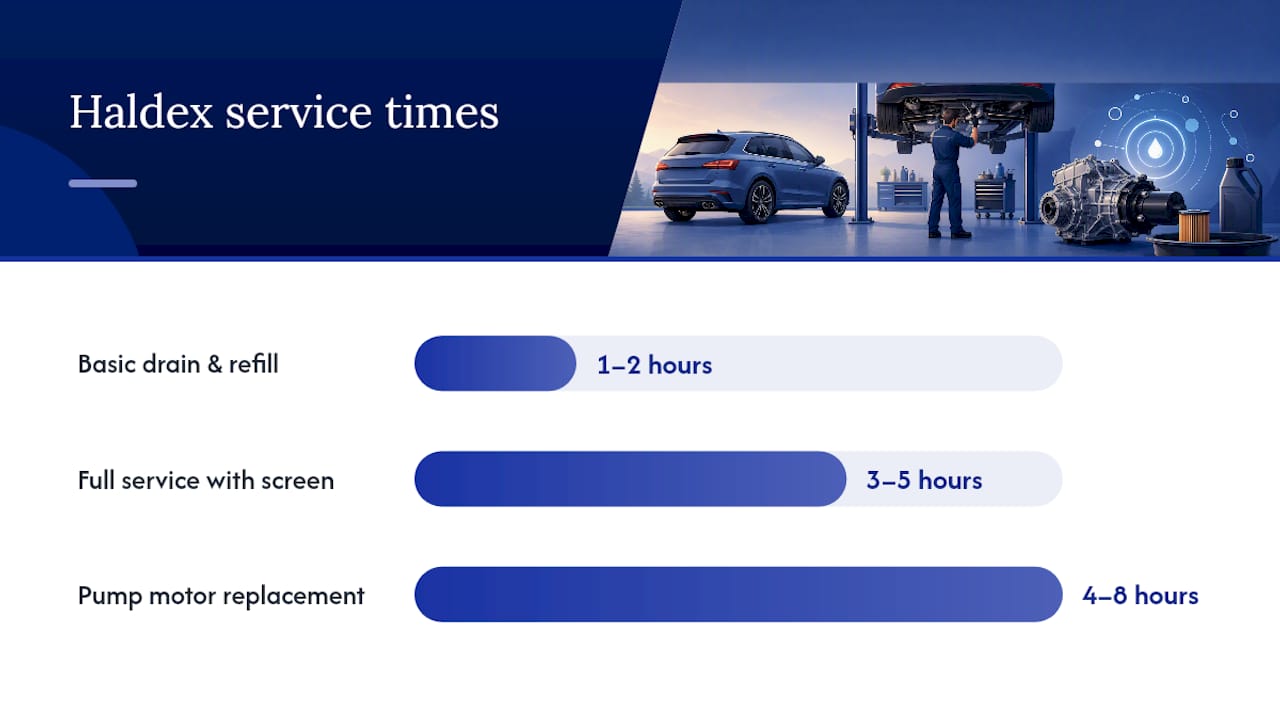
Parts costs scale in roughly the same direction: a basic drain and refill needs one bottle of the correct coupling oil, a full service adds a filter or seal kit on top of that, and a pump replacement means a complete pump motor plus its seal kit. Workshop labour for the more involved jobs typically costs more than the parts themselves, which is exactly why many confident DIYers take on the fluid service themselves and reserve workshop time for genuine pump diagnostics.
What does the SEAT workshop manual actually say about this procedure?
Forum advice is genuinely useful for troubleshooting real‑world symptoms, but for the procedure itself, the workshop manual is the only source that carries real technical authority. SEAT’s own documentation for the Leon Mk2, filed under final group 0AV covering the final drive and differential, spells out the exact fill‑and‑check sequence technicians are trained to follow.
Check and add Haldex clutch oil via the fill plug, confirm the correct level by drip‑out through that same fill plug, and follow the vehicle‑specific torque and safety procedures for both fill and drain plugs throughout.
That single instruction resolves the two most common DIY mistakes: guessing at fill level with a dipstick‑style check, and torquing plugs “by feel” rather than to the documented figure. Overtightening an aluminium‑housed drain plug is a remarkably easy way to turn a routine service into a housing replacement.
Why generation‑specific fluid degradation matters: oil formulated for the multi‑plate clutch pack breaks down under sustained heat and shear differently to how a standard gear oil ages, and understanding why Haldex oil degrades in the first place helps explain why the interval isn’t a fixed number so much as a range that shifts with how hard the car is driven.
The workshop manual takes precedence over anecdotal forum torque figures for one simple reason: it’s written against the actual housing material and thread specification for your exact model and year, not a generalised guess that happens to work most of the time.
What do experienced technicians get wrong about Haldex servicing?
The pitfall I see most often isn’t neglect, it’s partial attention. Owners diligently change the oil on schedule but never touch the pump screen, because the oil change feels like “the service” and the screen feels like an optional extra. It isn’t. A fresh bottle of oil pushed through a clogged screen just means clean oil struggling through the same restriction that was already starving the clutch pack of proper flow.
Routine, generation‑correct servicing genuinely does prevent the larger repair bills. A pump replacement costs meaningfully more in parts and labour than a filter or screen clean ever will, and the fault codes that precede pump failure rarely appear out of nowhere. They follow months of a system running on degraded, restricted oil flow that a proper service would have caught.
If you’re buying a used Seat with 4Drive, checking the service history for actual Haldex‑specific work, not just an engine oil stamp, tells you more about the car’s real condition than the odometer does. And if you’re taking this on yourself for the first time, prioritise pump screen inspection over simply timing a fluid swap, and buy a service kit matched to your exact generation rather than trusting a generic listing.
Where can you buy the correct Haldex parts and kits?
Getting the generation wrong on a filter order is the single most common reason a DIY Haldex service stalls halfway through. Haldexparts solves that by organising every kit, oil, and pump component by vehicle and generation from the outset, so you’re matching parts to your Seat’s actual hardware rather than guessing from a model name alone.
The service kits collection bundles the correct OEM‑spec oil with the matching filter or seal kit for your generation, which removes the guesswork of sourcing each part separately. If you already know exactly what’s failed, whether that’s a pump motor that won’t prime or a filter that’s overdue, you can order that component on its own instead.
Before checkout, confirm fit using your vehicle’s part number rather than model name alone, since two cars with the same badge can carry different Haldex generations. Add a set of new drain and fill washers to your basket at the same time. It’s a small cost next to a repeat trip for a part you forgot. Browse the full range of Haldex parts to see oils, filters, and pump kits organised by generation before you commit to a specific kit.
Frequently asked questions
How often does a Seat Haldex system need servicing? Most specialists recommend every few years depending on use and model or roughly three years, with heavier use such as towing or frequent hard driving pushing you toward the lower end of that range.
Can I use standard differential oil instead of Haldex coupling oil? No. Haldex fluid is formulated to manage friction across a multi‑plate clutch pack rather than lubricate gears, and using the wrong oil can cause the coupling to slip or engage inconsistently.
Do all Seat Haldex generations have a replaceable filter? No. Later generations commonly include a filter you can swap directly, while earlier units rely on a pump pre‑screen that needs manual removal and cleaning instead.
What’s the biggest sign my Haldex pump is failing? Inconsistent or delayed rear‑axle engagement, particularly on loose or wet surfaces, combined with stored pump fault codes on a diagnostic scan. Pump failure often happens without any dashboard warning light.
Is a Haldex fluid service something I can realistically do myself? A basic drain and refill is manageable for a confident DIYer with a transfer pump, axle stands, and a torque wrench, typically taking one to two hours. Pump removal or replacement is more demanding and benefits from diagnostic tool access to verify the result afterwards.
Sources
- Haldex Oil Change Service Guide - Mechalex
- SEAT Workshop Service and Repair Manuals > Leon Mk2 > Final group 0AV | Final drive, differential, differential lock | Oil level | Haldex clutch oil level: check and add oil
- How to perform complete Audi Quattro maintenance? | Differential Haldex and Transfer Case Service
- Haldex Oil Change | VW, Skoda, Audi & SEAT | Guildford



