

Yes, your Ford’s Haldex unit can and should be serviced: the right oil, filter and pump clean-out will prevent many AWD faults before they become expensive ones. Most owners can do this at home with basic tools and a few hours to spare. The two things that catch people out are using the wrong oil specification and snapping the brittle plastic filter housing, so read the generation-specific steps before you drain anything.
TL;DR:
- Using the correct generation-specific oil and matched filter kit is crucial to prevent leaks and avoid damaging brittle plastic filters during servicing.
- Drain the Haldex oil when the unit is warm, ideally between 20 and 40°C, to ensure a complete and efficient fluid change.
- A typical service involves carefully extracting and replacing the filter with tools to retrieve snapped fragments, inspecting and cleaning the pump strainer, and refilling with the specified oil volume.
- Fault codes and warning lights usually indicate either oil or electrical issues; a diagnostic check can differentiate between a simple service need and deeper electrical faults.
- Servicing every 30,000 to 40,000 miles or 3 to 4 years is recommended, with DIY costs roughly 100 to 150 pounds versus much higher repair bills for pump or ECU failures.
Table of Contents
- What you need before starting a Ford Haldex service
- How do you service a Ford Haldex system step by step?
- What do Haldex warning signs actually mean?
- How often should you service a Haldex system, and what does it cost?
- Which Haldex kit fits your Ford, and why matched parts matter
- Is DIY Haldex servicing actually worth the effort?
- Order the right Haldex kit before you start the job
- Where to go for deeper Haldex workshop detail
- Sources
What you need before starting a Ford Haldex service
Before you touch a spanner, work out which Haldex generation sits under your car. Gen 3 units (common on the 2008 to 2009 Ford Kuga) use a different filter arrangement to Gen 4, which appears on later Kuga models and shares hardware with certain Land Rover and Range Rover applications. Check your VIN against the parts catalogue or look at the physical shape of the housing on the rear differential, since Gen 4 units typically integrate the pump and control unit into a single assembly that Gen 3 does not.
Getting the parts list right matters more than almost anything else in this job. You need the correct Haldex oil for your generation, a matched filter kit, new crush washers, and, if the pump strainer looks tired or you’re chasing a fault code, a full pump kit.
Tools worth having on the bench:
- Torx and hex sockets (commonly T30 and 10mm/13mm hex, but confirm against your specific unit)
- A socket extension bar and a universal joint for the tight rear differential access
- A pick set for extracting seals and gaskets
- A large syringe, funnel, or length of clear tubing for filling
- Axle stands or ramps rated for the vehicle’s weight
- A sealed oil catch container and rags for the inevitable mess
Support the car properly on axle stands, never a jack alone, and wear gloves and eye protection when working under the differential. Used Haldex oil must go to an approved oil recycling point, not down a drain. It’s also worth plugging in a diagnostic tool before you start to check for existing AWD fault codes; this gives you a baseline to compare against once the service is done.
How do you service a Ford Haldex system step by step?
Confirm your generation first. Everything from access points to fill volumes changes between Gen 3 and Gen 4, and using the wrong oil PN is one of the most common DIY mistakes. Workshop guides reference an oil specification such as G055 175 A2 for certain Gen 4 applications, but you must check the exact part number against your own vehicle before ordering, since Ford and Volvo based units use slightly different fluid specs depending on model year.
Drive the car for ten to fifteen minutes before you start. A warm unit drains faster and more completely, and on Gen 4 vehicles you can check the actual oil temperature through a diagnostic reading, aiming for roughly 20 to 40°C before you drain. Doing this cold thickens the oil and leaves more of it stuck inside the housing.
- Get access. Raise and support the car, locate the Haldex unit on the rear differential, and remove any underbody shielding blocking the pump and filter housing.
- Remove the pump. On Gen 4 units the pump often sits behind the control unit, so you may need to unbolt the ECU bracket to reach the filter cover underneath. Gen 3 units generally give more direct access to the pump housing.
- Drain the old oil. Most Haldex units have no dedicated drain plug, so you’ll typically pull the pump or filter housing and let the oil run into your catch container, tilting the unit if needed to get the last of it out.
- Extract the filter carefully. This is where most DIY jobs go wrong. The plastic “nose” on the filter seal is brittle and can snap off inside the housing on removal. Community reports back this up repeatedly, and experienced technicians keep a small pick set and magnet extractor on hand specifically for retrieving snapped fragments.
- Clean the pump strainer. Inspect the gauze strainer on the pump. Owner threads consistently show partial clogging by mid mileage, and cleaning it during a service often restores smoother pump operation rather than leaving a half-blocked strainer starving the unit of flow.
- Fit the new filter and seals. Use new crush washers and O-rings from your kit rather than reusing old ones, since a poor seal here is a common cause of slow weeping leaks afterwards.
- Refill the unit. Fill volumes vary by generation, with some Gen 4 implementations taking roughly 650 to 700 ml, while other units run closer to 850 ml depending on housing design. Use a syringe or clear tubing fed through the fill port and top up slowly.
- Confirm the fill level. Where there’s no dipstick, the standard method is filling until oil overflows from a second port or the fill hole itself, which tells you the level has reached capacity rather than guessing at a volume.
- Prime and relearn the pump. After refitting, run the pump relearn procedure through the AWD diagnostic’s basic settings menu so the control unit recalibrates against the fresh oil and cleaned strainer.
- Torque everything to spec. Recheck every bolt you removed, particularly the pump housing bolts and any ECU bracket fasteners, and refit the underbody shield.
- Clear codes and test-drive. Clear any stored AWD fault codes, then take the car on a mixed drive covering slow manoeuvring and some acceleration to confirm the AWD system engages smoothly.
Pro Tip: Keep a spare crush washer and O-ring set in the car for a week after the service. If you spot a slow weep from the filter housing, you can fix it on the driveway rather than dropping the unit again.
What do Haldex warning signs actually mean?
Not every AWD warning light means the same thing, and reading it correctly saves you from either an unnecessary strip-down or ignoring a genuine pump failure.
Symptoms that a fresh oil and filter service will usually fix:
- Intermittent AWD engagement, especially noticeable pulling away on wet roads
- A faint whining or pump noise that comes and goes under load
- Slight shudder or hesitation when power shifts between axles
Symptoms pointing to a deeper pump or electrical problem:
- A persistent AWD Malfunction light that returns immediately after clearing codes
- Pump open circuit or lower limit exceeded codes, which appear frequently in Gen 4 troubleshooting lists
- No pump response at all when you listen for it during a basic settings test
A simple diagnostic check before you even drain the oil can save wasted effort. Plug in a diagnostic tool, request the pump to run through basic settings, and listen for it cycling near the rear differential. Silence usually points to an electrical fault rather than an oil problem, which no amount of fresh fluid will cure.
If fault codes return immediately after a proper service, or the control unit shows stored memory errors that won’t clear, that’s the point to stop the DIY approach and bring in a specialist with proper Haldex diagnostic software. Chasing an ECU fault with repeated oil changes wastes time and money.
How often should you service a Haldex system, and what does it cost?
Independent specialists and plenty of owner reports converge on roughly every 30,000 to 40,000 miles or every 3 to 4 years for most Haldex generations, though Gen 5 units without a separate filter may need attention closer to every 10,000 miles. Ford’s own service literature sometimes describes these units as fitted for life, but that framing doesn’t match what repair centres actually see on the bench.
- A full oil, filter and crush washer kit typically costs a fraction of a pump or ECU replacement
- Pump failure or control unit faults often carry significantly higher repair bills once labour to remove and diagnose the unit is factored in
- A DIY service generally takes two to four hours depending on access and whether bolts fight you
- Professional workshops often finish faster purely because they already own the extraction tools for snapped filter parts and the diagnostic software for pump relearn
Owners who skip servicing entirely tend to discover the “fitted for life” label doesn’t hold once filters clog and pumps start struggling, at which point the repair bill dwarfs what a kit would have cost. That’s the real argument for doing this proactively rather than reactively.
Which Haldex kit fits your Ford, and why matched parts matter
Buying the pump, filter and oil as a matched set removes most of the guesswork that causes DIY headaches. Three kits cover the majority of Ford Haldex applications:
- BorgWarner Haldex AOC Oil Pump, Filter & Volvo AWD Oil Kit – 3rd Gen (8V41-4C019-AA, 8V41-4A319-AA, 2000884), built for the 2008 to 2009 Ford Kuga’s 3rd-gen Haldex unit.
- BorgWarner AOC Oil Pump, Filter & 850ml Oil Kit (8V41-4C019-AA), another 3rd-gen fitment with the full 850ml oil charge included.
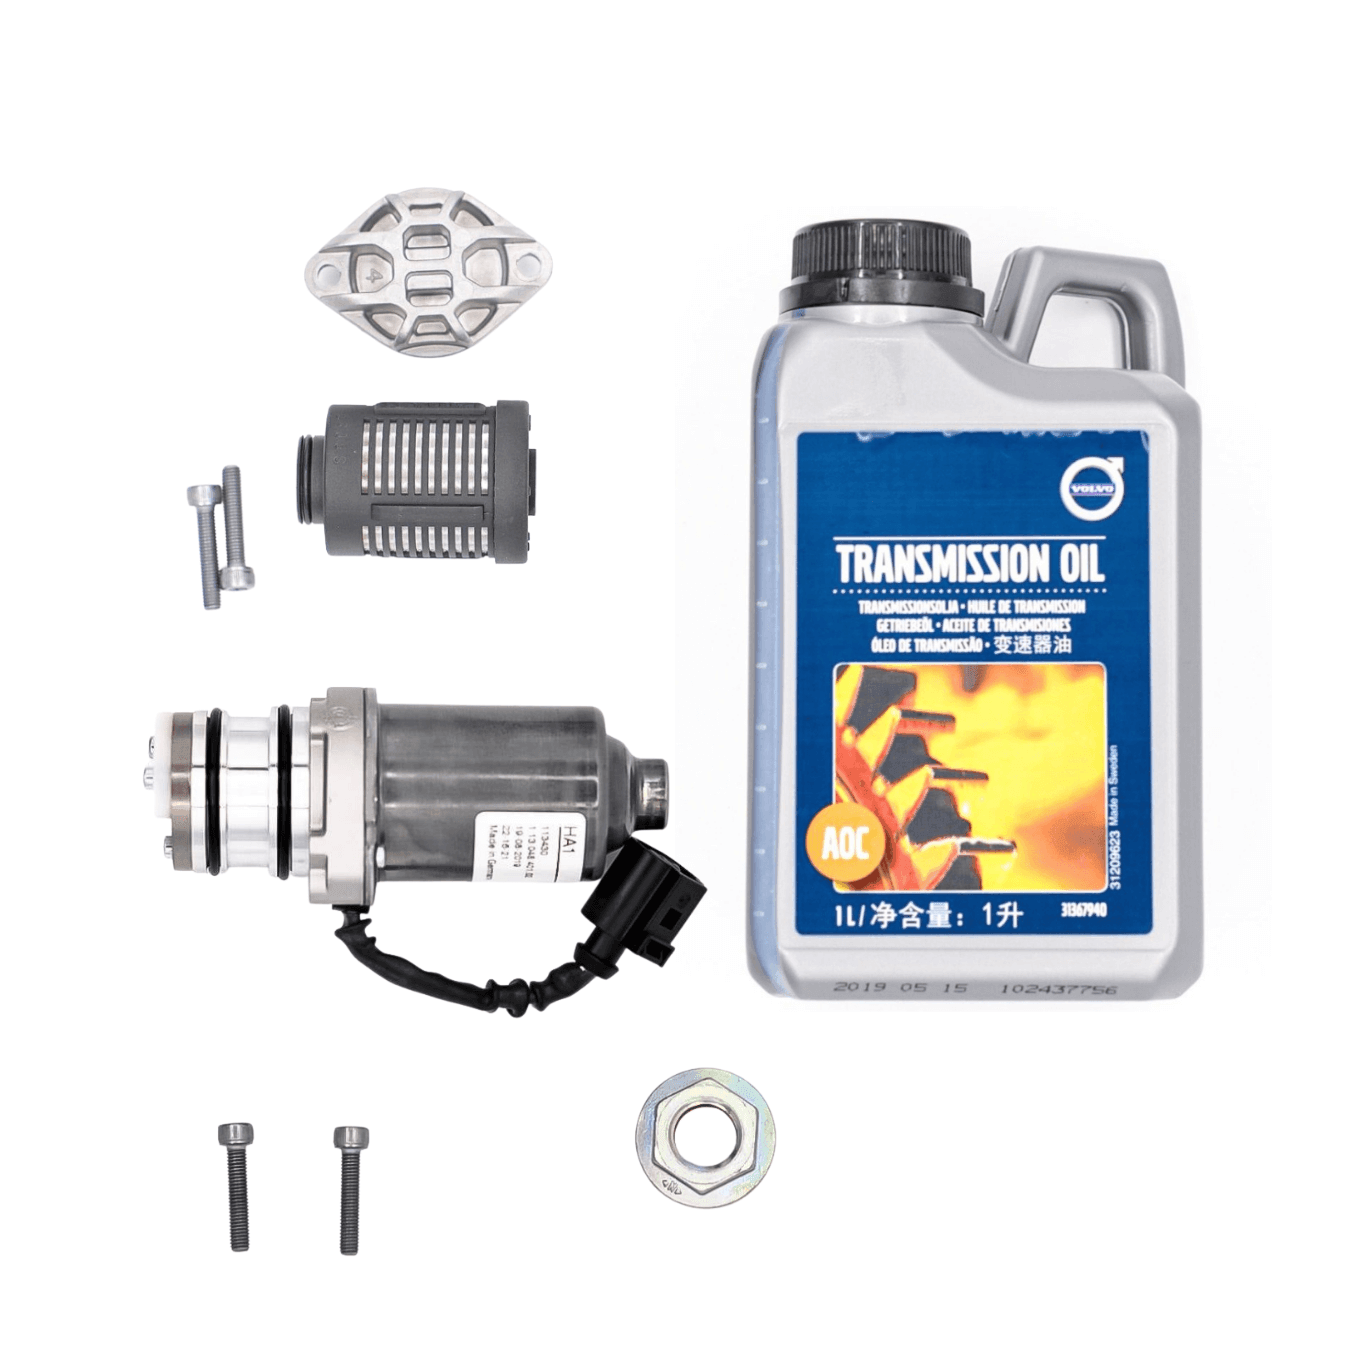
- BorgWarner Haldex Pump, Filter & Volvo 31367940 Oil Kit, covering 4th-gen AWD systems shared across Land Rover, Range Rover and later Ford Kuga models.
The advantage of a matched kit is that the oil specification, pump O-rings, and crush washers are all designed to work together rather than mixed from separate suppliers. This is where the “fitted for life” claim breaks down in practice, since a mismatched oil viscosity or missing crush washer can undo the benefit of servicing at all.
Before ordering, confirm your VIN and generation against the kit’s listed fitment, and check what’s included in the box: most kits ship with the pump or filter, the correct oil volume, and new sealing washers. If you want a wider look at how the Haldex coupling works before ordering, this guide to the Haldex AWD system covers the basics of how the unit engages power to the rear axle.
Is DIY Haldex servicing actually worth the effort?
Independent technicians tend to disagree with the fitted for life framing, and having gone through the diagnostic reasoning above, I think that scepticism is justified. A £100 to £150 kit against a pump or ECU repair bill running several times higher isn’t a close call. If you’re comfortable with basic diagnostics and don’t mind a fiddly hour extracting a snapped filter nose, this is a genuinely doable weekend job.
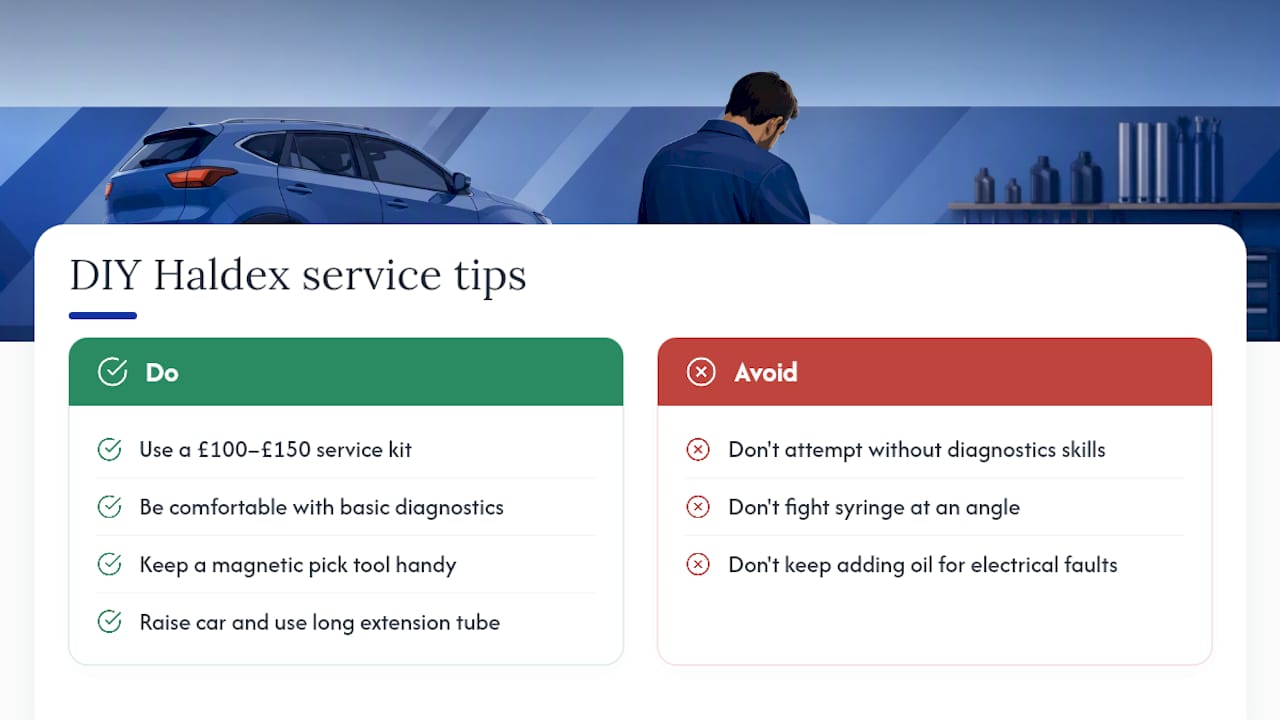
Two things from real servicing threads worth remembering: keep a magnetic pick tool within reach before you even start removing the filter cover, because the plastic nose snapping is closer to routine than rare. And if the fill plug sits somewhere awkward, resting the car on stands with a bit of extra height and using a long extension tube beats fighting the syringe at an angle.
If your fault codes persist after a clean service, don’t keep throwing oil at an electrical problem. That’s a specialist’s job.
— Mindaugas
Order the right Haldex kit before you start the job
Get the parts wrong on this job and you’ll be doing it twice. Haldexparts sells matched BorgWarner kits built to the exact oil, pump and filter specification your Haldex generation needs, so you’re not gambling on a mismatched viscosity or a filter that doesn’t seal properly.
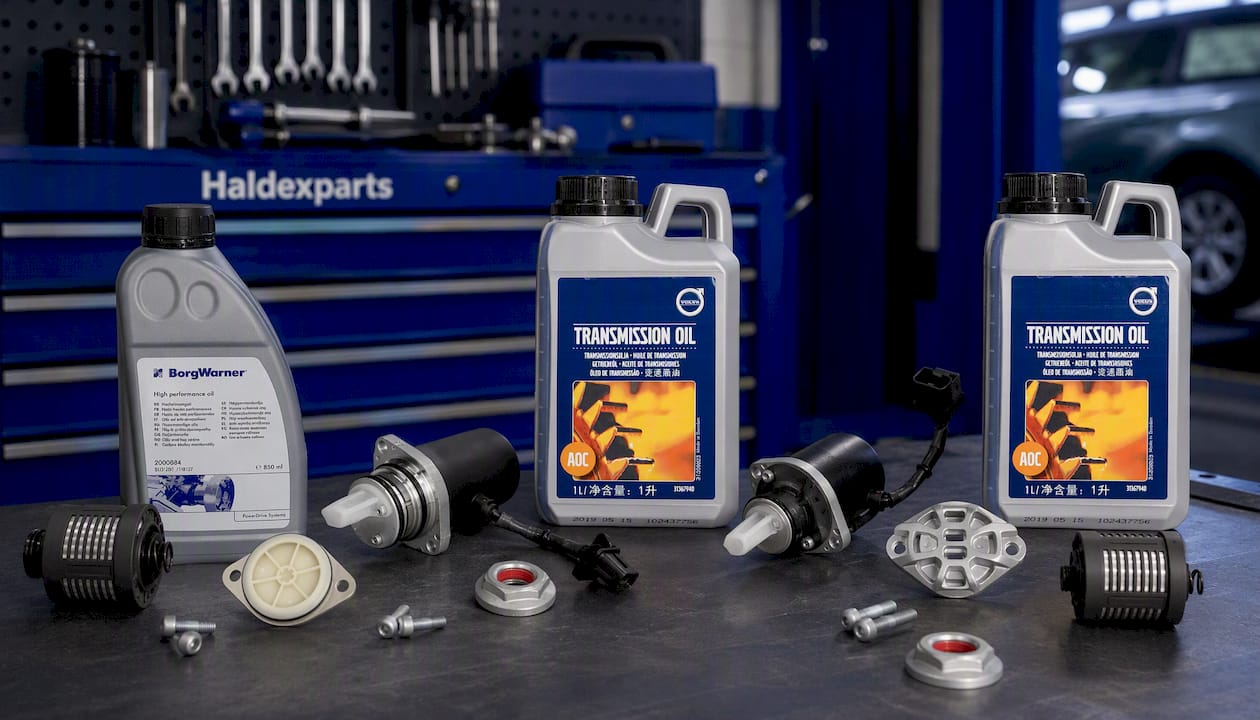
For 3rd-gen Ford Kuga owners, the BorgWarner Haldex AOC Oil Pump, Filter & Volvo AWD Oil Kit covers the pump, filter and full oil charge in one order, as does the BorgWarner AOC Oil Pump, Filter & 850ml Oil Kit. If you’re working on a 4th-gen unit shared with Land Rover and Range Rover platforms, the BorgWarner Haldex Pump, Filter & Volvo 31367940 Oil Kit is built to that specification.
Every kit lists the exact part numbers so you can check fitment against your VIN before you buy. Check the product page for your generation, confirm the fitment notes match your Kuga or AWD model, and get the kit ordered before your next service window.
Where to go for deeper Haldex workshop detail
For torque specs and photographed step sequences, the JCR Leeds Gen 4 guide is thorough. For real-world access tips and fault-code discussion, the Kuga Owners Club thread is worth a read. Always cross-check against your own vehicle’s manual and diagnostic output before starting.
Sources
- Essential Guide: Ford Kuga Haldex System & Oil | Willand Service Centre
- How to Service Haldex Generation 4 full guide | JCR Leeds
- Generation 4 IV Haldex oil and filter service | Kuga Owners Club



